22 October, 2015

Giving Doesn’t Always = $

2015-10-22T14:32:04-05:00An Artist's Life|2 Comments

IMG_7463

I originally posted this in June 2013, but I thought of it again the other day.  I got my first “annual appeal” email today, so it seems very apropos.  I no longer work full time at the non-profit I mention in this piece, but I do still teach there and I have joined the board of directors/advisory committees of two other non-profits in the past year. For every organization I have worked for or volunteered with, these things are still true.


Many of you know I work for a non-profit arts center and I have for 9 years now.  I have worked for and volunteered for and advocated for a number of non-profits throughout my entire life and all of them have been pretty amazing creatures that do pretty amazing things.  So, I have had a couple of conversations lately with a number of different people about “I love this organization, but I can’t afford to donate anything and I feel bad about that and so I don’t know what else I can do.” and I wanted to say that there are TONS of things that you can do that don’t cost you anything, but can be enormously valuable to a non-profit.  So here’s my list of 8 simple things you can do that will cost you very little and can add up to a lot.

1.  Participate.  A lot of grants that non-profits write to help support their free concerts and exhibitions and make and take programs are all about the number of people served.  There are whole sections of grant applications that require the organization to talk very specifically about the audience and who will be participating.  So, everybody who shows up gets counted and the more people attend a concert or sign their name in the guest book, the bigger the impact the organization can show.  So just by showing up and seeing the art in the gallery and then signing your name in the guestbook, you are saying to that funder or sponsor “I think this is valuable” and that makes a big impact.  Downloading the email, clicking the link, or showing up at the event are all ways for you to be counted.

2.  Comment.  Good or bad, take the time to write a comment or complete an evaluation:  “I really loved seing this work in person because it was so amazing to be able to see the detail up close.  I will come back again for your next exhibition.” or “My kids and I attended the concert in the park and they spent the rest of the afternoon pretending to play violins and conducting their own imaginary orchestra.  What a great afternoon!”  One of my very favorite REAL quotes from a teacher that brought a field trip to my art center:  “The second grade says weaving is better than recess!”  (We named our annual youth programs exhibit after this quote.)  Quotes are also a valuable way for non-profits to communicate with sponsors and funders as a way to say “We know this project is successful because we have this feedback from people who participated.”  Evaluations are required by many program funders and feedback good (or not so good) is all really important.

3.  Like it or tweet it.  Every non-profit would like to reach more people.  If you see something on your favorite organization’s website and you hit the “like” button, you become part of the magic algorithm that networks like Google and Facebook use to rank search results.  Very simply put, the more people “like” something, the more the search engine thinks that it must be “important” or “relevant” to whatever it is looking for.  So something as simple as clicking “Like” on a post about an upcoming class about shibori silk scarves can mean that more people will discover that art center you think is really cool when they are searching around on Google.

4.  Link it.  Have a facebook page or a website or a blog?  Post a link to your favorite non-profit’s website.  Links to organizations work the same way as likes and tweets.  The more connections to the site, the more important the search engines think it is and the bigger the potential reach for your favorite organization.

5.  Spread the word.  The next time you are at your art center or a concert in the park, take an extra postcard or flyer about an upcoming event and stick it up on the bulletin board at work.  Or at your favorite coffee shop.  Or at your church.  Let me tell you from experience that getting those beautiful postcards out into the world is one of the hardest jobs ever.  There is just never enough time in the day (or postage money in the budget) to get everywhere you would like to get them.  If you get an email about an event, pass it on to a friend or post it on your Facebook page.  (Or print it out and put it on the bulletin board).  Even just talking about it is great!  Word of mouth is a really powerful tool, especially if you tell your story.

6.  Donate stuff, but ask first.  Speaking for my own non-profit program, I am delighted to get donations of stuff, but I have about zero square feet of storage space to put it in.  So although I would LOVE to have your yarn, I might have to store it on my desk until I can make room to put it. Which isn’t really ideal.  But there are really goofy things that I need (that you might not even think of) that I could put to good use right now.  Like a gallon or two of vinegar or a salad spinner or some empty yogurt containers.  We used all of those items at summer camp today and we could have used a few more.  Other useful stuff?  Rulers, sticky nametags, tablets of white scratch paper, flexible tape measures, a crock pot, a wall clock, a really big color wheel…  Many organizations have a “wish list” that might contain something you have collecting dust at your house.  Win win.

7.  Time.  Do you have an hour?  Would you be willing to hand out programs at a concert?  Or stuff envelopes for a mailing?  Or weed the garden around our building? Or help clean up after an event?  Volunteering seems like an obvious one, but sometimes the hardest jobs to fill are the ones that sound boring.  Everyone wants to attend the XYZ Event for free in exchange for some volunteer hours, but maybe you would be just as content to listen to the radio in your car and deliver these concert flyers to all the public library branches in Minneapolis.  Or maybe you would be happy to look up the address and contact info for all of the afterschool programs in the metro area and address some envelopes for me so I could send out some field trip applications?  Also if you have special skills, tell someone.  Are you a lawyer and would be willing to read over contracts for me, just to point out anything I should be concerned about?  What a great resource!

8.  Photos.  Do you love to take photos? As staff at an event, I am lucky to have a minute to snap a few pictures because I am busy making the event happen and although I wouldlove to hire a photographer for every event, that is just not in the budget.  But I would LOVE to have your photos if you are willing to share them.  Photos are another great tool for spreading the word and showing the impact of a program or event.  They are a handy way for us to document who was there and what happened so we can refer to it next year when we start to plan the next one.


I hope this inspires you and maybe gives you a few ideas as this “annual fund” season rolls around.  This week I mailed a piece of art off to a fundraiser as a silent auction item, I spent 2 hours at a board meeting (as a volunteer) and I picked up a book of proposals to review for a grant panel in November.  Donating dollars is hugely important to these organizations too, but I hope these are ways you can maybe make the $ you are able to donate add up to a whole lot more.

8 October, 2015

Class projects & collaborating

2015-10-08T17:27:17-05:00An Artist's Life, Classes & Teaching|Comments Off on Class projects & collaborating

I taught a really great class last night which was an intro to digital fabric design.  We talked resolution, we talked pixels, we talked formats & file sizes.  It’s basically a class to make you brave enough to go dabble and try something on your own.  My goal is to empower and inspire: to give you enough information that you feel confident enough to try and to give you some idea that is exciting enough to make you take the step and do it.  I hope that’s what happened for my students last night.  (It felt like a pretty inspiring and empowering night to me.)

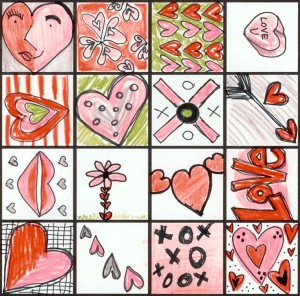
Once we got through all of the vocabulary, we did a couple of hands on projects.  In this class, I like to do a collaborative fabric design where everyone contributes a piece and then we put it together, create a design, I order a yard and I mail everyone a swatch after class.  So you get a piece of fabric you worked on.  Sometimes I do a grid where everyone draws in a square.

lovegrid

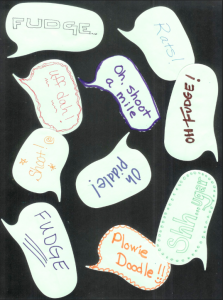
Sometimes we do a collage like this one with speech bubble shaped sticky notes and our favorite “clean” swear words.

Screen Shot 2015-02-05 at 9.47.06 AM

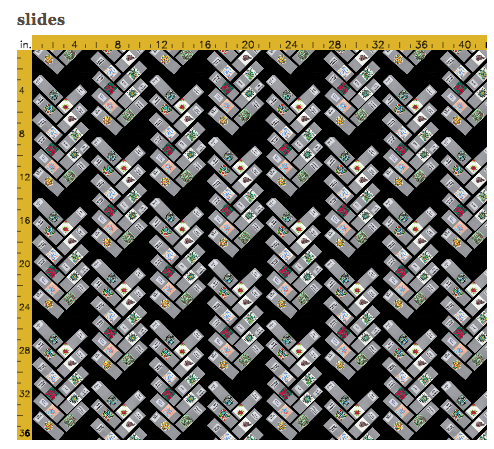
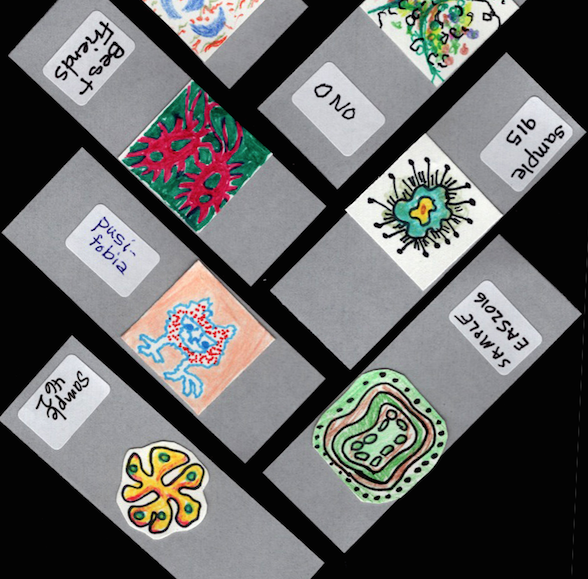
This time I decided to play with the Spoonflower weekly contest theme: microorganisms.  My class was skeptical.  I prepped a little ahead of time: I cut vellum paper to be microscope slides, we drew organisms, we added a sticker label to our “samples”.  I like to keep it small and simple so we don’t take up a lot of class time or trigger any “i can’t draw” anxiety.  Someone suggested a herringbone arrangement, which I thought was really fun.

Screen Shot 2015-10-08 at 2.23.23 PM

Screen Shot 2015-10-08 at 2.24.09 PM

I think it’s adorable.  And funny.  And it got us many great lessons – how to scan, how to touch up & crop, how to upload and so on.  We did all the steps in class, looked at different repeats, discussed negative space and made a great cohesive design.  Score!

But one thing that made me think.  One student said: Do I have to?  What if I don’t want to make a microorganism on a slide?

I get it.

I totally get it.  Part of the joy of making things is that you get to do it your way.  That’s the bonus of making it through so many elementary school art classes (at least the ones I was exposed to). If you learn the skills of working with a paintbrush or using the scissors by making all of the “cookie cutter” projects, then you can take those skills and run with it.

I told her she had to make a microscope slide along with the rest of us.  And not because I needed everyone to be doing the same thing, but my goal was different.  I encouraged everyone to try things that they were interested in seeing the results of: use colored pencil if you want to see how that texture looks as you print it on fabric; outline in pen (or not) if you want to see what ink lines look like; try shading.  You have 1 inch to do your experiment.  We talked about ways to make a design cohesive.  Sometimes I limit the colored pencil colors so we have a specific colorway (the hearts design above), sometimes we have a theme like the post it notes.  These design elements all had the “slide” and the sticker shapes to tie them together, so we let that be the cohesive element.  We talked about how to arrange them (and the drawbacks to the pattern we chose), we looked at all of the repeat styles and the pros and cons of those as well.

On a personal level, I loathe group projects. (Who doesn’t?  Have you ever met anyone who says:  I sure love working on group projects?)  But as a teacher, we got to have a deeper discussion because we were all working on the same design and not 10 different designs.  We didn’t compare whose was better or more clever because it was ours, together and we were all equal contributors.

I once sat in on a seminar with awesome feltmaker Lisa Klakulak.  She was teaching a really basic wet felting technique and we each started a 3 inch square of felt, laying it out and getting the first steps done.  A few minutes in to the process, she had us pick up the piece and pass it to the person on our left.  The clamour!  No one wanted to hand over their precious piece and she made us do it anyway.  By giving away the ownership, we could focus on the technique.  The new piece that was handed to you was different.  You had to look and feel and analyze and think about what it needed next and think about what she had taught us.  After a few minutes, we picked them up and passed them again. Once that first shock had passed, the grumbling got much less.  At the end, we all ended up with a random swatch, made by many hands, but I learned so much.  I saw so many different versions and variations, successes and challenges. And there was no talk of “I’m not good at this” or “Mine looks dumb” or “Look at how pretty Lucy’s is”.  The discussion was instead about the process: “Look at how much smaller this one was, I wonder if it started with less fiber or those were just aggressive felters.”  The discussion moved away from “me” and on to the art technique.  I haven’t been brave enough to pull Lisa’s kind of a “trick” on a class, but I still think about it and how effective it was.


22 September, 2015

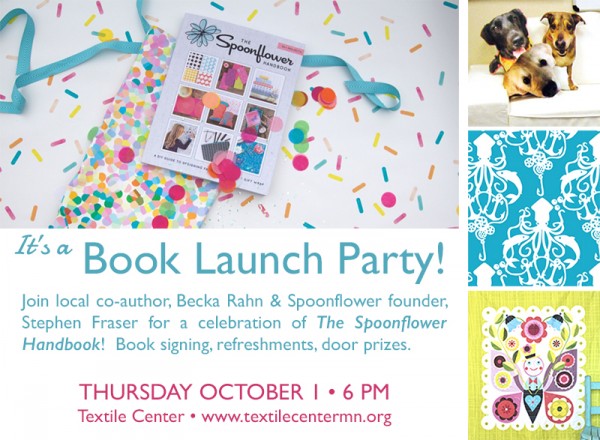
You are invited: Spoonflower Handbook Book Party

2015-09-22T09:51:19-05:00An Artist's Life, Spoonflower & Fabric Design|2 Comments

booklaunchSpoonflower

We are throwing a party and we want you to come.  I would like to personally invite all of you to join us at a book party for the release of the Spoonflower Handbook.  I wanted to do a little event here in Minneapolis because this community has been so fantastic.  So many of you have taken a class or asked me about a project or taught me something about design, that I thought it was only right to do something fun to say thank you for all of your help and encouragement and inspiration.  So, Stephen is coming and we will talk about the book.  He’s bringing all of the projects from the book (and some more really fun bonus projects).  We will have door prizes to give away.  Textile Center will have books to sell.  We will even sign your books if you want us too.  (I can’t believe I actually have a book to sign!  How cool is that??)

The party will be held at Textile Center on Thursday October 1 at 6pm.  (Go to www.textilecentermn.org for parking & directions.)


15 September, 2015

“Bonus Becka”

2015-09-15T17:56:26-05:00An Artist's Life, Gallery Exhibitions|3 Comments

Screen Shot 2015-09-15 at 4.58.53 PM

My blog software shows me all kinds of statistics about how many people visit the site each day (hi everybody!) and what pages you are looking at.  One of my favorite things is to see the search terms that got you here.  I know a lot of you look for sewing machine reviews.  (Glad I posted those.) You are often looking for weaving advice.  (I am not very helpful with that, sorry.)  My favorite one today was the search “bonus Becka”.  I am not sure what you were looking for with that search but I am glad it brought you here and it made me smile.  I will see if I can provide some bonus Becka.

It has been a hard week.  Not a feel-sorry-for-me-because-my-life-is-so-rough week, but it was the week after a huge week of important projects wrapping up.  And I won’t pretend that isn’t a big let down. Let’s be real. That’s part of being an artist of any kind. I remember doing theater all through college and the week after a show everyone got sick.  You spend the whole time leading up to the show running on caffeine and adrenaline and then when it’s over, you feel like you’ve been hit by a truck.  I am happy with how everything turned out with my exhibition, I’m pretty proud of my work and I love the response the book is getting so far, so please don’t think I am not appreciative!  But this week I am regrouping and resting and letting everything do its thing without me a for a few days. Because I can.

The question I have been asked a lot lately is “what’s next?”  The answer is, I don’t know.  I am not too worried about that because that’s part of my plan.  It’s been just over a year since I left my full time job as an arts admin and I said, when I did that, I was going to take some time to explore and try things.  In the last year, I have done 4 new-to-me art shows in a variety of venues both large and small.  I have applied for several exhibitions (I didn’t get in.)  I won a Jerome grant.  I didn’t get a state arts board grant.  I finished the book and it felt surreal to finally have it in my hands.  I have applied for some awesome teaching gigs; one I’ve got (ARROWMONT!) and several I am waiting on.  I am waiting to hear about 2 other grant applications.  (There’s lots of waiting going on right now.)  I got a grant to do a school residency in November.  (I am great at teaching kids, but is that even my “thing” anymore?  I don’t know.)  There’s a whole list of things that I didn’t get done in this year that I thought for sure I would have time for. I said no to a few things and yes to some things I probably shouldn’t have.   I also had things fall through or experiences that just did not live up to my expectations at all. (And that’s really hard for me because I set a very high standard for myself and I assume others to do the same.)  I have learned a lot about myself and the ways I do my best work.  All-in-all, I had a fantastic year, I got to do some amazing things and I LOVE being my own boss.

Screen Shot 2015-09-15 at 5.38.17 PM

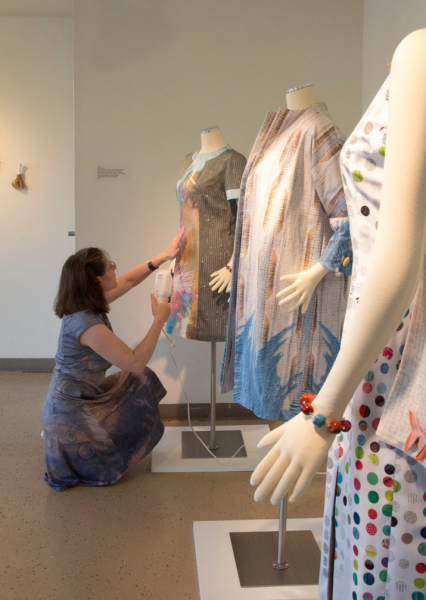
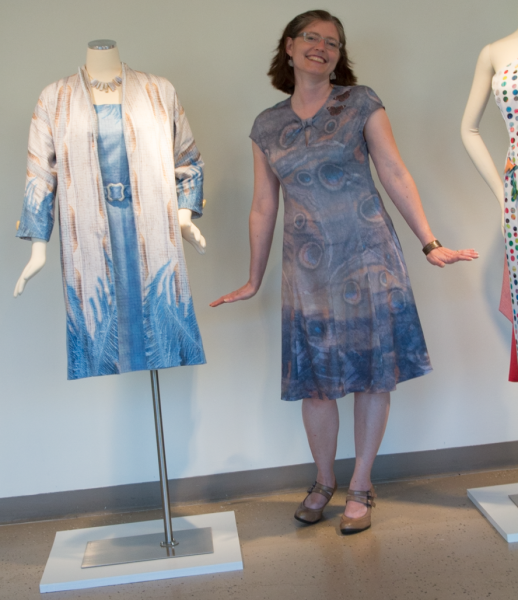
Some bonus Becka?  I can show off one other piece of unofficial art.  This is the dress I made to wear to the opening reception for my show.  The pattern is Davie by Sewaholic (with a tiny modification that I added the “knot” at the keyhole neckline.)  I screwed it up with a rookie mistake (seam allowance!), although it ends up that I fixed it just fine. (Don’t ask why I am catawampus or being silly posing like one of my dress forms.)

sunset


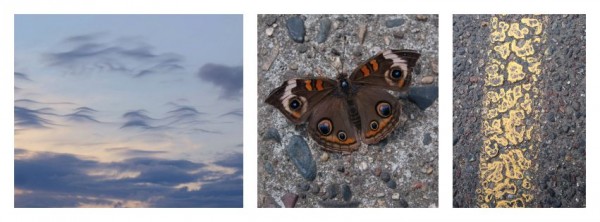
This design was made using these 3 photos.  The sunset (thanks Mom!) is the background, adding a beautiful gradient and those peachy colors.  The butterfly is cut out and transparently layered many many times over that at very large scale.  Then I put it at actual size on the shoulder, as if it was a pair of butterfly brooches.  They each have a few translucent sequins stitched on them for a tiny sparkle.  Finally the last layer is a greyscale version of that asphalt, just to add an organic bubbly texture to the whole thing.  I very carefully laid this out like a border print to be able cut the dress and have the print exactly how I wanted it.

Screen Shot 2015-09-15 at 5.48.43 PMThis one doesn’t have a title yet.  Got any great suggestions?  I would love to hear them.


26 August, 2015

Jerome Grant Projects: Duet #2

2015-08-26T16:41:27-05:00An Artist's Life, Everything Else, Gallery Exhibitions|Comments Off on Jerome Grant Projects: Duet #2

My second project for my Jerome Grant is all about the story.  My partner Dawn and I have been friends since the 7th grade.  Dawn is now a professor, teaching art at a community college.  She isn’t a digital or fabric person at all; she gravitates towards printmaking and book arts.  I thought it would be fun to go “offline” with Dawn and write a series of postcards to one another.  I bought several packages of blank cards and a bunch of stamps and we mailed our conversation back and forth with one side of the card for words and one side for a sketch of something. She block printed, I water colored with tea and we talked about art.  Why do I hate working with the color red?  Do you have a “go to” doodle that you always draw when you don’t know what to draw?

Dawn really inspired me to do something hands on and get away from the computer a little bit.  So I started a series of designs based on cut paper collages made from found paper and junk mail.  I now have about 6 designs based on that idea and I am really loving that whole set of work.  We talked a little at the beginning of the project about making a garment that told a story. Could a dress be a book?

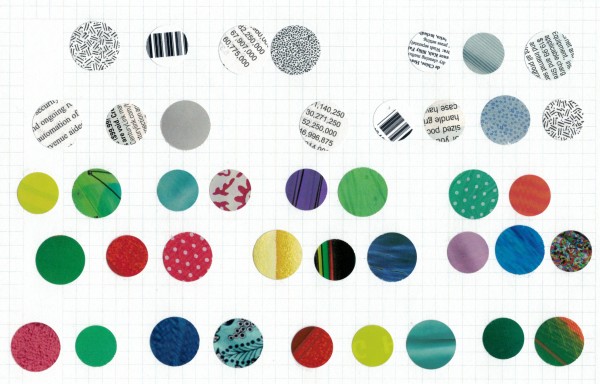
dots 2


This design is the base I started from.  Two sizes of circle punches and a stack of catalogs and envelopes.  I made 4 like this that became the final fabric design.  They alternate between bright colors with no text and grey/black/white with text on them.  I wanted to incorporate text into the design to refer to that book idea, but I didn’t want it to be a literal story that you would read.  So I used text as a design element throughout.

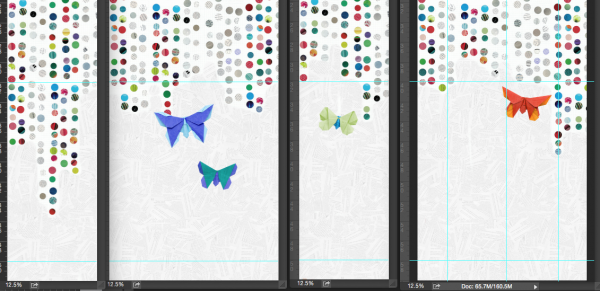
What kind of a story would a dress tell you?  It would have to be a “choose your own adventure”, where something you would do would be like turning the pages of the story.  So I created a text design from a torn up choose your own adventure book from the thrift store.  More text, but used in a textural way.  That is what makes the texture on the hem of the dress, which is shown here.  This is a screenshot of the actual dress panels as I was working on them.

Screen Shot 2015-07-15 at 12.23.23 PM


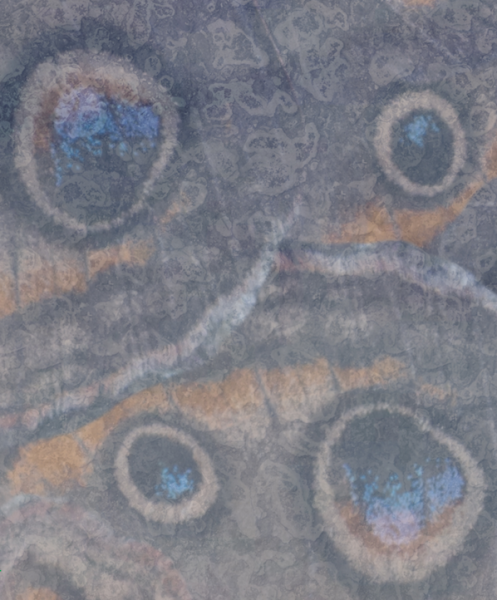
The origami butterflies came next.  I had made some fabric butterflies as a way of using up some pretty scraps for a show early in the spring.  And I loved that this design was evolving entirely from paper, so I made two kinds of butterflies.  These above were folded from origami paper and photographed to be layered into the design. And then I made 3-D fabric origami butterflies that embellish the dress.  (I have an affinity for origami butterflies.  My engagement ring was an origami butterfly folded from shiny silver paper.)

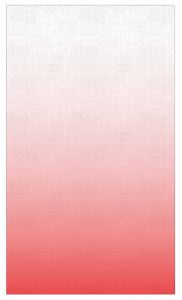
Finally I wanted to get our postcards incorporated into the design, so I scanned the text from several and created a final text design that is our handwriting with a color gradient over top.

Screen Shot 2015-08-26 at 4.31.11 PMScreen Shot 2015-08-26 at 4.31.48 PM

This design was printed on 2 yards of silk crepe to make a “scarf”.

Where does the “choose your own adventure” come in?  The dress is designed to be rearranged by the wearer.  Like a magnetic nametag, the fabric butterflies have neodymium magnets stitched to the back and another stitched to a felt backing.  The magnets let you put butterflies anywhere you like.  Up over the shoulder, all along the hem.  They also hold the scarf piece in place, so you can add a cowl back or an extra strap or a hood or a piece draped grecian style.

This one is called “Choose Your Own Adventure”.  (And I will post finished photos also after the show has opened.)

24 August, 2015

Jerome Grant: Duets Part One

2015-08-24T10:34:01-05:00An Artist's Life, Gallery Exhibitions, Spoonflower & Fabric Design|Comments Off on Jerome Grant: Duets Part One

The three projects for my Jerome Grant exhibition are all duets with other artists.  I chose three people as partners who I thought had something to teach me about art and design.  The original idea was to work on things digitally and have the focus be about the ways we all use digital design tools, but as we started to talk, each duet turned into something a little different.  The first partner I worked with was my dear friend Donna Kallner.  Donna is the fiber artist of the three and although her particular passions are ancient art forms, she is one of the most self-taught “techhie” artists I know.

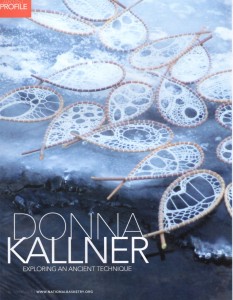
Donna was featured in the Spring 2015 of the publication from the National Basketry Organization.

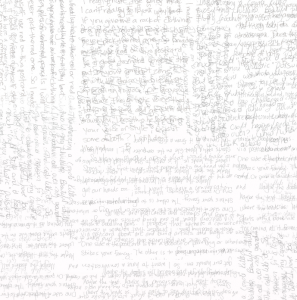
Donna was featured in the Spring 2015 of the publication from the National Basketry Organization.

Donna and I decided to play a game called “Photoshop Tennis”.  The idea is that you pass a digital image back and forth and each make an edit.  I do something and lob it back to her and vice versa.  We gave ourselves a pool of images to work from with a shared DropBox folder.  We set down some ground rules (choose at least 2 photos to combine) and a general aesthetic (organic, earth tones.)  We had wet dogs, fungus, brick, bittersweet, weathered tables and agates among the images in that folder.

originalsq


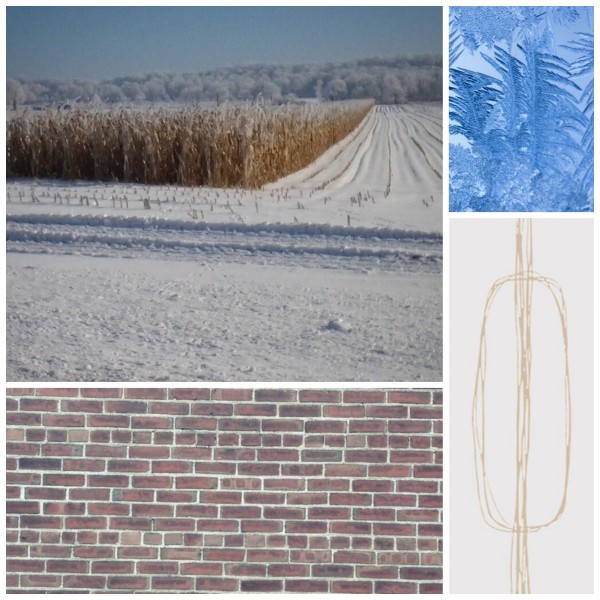
We had several versions of designs going, but this set of photos ended up being the final fabrics.  A brick wall, a snowy cornfield, frost on a window and a line drawing that I scanned.  These were layered with different opacity, repeated, mirrored, inverted.  We did a lot to them, but I think they still read in the final fabrics amazingly well.

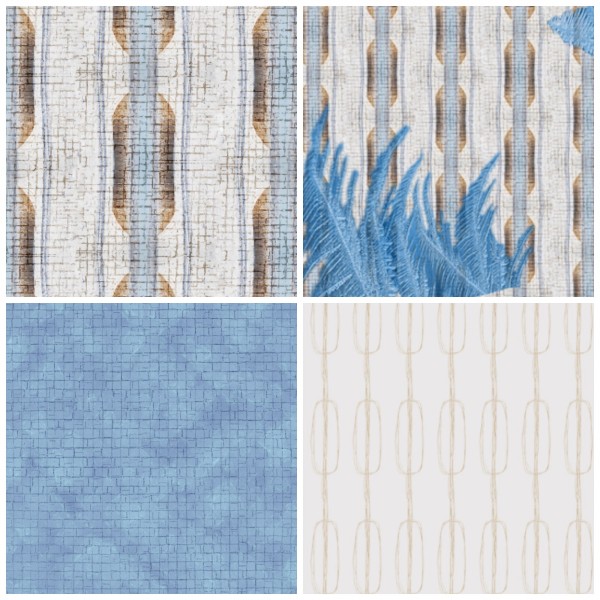
finishedsq

I love that we created a geometric print from an organic shape.  That is one of my favorite parts of this design. I can’t tell you who did what because it evolved very organically. I was completely skeptical at first because I had never created a design from a large landscape image.  My photo choices tend towards close up macro shots, at the other end of the spectrum.  One of the “new” ideas I think I learned was the use of repeating layers.  The brick pattern was layered several times by itself and rotated – transforming the brick into a more irregular cross-hatch pattern, which is a fantastic texture. We left our files “in progress” when we passed them back and forth, so I could dig right into the layers and see how everything fit together. I think we get into habits as designers of going to your “go to” tools and this was a really interesting exploration for me to dig into Donna’s work and say “what did she do there”.  It was a way for me to watch her work and see a new process.

The ensemble that these fabrics go in to is two major pieces: a sheath dress made from the blue brick print and a coat made from the geometrics.  Both pieces have the frost image layered on top in very specific places.  It makes a “collar” on the dress and is layered at the hem and cuffs of the coat at very large scale.  The hand-drawn print is the coat lining.  The dress and coat are made from cotton sateen, the coat lining is satin.  (The coat is interlined with a heavy cotton twill to give it some weight and structure.)  Both pieces are based on 1950’s vintage patterns.

I have titled it “You Can Take the Girl Out of the Country”.  I do know that I am taunting you, but I won’t show the finished pieces until after the show has opened.  Hopefully you can use your imagination a little bit until then.

Go to Top