18 July, 2017

Teaching is all about the preparation.

2017-09-25T10:56:51-05:00An Artist's Life, Everything Else|10 Comments

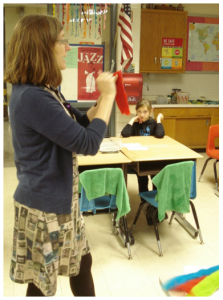
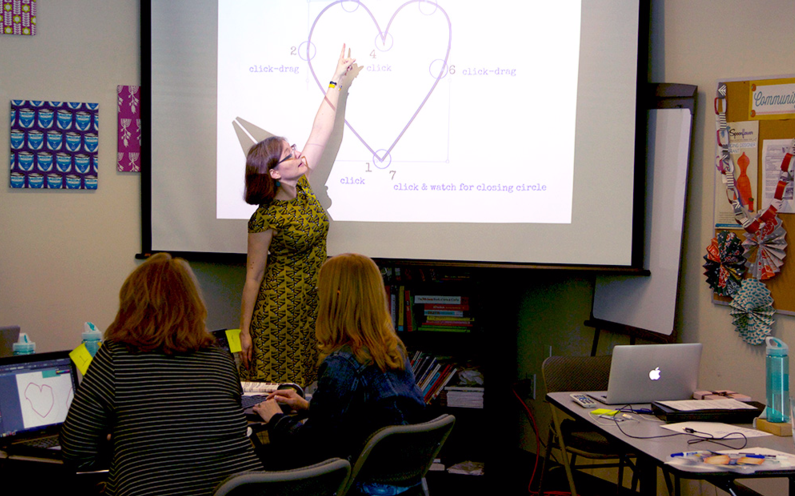
This is me teaching a school residency where I worked with 700+ students in 5 days.

I am prepping for a teaching trip this week. I am heading out to NC to teach some highschool teachers about how to use Spoonflower in their classrooms. It should be great. I like teaching teachers.

As I was getting ready to start polishing up my slides and handouts I was thinking about some of the more interesting teaching gigs I have had over the years. A few standout examples:

  • Taught a digital photography class in an unheated 4-H barn with no wifi access. Had to use my LCD projector by projecting on to a piece of foam core propped up onto a chair. It was supposed to be an adults class, but the venue registered just two 8th grade girls in the class instead. Talk about revising your class on the fly.
  • I taught at a national conference where instead of booking classrooms for some of the smaller classes, they put us in a regular hotel room with a bunch of extra chairs in it. I taught the class sitting on the bed and pointed my projector at the bedsheet which we took off the bed and taped to the wall to make a screen because the walls were dark and textured.
  • I showed up to teach a digital design class at a venue on a Saturday morning that had a policy of turning off their internet access completely on the weekends. No wifi at all. We ended up gathering everyone up and driving nearby to a student’s house. I taught the class using her pool table as my work space.
  • I taught a quilting workshop to non-English speakers, using a college student as a translator. None of my adult students had ever used scissors before.
  • I had a daughter who bought a class for her mom as a surprise gift. The mother walked in to the shop and when she found out what the class was about she said to her daughter “Who does that? I am not taking any damn tatting class. Why would you think I wanted to do that?” I (the instructor) was standing right there.

Let’s just say that I have learned to be very flexible and just a little over prepared. As Tim Gunn says, “Make it work!” I am basically ready for everything. So, I wanted to share a few thoughts about what goes in to that prep work; call this a teaching “behind the scenes” post.

Preparing to be flexible

For a while now I have been sending out pre-class surveys to students who are registered in my classes so that I can get a handle on who is in the class. This way I have a chance to adapt to the group I have and to make sure that everyone is really getting the class they thought they were getting and I can troubleshoot a few things in advance. I teach with technology; there is always troubleshooting to do.

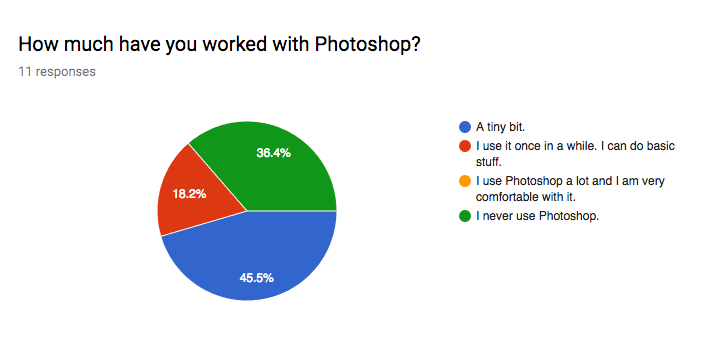
For example, a venue I worked with recently really wanted me to teach an “advanced” Photoshop class. They assured me that all of their pool of potential students would already know how to use Photoshop well and they were sure that we could skip over the beginner stuff and go right into an intermediate/advanced class. So I put together a description and projects and so on, and after registrations were all in, I sent out my survey.

Yes, that is 0% of my “advanced” class that say they are experienced with Photoshop and about 4 students who have basically never used it at all. This isn’t the first time that has happened. Fortunately, I had a feeling that this was going to be the case and I was mostly prepared for that.

The importance of class descriptions

A lot of that preparation is spending a significant amount of time writing the class description. I know that I need it to be specific enough so students have a concrete idea of what they will be doing in class, but flexible enough that I can actually accomplish the projects with students who are at a different skill level. Nothing makes a class start to head for disaster more quickly than poorly matched expectations. Now that I know that my “advanced” class actually has very little experience with Photoshop, I can make sure I am introducing things at a level where everyone can have success, starting with the basics.
This was from a class that I took where the teacher actually labeled our stations with post it notes so she could keep track of our experience level. I was a beginner, so I was a “1”. I have my students rate themselves too.

I spent this morning writing new class proposals for something in 2018 and thinking a lot about the students I thought I would expect to see at that venue. I basically construct a “model student” in my head. For the proposals I was writing this morning and based on what I know about the venue, I was pretty confident that my students would be:

  • quilters and crafters (not making clothing)
  • retired or near retirement age, budget conscious
  • not very technical/computer focused
  • skilled and experienced sewists

I have taught at this venue before, so I feel like I have a pretty good model to go on. So when I wrote my class descriptions, I wrote them for that audience:

  • Classes focused on process not product. We will be designing fabric and learning design concepts, not making a bag or a tea towel. They know how to do that already so that project won’t get them excited.
  • Beginner level technical skills. Several of the techniques can be done in more sophisticated ways with Photoshop or Illustrator, but you can do the basic version in any graphics software. It’s about the concept not the tool you use to get there.
  • Using free/online design software. You can do them in Photoshop if you have it, but you can try it out without having to invest in a lot of software and equipment. Making it approachable so people are willing to try it.

As a teacher, the phrase “That was worth the whole price of the class right there.” is a huge high five for me. That means I exceeded expectations and that’s awesome. I took a silversmithing class once where the supply list was so full of technical jargon that I showed up for class with not quite the right supplies and ended up spending a lot of time (and $) making something I hated. The instructor assumed that I knew more than I did. Expectations can work both ways.

What do you think this class is about?

Another question I ask in my pre-class survey is “What would you like to get out of this class?” Sometimes people skip over this one, but when they answer, the answers are always super helpful. For the “teacher training” class I am teaching next week, most of the answers were about getting ideas and inspiration for high school students and projects to do in their classrooms, specifically for interior and apparel design. Which is exactly what you would expect from that audience and assures me that I am preparing the right things – less about personal designs and more about ways to incorporate this into lessons, projects and how to break it down into components you can teach to others. I can do that.

I have had overzealous copy editors edit my class descriptions in ways that unfortunately changed the student’s whole expectation of the class. I learned this the hard way in one of the first professional classes I taught at an art center venue. It was a purse making class that I thought was a beginner sewing class where you made your own simple paper pattern, but it suddenly evolved into a pattern drafting class for designing your own purse. Similar on the surface, but a few words can make all the difference. I ended up with a horribly mis-matched class of beginners who didn’t know how to use a sewing machine (which I was prepared for) and a few students who thought they were getting a pattern drafting class for custom purse making (which was far beyond the scope of what I was teaching). It was awkward for everyone. The beginners felt like they were dumb, the experienced students looked at the project samples and said “Is that all we are doing?” and I wanted to crawl under a table and die. The venue had written the description for me since I was a newbie. That was a valuable lesson. Most venues still don’t check back with me when something gets edited before it gets sent out, so this survey question is also a quick reality check for me to make sure we are all still on the same page.

So, I am curious, what’s the weirdest venue where you have taught or taken a class? How did you make it work? Can you beat my hotel room story?

9 May, 2017

Shepherd’s Harvest Festival this weekend.

2017-05-09T09:40:48-05:00An Artist's Life, Everything Else|Comments Off on Shepherd’s Harvest Festival this weekend.

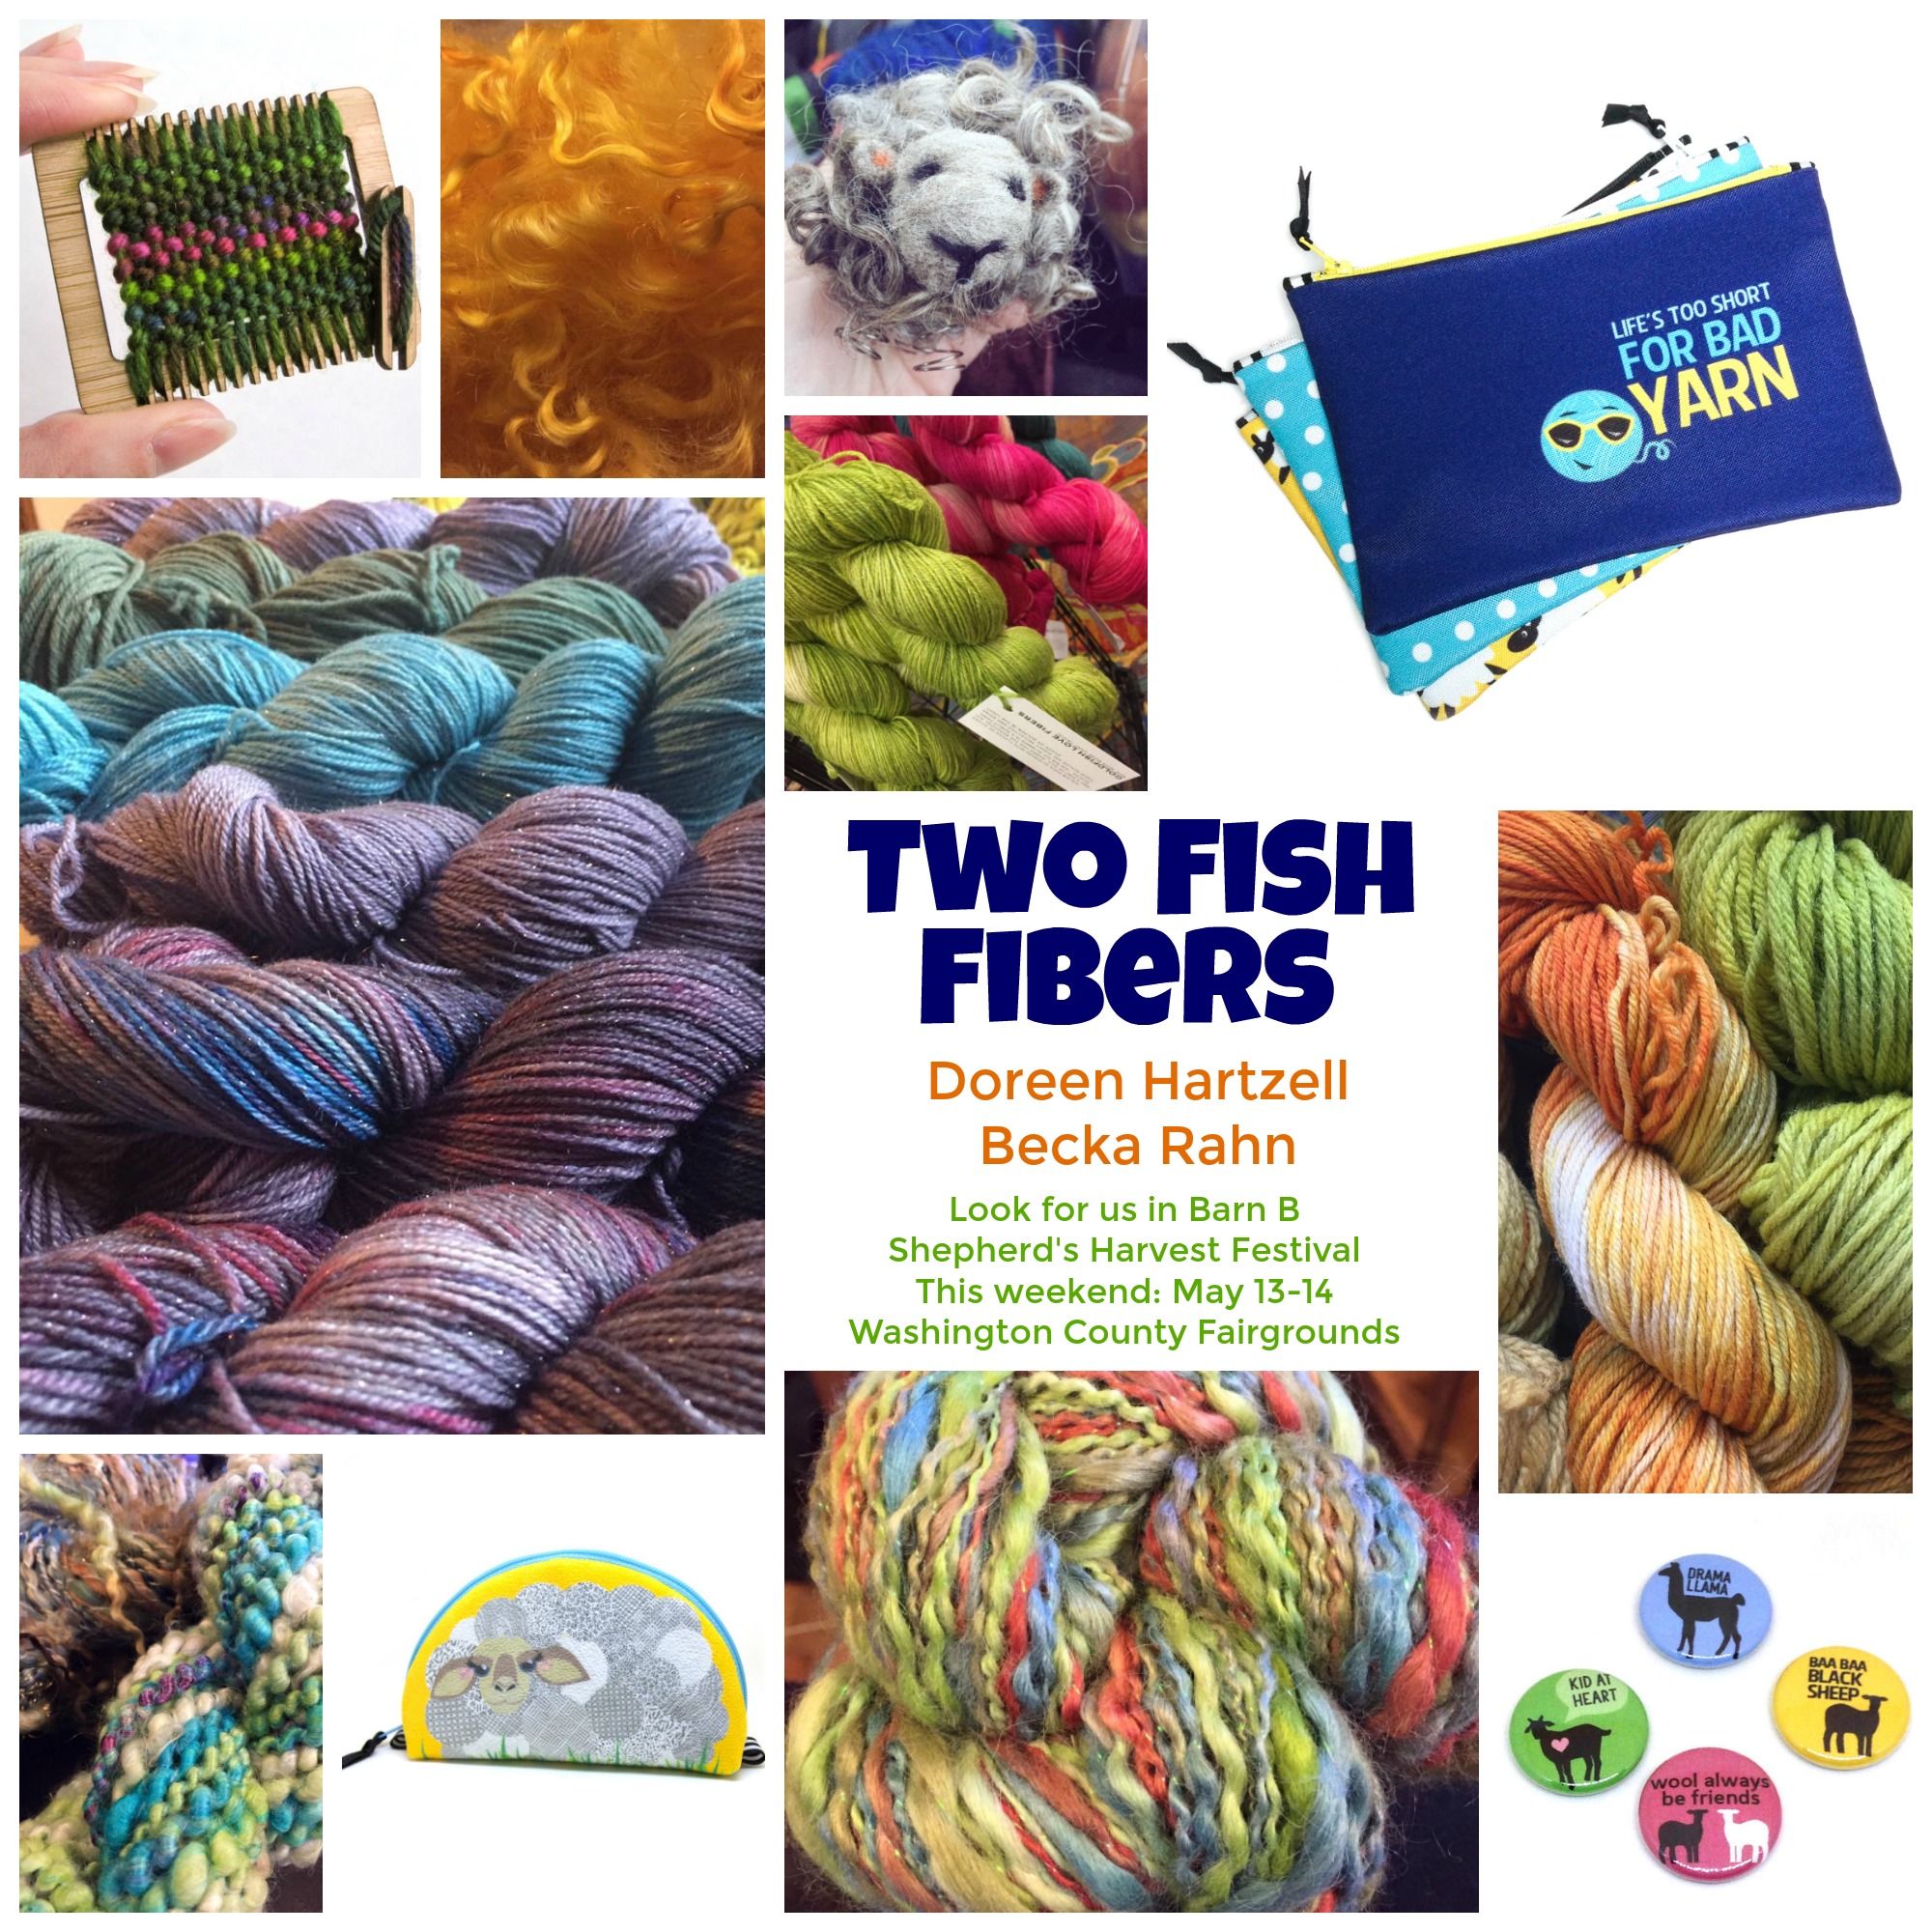
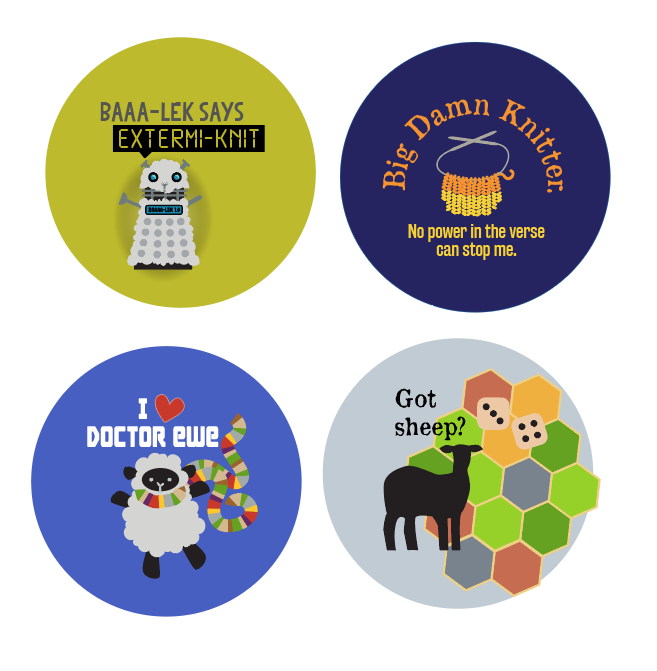
I think this is the 7th year I have been at Shepherd’s Harvest Festival with my friends Doreen and Jen. If you have never been to a fiber festival like this, it’s a lot of fun. It is held at a county fairgrounds. We have been snowed on and had 80 degree weather, which is pretty typical for May in MN. It looks like this year might be one of the nice ones. The 4H barns are full of vendors selling yarn, fiber, fiber tools, candles, soap, baskets. There are animals in the barns. You can watch sheep shearing, angora spinning, weaving, and all kinds of demos. There are food trucks. They’ve moved the festival back to Mother’s Day weekend after trying some different dates and we are really happy about that. It makes a great family outing for Mother’s day. I will have all of my zipper bags and punny fiber art geekery. I have BRAND NEW geeky designs debuting at the festival inspired by Dr Who, Firefly, Harry Potter and Settlers of Catan. Doreen, my boothmate, is a handspinner and dyer. She has all kinds of gorgeous yarns and she will probably be doing spinning demos most of the weekend. She has emu feathers that she has been spinning in to new yarns and I can’t wait to see them.

3 May, 2017

Being an artist is all a side hustle.

2017-05-03T17:12:27-05:00An Artist's Life, Everything Else|6 Comments

I first heard the term “side hustle” at a cocktail party with colleagues. When someone asks what you do for a living and you reply “I’m a full time artist”, every person you talk to pictures something different. Her vision was something like sew dresses all day and sell them to boutiques. (Which is really not what I do at all.) I tried to explain how my job is different every day of the week and I like it that way: I teach, I sell on Etsy, I do shows, I do community projects… And she said “Oh, it’s like teaching is your side hustle.”

Really, I think being an artist and being able to do it full time is all side hustle. It’s hard to support yourself by just making things and selling them. Not only do you put in the time to make it, but you have to put in the time to get it in front of people and hope that someone likes it enough to pay you for it. And you have to hope the economy is encouraging people to buy handmade. So you also sell it online, which doesn’t require you to be there standing in a booth all weekend and that helps with some of the overhead. And you teach it. And you write about it. Sometimes I wish I was making it more of the time, but balancing it with all of those other things really works better for me.

I was curious after I had this side hustle conversation with that colleague, so I pulled up my numbers for the past 2 years. 2015 and 2016 were the first two years that I have been my own boss full-time. Many of these things I have been doing part-time for many years along with my regular day job so these are established micro-businesses for me.

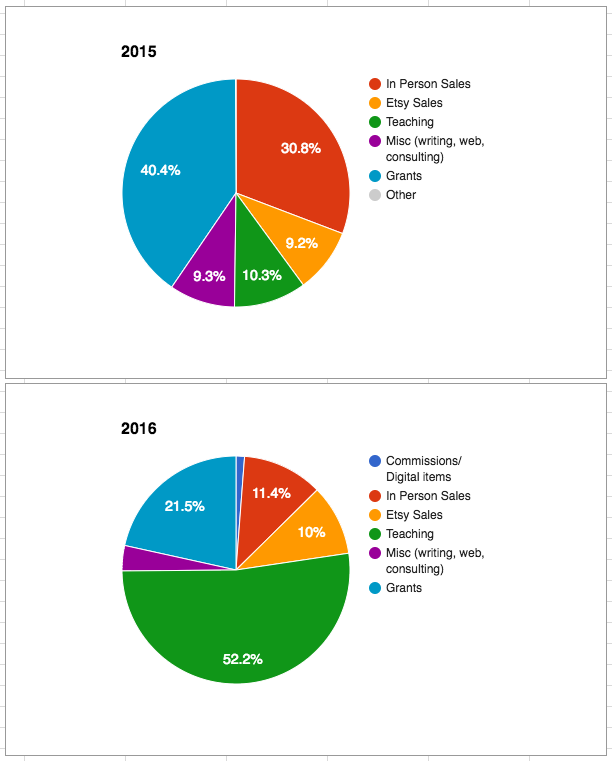
These are the percentages of my total income that I can attribute to each of my “jobs”.

Commissions/Digital Items includes things like the items I sell on RedBubble and Spoonflower. I make a commission from each of those designs that sell. That grew a lot in 2016. (It doesn’t even show up in 2015.) Why the growth? I put in the time. I added a lot of new designs, cleaned things up and put some care into my online shops. It made a difference.

In Person Sales includes consignment items I have at shops and art shows that I do, like the American Craft Council, Craft’za, Shepherd’s Harvest etc. I participated in more shows in 2015. I was really busy traveling to teach in 2016 so I couldn’t do as many.

Etsy sales is the things I sell on Etsy, obviously. Same story here: I did a lot of work on my Etsy shop in 2016. I rephotographed a lot of items and gave everything a fresh look and some polish to descriptions. I weeded out some things that weren’t selling and added a few new ones. Since this is a percentage of my total income, what you don’t see is that my total Etsy sales doubled from 2015 to 2016. (My income overall was greater too, so the percentage looks the same.) Seriously. The work to clean up and focus was completely worthwhile and so far 2017 is keeping pace with 2016, which is encouraging.

Teaching was huge for me in 2016. I taught a lot of classes, but I also started to adjust my teaching rates slightly to reflect what I should be paid for the expertise that I have. When I was teaching once in a while for local guilds it was fine to charge a “friends and family” kind of rate, but now that I am traveling and teaching more complex classes, I also need to be able to cover liability insurance, travel and things like that. I am hoping to roll out online classes this year, so I am teaching less in 2017 to have the time to get those up and running.

Misc is my consulting category. I have fees for writing articles & tutorials, web consulting, small graphic design projects.

Grants. I think this category is the least sustainable. I was super fortunate to get a whole bunch of large and small grants over the last two years. They are a lot of work to apply for and usually involve a lot of work for the grant project itself, but they are the thing that makes the big projects happen. I was able to do two huge teaching residencies, mount my first solo exhibition and first public art piece all because of grant funding. I will keep applying, but I know 2017 will be decreased, because I didn’t get one I applied for and I took a break from applying because I didn’t want to have too many overlapping projects. I was making myself a little crazy with so many balls in the air.


I thought these numbers were really interesting. (Did you know that my teaching degree is in math? Does this surprise you?) When I started on this adventure of being my own boss, I gave myself permission to just try stuff. I said yes to nearly everything. I applied for things that I thought would be cool and ones that I thought would be a long shot. I taught at a prestigious craft school and at the neighborhood library. This year I made enough actual profit to be able to contribute to a SEP IRA. But it was a LOT of hustle.

I’m still in the “trying stuff” phase of my business at this point. I am doing some serious thinking about opening a second online shop with all of my clothing & accessory items which I currently only sell at in-person shows. I am working on online classes which has been a goal for much too long. Time to make that one happen. I think my ideal balance would be in thirds: teaching/sales/grants. I don’t want to become a manufacturer where all I do is sew stuff to sell to other people. I like the one-on-one work of teaching people and I already have several more exhibitions dreamed up. That seems like a great balance to me.

If I want to have one message from this post to leave you with, it is actually something that I wish I could tell myself from about 8 years ago. I used to get really discouraged about not having thousands of blog followers and not being a craft-internet-celebrity or the most popular Etsy shop or whatever the success benchmark was. I was sure I couldn’t cut it on my own because I didn’t have the social media following or the giant mailing list. But I realized that doesn’t really matter. It’s about going out there and doing it. I had 11 students at the last class I taught and they could care less about how many Instagram followers I have. The 12 of us got to do nothing but make art for 2 hours together and how often does that happen? I had the privilege of being on the Etsy Sellers Advisory Board last year not because I had 16,000 sales, but because I stepped up and said “I have something valuable to contribute” and they believed me. If you don’t show up/ask/apply, they can’t say yes.


20 April, 2017

Using Adobe Capture for Fabric Design

2017-04-20T09:04:42-05:00Everything Else, Spoonflower & Fabric Design, Tutorials|3 Comments

This tutorial comes to you via an email I received. This seemed like the kind of question that would make a great tutorial.

I love the patterns that I’ve created using Adobe Capture and I can see them in my library when I use Photoshop.  What I’m having problems with is making the Adobe Capture patterns into a seamless repeat to upload into Spoonflower. I have been able to upload my image into Spoonflower and it looks good as a swatch, a quarter yard; however, the full yard you can see that the pattern is not seamless.   I can’t find any video or blog info on how to do a step by step to make these beautiful Adobe Capture patterns into fabric.  — Shirley

What’s Capture?

Adobe Capture is an app for your phone or tablet. You can “capture” colorways or patterns in the app using your device’s camera and they are loaded directly into Adobe Photoshop or Illustrator in the Libraries tab. Once they are in the Libraries, you can use them in your Photoshop or Illustrator designs. Here is a great tutorial & description from Adobe for a little more about how Libraries work.

For this tutorial, I am going to talk specifically about the workflow of taking a Pattern that you create in Adobe Capture and how to upload it to Spoonflower to make a fabric design.

Create the pattern

First, you need to create a pattern in Adobe Capture and save it to your Library.

Launch Adobe Capture and make sure you are signed in to your Adobe account. Choose the Patterns tab at the top of the screen. Then tap the + button at the bottom to add a new Pattern.

Use the built in camera to capture an image or you can choose something you have saved to your Camera Roll by tapping the thumbnail in the top right. Along the left side of this screen, you see the different pattern repeat types you can choose. Each one crops out a section of the image and repeats it by mirroring and rotating it. When you have the pattern you like, then save it by tapping the purple button.

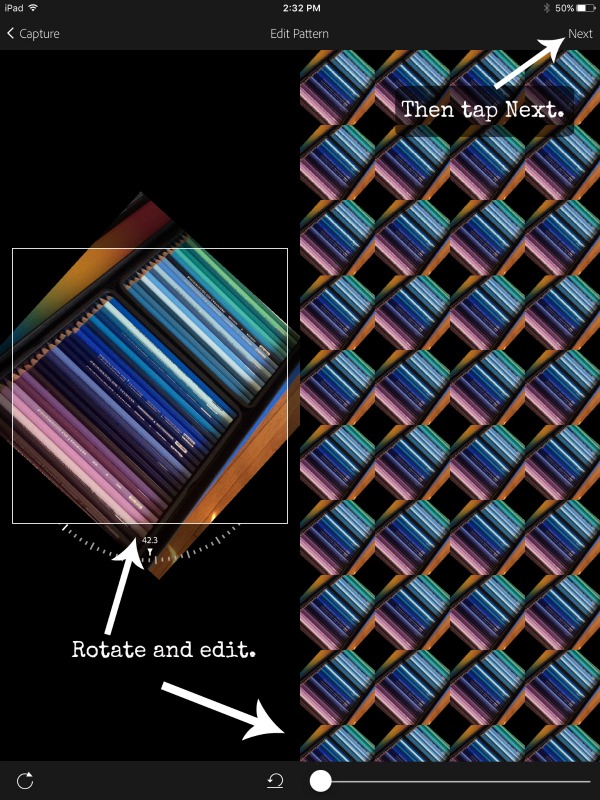
Next you will come to the Edit Pattern screen. You can change the angle and some blending on your photo. Once you are happy, tap the Next button at the top right.

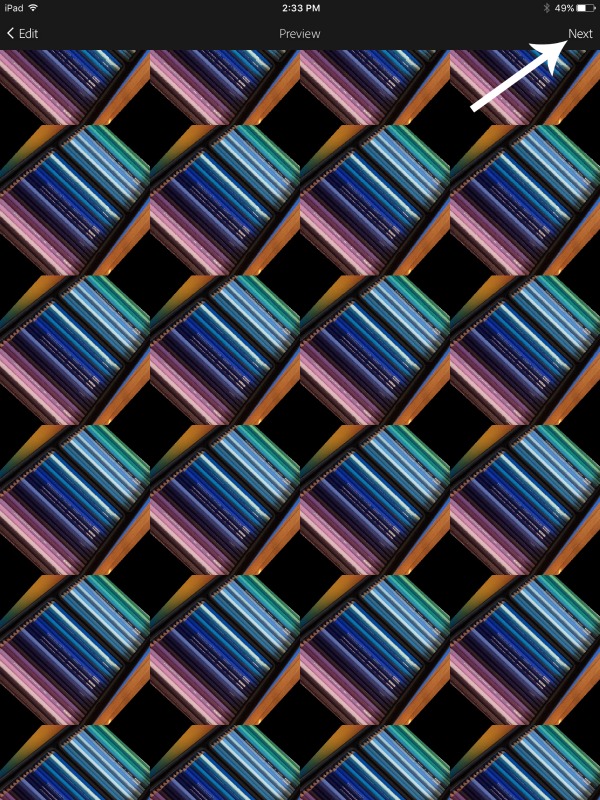
Then you will get a Preview screen so you can see what your pattern would look like filling up the whole screen. Cool. Tap Next at the top right.

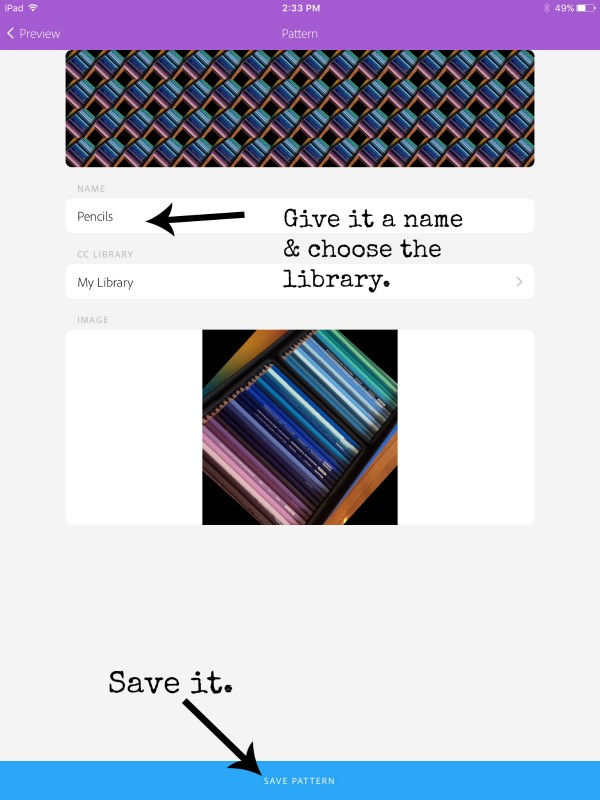
Finally save it to your Libraries. You can give it a new name and choose the Library you want to save it into in the dropdown. Then tap Save Pattern.

Finding your Pattern in Photoshop

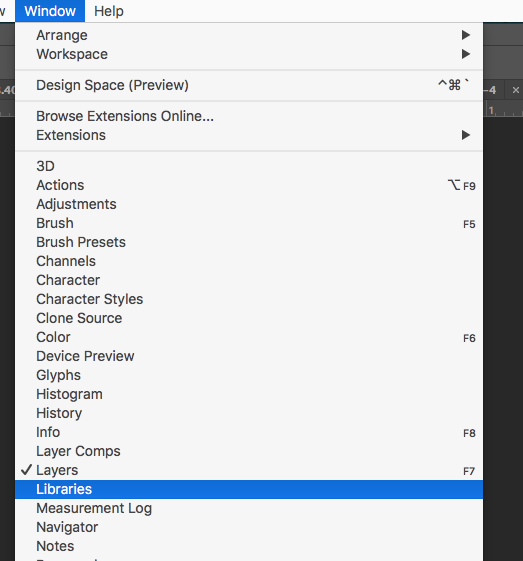
Here’s the cool part. When I open Photoshop, this pattern is going to pop up there automatically. Look for a palette that is called Libraries. It is often not open by default, so you will need to go under the Window menu and find Libraries to open it up.

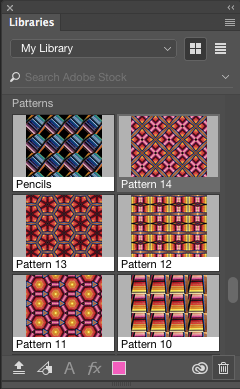
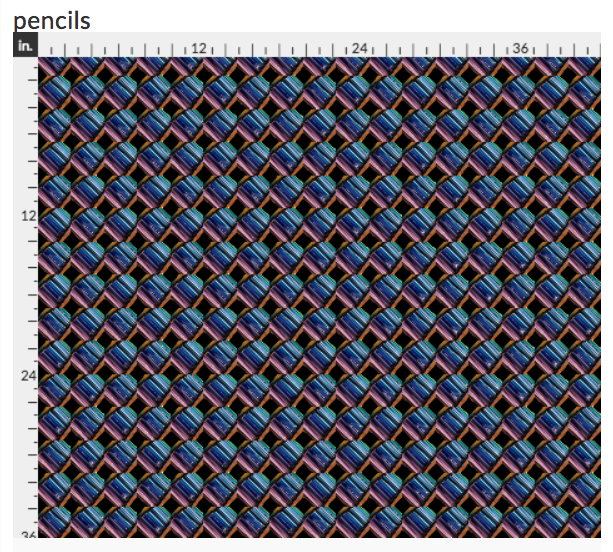
Within that Libraries palette, scroll down until you see Patterns and there you will see the Pencils pattern I just made. (Sometimes they take a few seconds to pop over there depending on your wifi speed. Be patient.)

So why do we have to go to Photoshop? Can’t we just upload that pattern from Capture somehow? The pattern isn’t actually a file you can upload directly to Spoonflower, although that would be really handy. It only exists in the Pattern palette until we fill a canvas and turn it into a .jpg. Think of it like a knitting pattern. Until you take the pattern and knit a sweater from it, you can’t wear the sweater. Until you apply the Pattern to something, you can’t use it at Spoonflower.

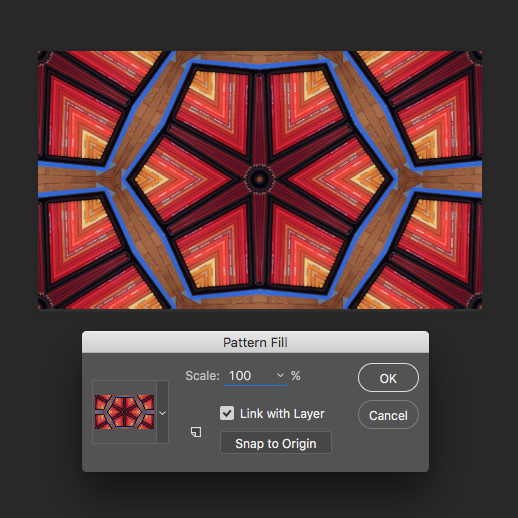
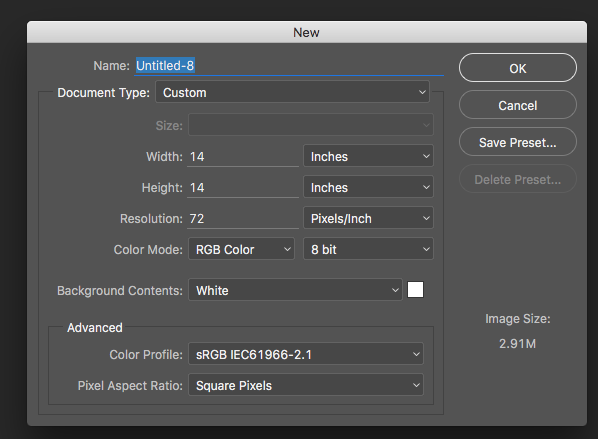
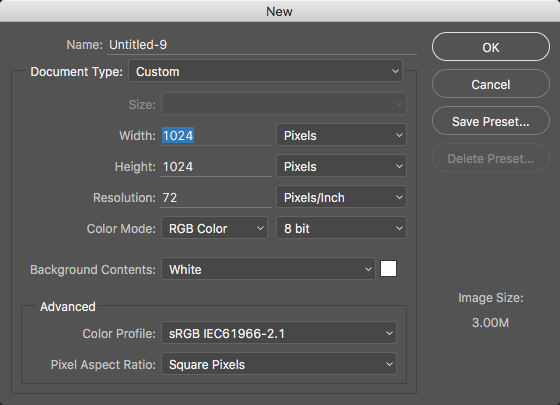
Make a new blank file by choosing File -> New. I made mine 14×14 inches at 72 ppi. I will explain why I chose that size in a minute. Then I click the pattern in the Libraries palette and it will fill the canvas with that pattern.

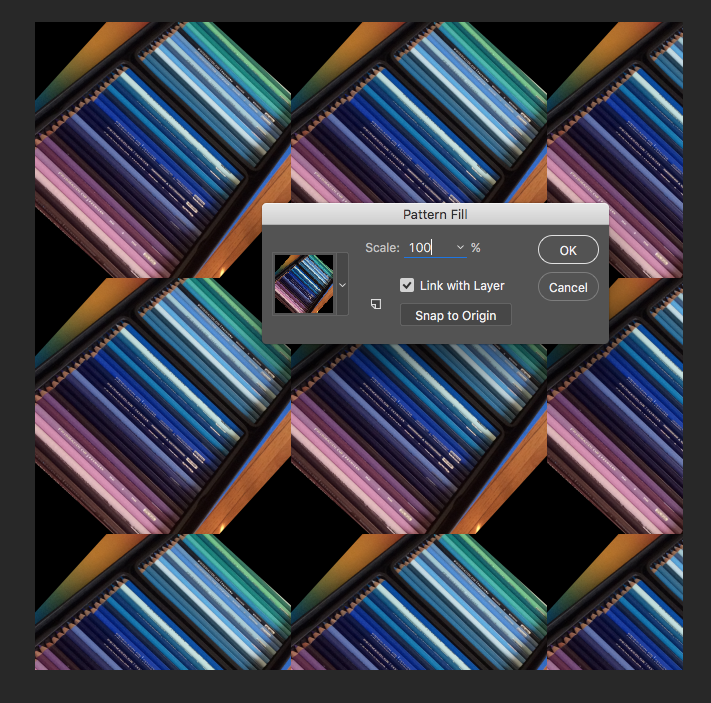
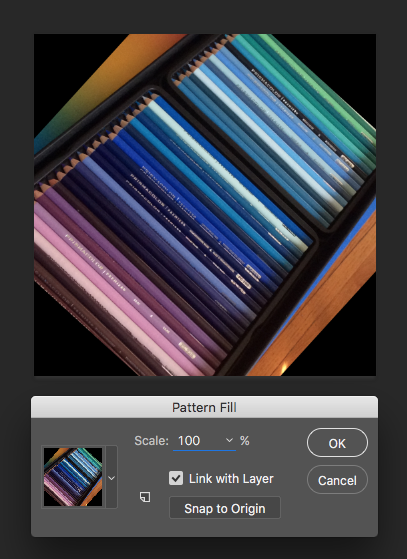
A Pattern Fill dialogue box will pop up asking what scale you want to fill your canvas. Enter 100% in the scale box and click OK. Why 100%? Because I want to make this the largest it can possibly get. It’s super easy to scale it down in Spoonflower, but I want to save it the biggest I can get it so I have the most options for using it. Now that we’ve filled something with the pattern, we can save this and upload it to Spoonflower.

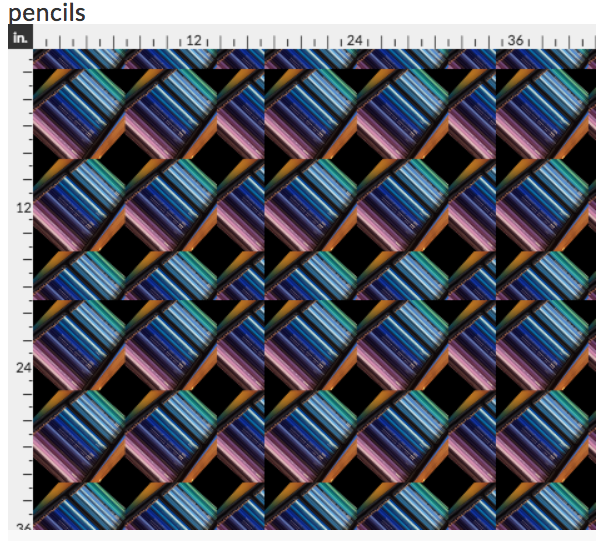
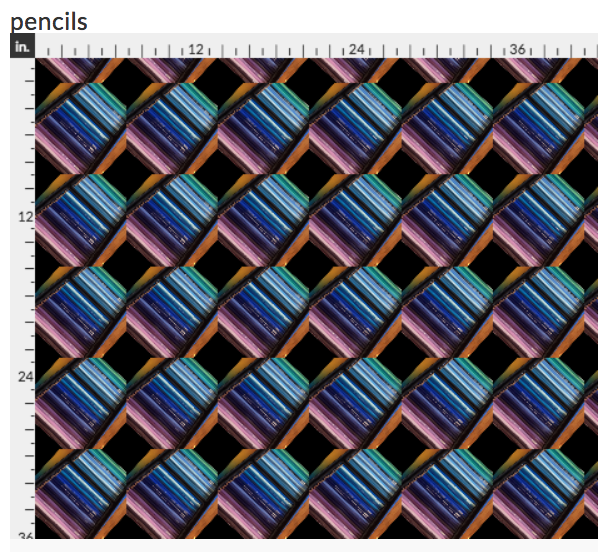
But first, I want you to take a look at this image. I think, based on Shirley’s email that we saw at the top of the post, this was the step that is tripping her up. If I upload this right now to Spoonflower, it’s not going to be seamless. You are going to see a flaw. If you look at the left and right sides of the image, you can see that they wouldn’t match up. There is a half an image on the right side, but no half image on the left to match it to. Here’s what it would look like if I uploaded it right now.

That’s not the same thing we saw on the Preview screen up above. Why? The repeating pattern tile that Adobe Capture creates is a set size and that size is not 14×14 inches. Photoshop filled the 14 inch canvas exactly as we asked, but to fill it, it used about 2 1/2 repeats by 2 1/2 repeats of our tile. I picked a 14 inch canvas so I could show you this example, but there is a better size to make your canvas.

Making One Repeat

To make it seamless on Spoonflower, we need to upload one repeat, not 2 1/2 repeats like we made in that example file.

So how do you make it so you have just one repeat? That took me a little sleuthing and I couldn’t find this spec published anywhere so I had to go in to Photoshop and figure it out. (ie Lots of trial and error and zooming in looking at pixels. You can imagine this step.) Disclaimer: I couldn’t find this information actually published anywhere, so this is the results of my experiments. I may be off by a pixel or so but I think this is accurate.

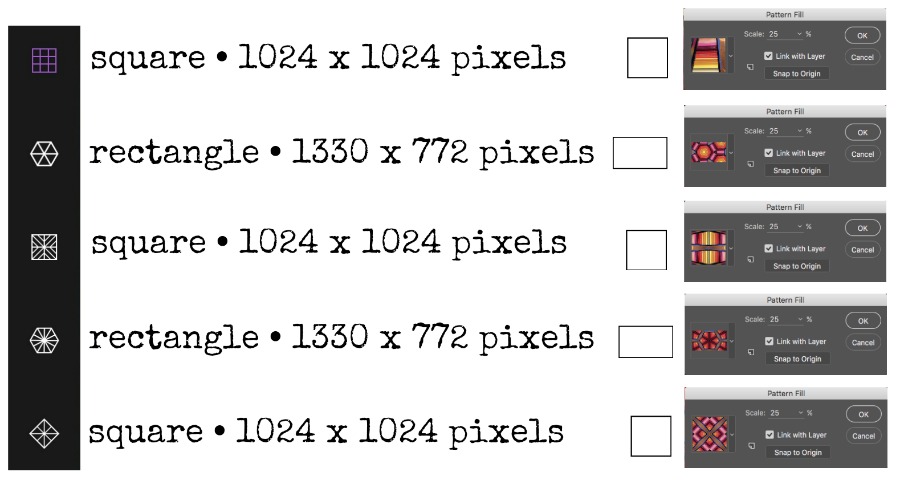
For each of the different repeat styles you can choose in Adobe Capture, it creates a pattern tile that is an exact size. I made the chart (shown above) that tells you what those sizes are. For some of the patterns, the tile is square and for some it is a rectangle. The size you see on the chart represents the size of one repeat at 100% scale.

Making one repeat is pretty straightforward once you know the size. Create a new file by going to File -> New and fill in the size of a single repeat from the chart.

If you don’t remember what repeat style you chose, there isn’t a really good way to tell which is which. A good rule of thumb is that if you can see hexagons in your design anywhere, it was very likely one of the rectangle (1330×772) designs.

Now choose the Pattern by clicking on it from the Libraries palette and set it to fill at 100% scale. Now I have one repeat.

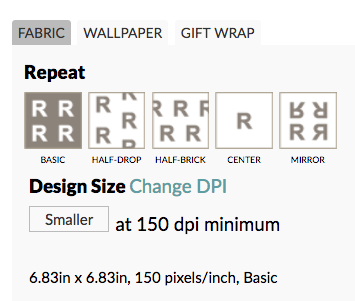
Save this file as a .jpg and upload it to Spoonflower. Choose the basic repeat style. Now the uploaded design at Spoonflower looks just like the Preview we saw on the iPad screen.

The preview we are looking at in the image above is 1 yard of fabric, which means this repeating element is pretty big (almost 7 inches). If you want to scale it down, just click the smaller button under the Design Size section until you like the scale.

I clicked the “smaller” button a bunch of times and this shows a repeat size of about 2.5 inches on a yard of fabric. Perfect!


Thanks, Shirley, for a great question! If you have a question you’d like me to write a tutorial about, just ask! I love getting ideas from you.

30 March, 2017

One more time!

2017-03-30T11:50:54-05:00Everything Else|Comments Off on One more time!

Sunday April 2 • 3-5 pm
Hennepin History Museum

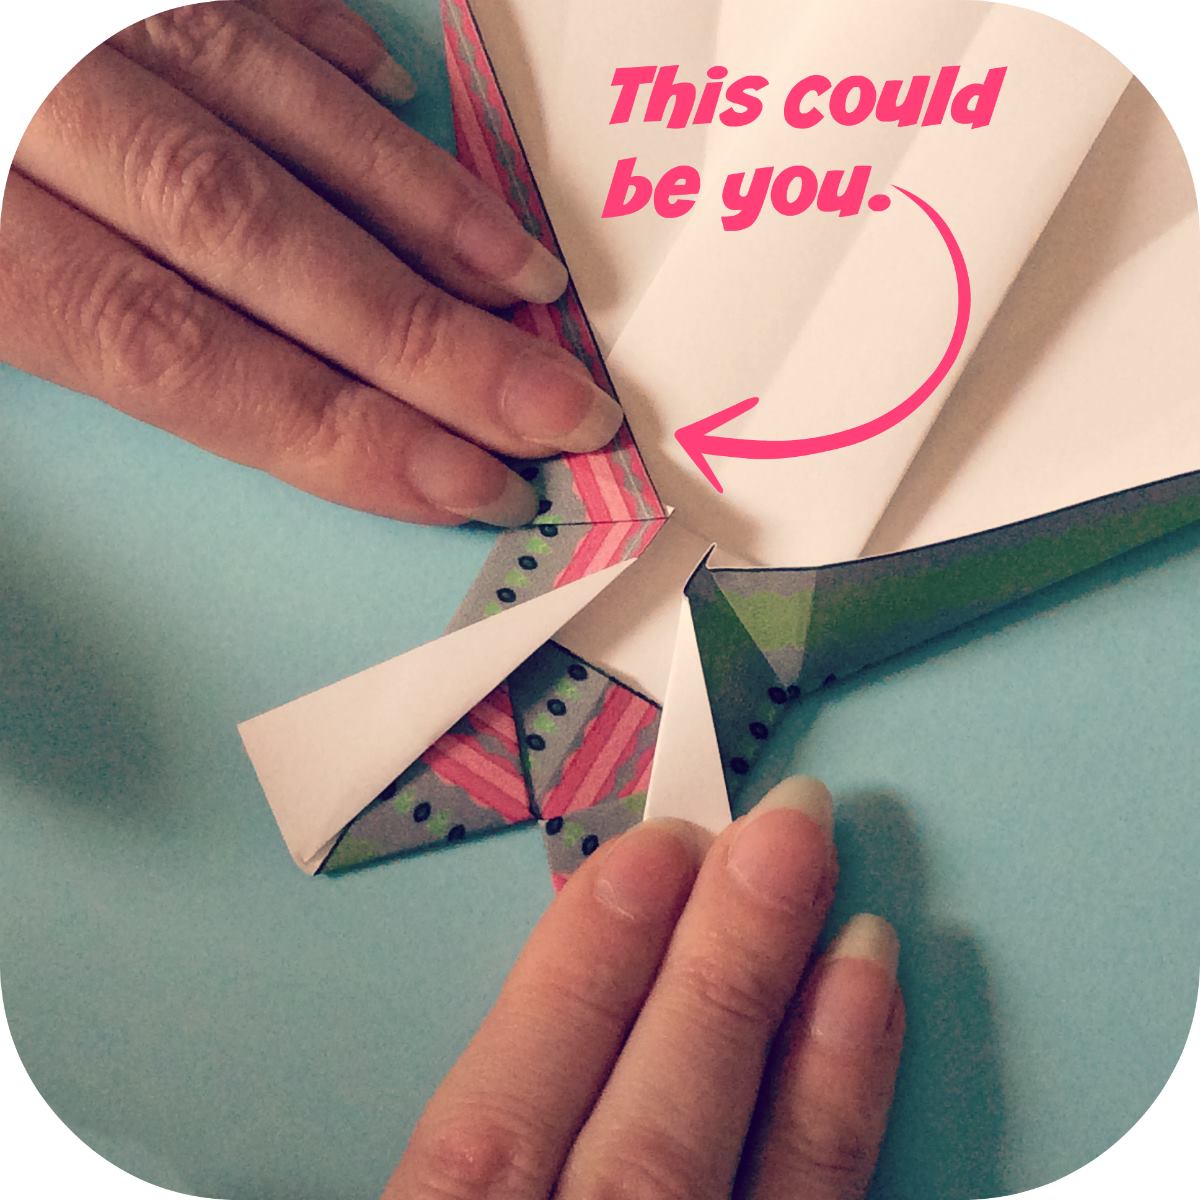
I’ve got one more art making workshop in the gallery this weekend.  You can come and learn to make origami dresses in the gallery with me using fun patterned papers. It’s free with museum admission and you can see the other cool exhibits that are there as well. The show is up through the end of April, but this is my last hands-on art-making session. Hope to see you there.

17 January, 2017

You are invited: Unexpected Art Exhibition

2017-01-17T08:09:39-06:00Everything Else|Comments Off on You are invited: Unexpected Art Exhibition

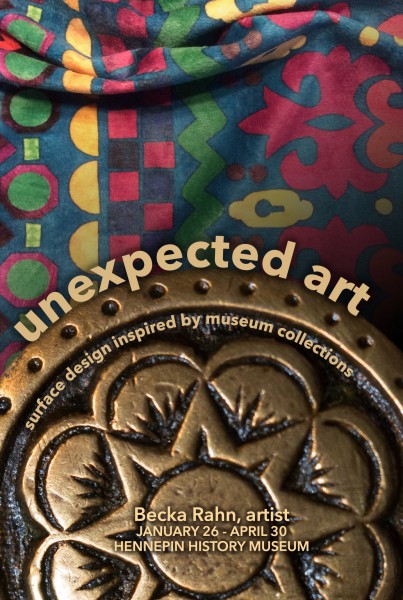
PostcardFrontFinal

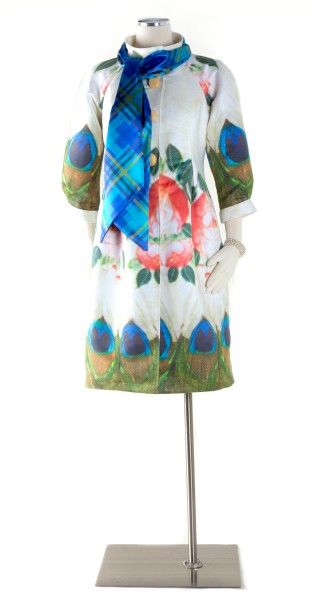
Art often shows up in unexpected places. A brass doorknob, a painted feather, or a pacemaker can become an evening dress — if you know how to look at them. Artist Becka Rahn dug deep into the collections at The Museum of Russian Art, The Bakken Museum, and Hennepin History Museum to find items that have been hidden away, unnoticed, or overlooked. Drawing inspiration from these forgotten objects, Becka created new surface designs which were digitally printed onto fabric and paper, transforming unexpected items into new pieces of art.

About this project
Several years ago, I was approached by the Jane Addams Hull-House Museum for a project that they were working on in an effort to bring some new life and relevance to their collection. They asked artists to respond to a piece in their collection, and these pieces and corresponding artistic responses (poems, essays, art) became an online exhibition with an objective of presenting a new way to look at old objects. Several years later, inspired by the same idea of an artistic response to a museum piece, I created two more designs, drawing from a woodwork detail and a feather fan from the collection at Hennepin History Museum. I loved the idea of looking for museum pieces that were overlooked, forgotten, ignored, or even maybe were just too odd to be on display in a typical exhibition and finding a way to put them in a spotlight.

My work for this exhibition continues the idea of an artistic response to an item from a museum collection. I worked with curators and staff at each of my museum partners — The Museum of Russian Art, The Bakken Museum, and Hennepin History Museum — to choose quirky pieces from their collections. In response to these pieces, I created original surface designs that were digitally printed on to a variety of fabrics. The designs were created from a variety of sources: photographs, hand cut paper, and original illustrations. I designed and sewed a garment from each original fabric design, choosing a silhouette or style to compliment the inspiration piece.

In 2016, I received an Artist Initiative Grant from the MN State Arts Board and that is what has made this project possible. An important component of that grant was doing hands-on art activities with members of the community. With the grant funding, I was able to purchase six laptop computers, giving me a mobile computer lab to use for workshops. Grant funding covered the materials costs so that we could make these workshops affordable for both the participants and the partner organizations that I was privileged to work with. I also had the support to create a body of work and put together a solo exhibition of that work. As an artist, I can’t put a value on that kind of opportunity. Many thanks to the MN State Arts Board and the voters of Minnesota, who make this Legacy funding possible. We live in an amazing community.

The opening reception is Thursday January 26 from 6-8 pm and if you are in the Minneapolis area, I hope you can make it. I will also be doing 3 mini-workshops in the gallery throughout the run of the show. More details about those will be posted soon, but you can come and make your own origami dress just like the ones that will be in the exhibition.

Digitally printed faux suede from a photo of an antique feather fan.

Digitally printed faux suede from a photo of an antique feather fan.

geissler

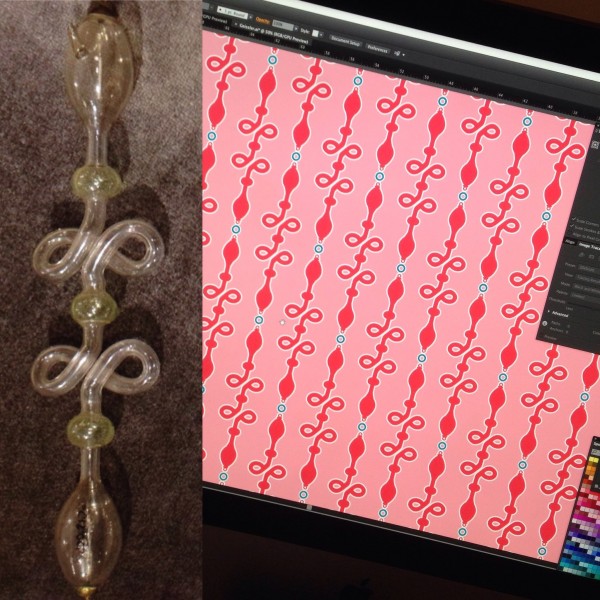
Fabric design inspired by a Geissler tube from the Bakken Museum collection.

Go to Top