 I am going to call this tutorial the first in what I hope will be a series of “Suggestion Box Tutorials“.
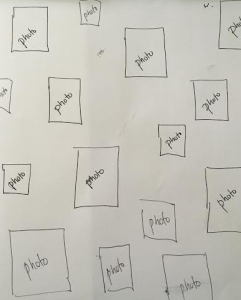
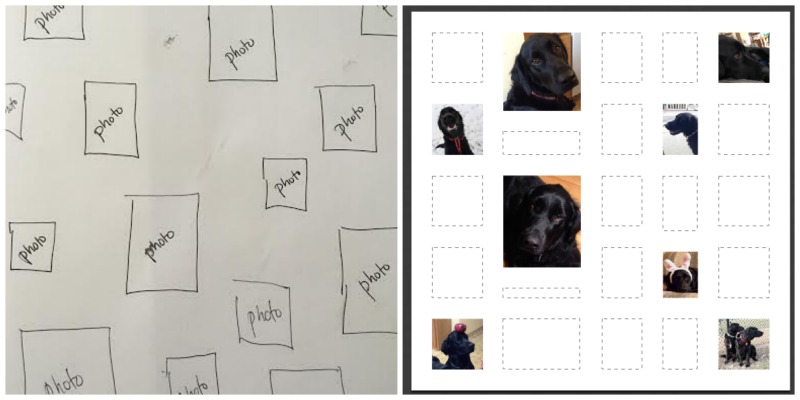
I got an email from a woman this morning asking for help designing a fabric to make a keepsake zipper bag. She and a collection of friends are meeting up this summer and she wanted a little something to give each of them to commemorate the occasion. She had a great idea for what she wanted the fabric to look like: a collection of photos and little graphics that were all significant to this group of friends. The photos should be scattered like postage stamps on a white background. She even sent me a sketch.
Her question was: did I know of anywhere there was a tutorial that could show her how to do this and how could she make sure that it was just the scale and size she wanted?
Could I think of anything? No. So, this seemed like the perfect tutorial for me to write.
What does your intention tell you about your design?
If you have had the chance to take a class from me, you know that one of my tips for creating really successful fabric designs is to design with intention. The intended use for your fabric can give you so many hints about how you need to set up your design files.
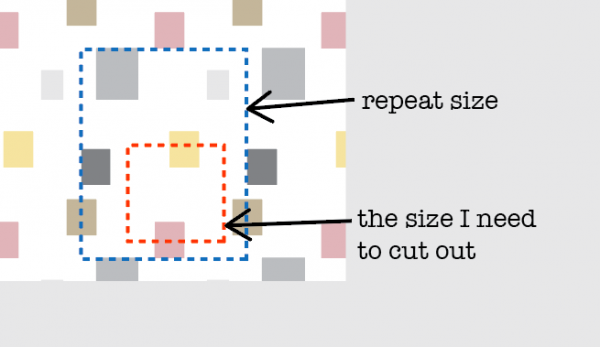
This fabric is intended to be a lining for a small zipper bag. So we know that will use pieces of fabric that are maybe 10-12″ square. If I create a repeating tile that is larger than 12″, I won’t see all of the photos that will be in the design because I will be just cutting out a piece. Maybe that’s ok. Or maybe you want to make sure that each bag has every photo visible. That’s a choice for you to make.
I also know that if my zipper bag is 10-12 inches, I probably need the photos to be pretty small in relation to that so that the scale makes sense. If the photos are each 6 inches, I will only be able to see a couple of them once I cut it out.
Do the math.
So for this project, I am going to use that information to set up my design file (aka do the math). Why do I need to do that now? Can’t I just do the fun part (designing it) and worry about that math stuff later?
The number one thing I hear from new fabric designers is:
I uploaded my thing to Spoonflower and it was so awesome, but it was totally the wrong size! I thought it would be small but when I uploaded it, it was huge! I don’t know what happened. I was so surprised.
This is the step where you can make it turn out exactly the size you want it to be. It just involves a tiny bit of math.
- Decide what size you want your repeat to be. By “repeat” I mean the file that you will upload to Spoonflower. Spoonflower computers will repeat that file it to fill as much fabric as you want to print. Yes, you repeat your repeat. English is weird.
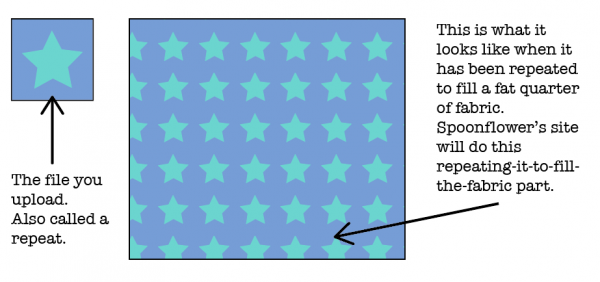
I decided that for this zipper bag lining, I want my repeat to be 12″ because I want to be able to see the whole thing with all of the little photos when I cut out my lining piece. That’s my design choice. You make your choice.
2. The magic number is 150.
The only thing you need to remember about resolution for this project is 150. Resolution is the number of dots (or pixels) per inch that the file needs in order to print at the size you want. Dots per inch = DPI.
Spoonflower’s printers use a resolution of 150 DPI. That’s why 150 is our magic number. That means if you set your file to 150 DPI, you will get exactly what you expect to get. That’s a rule. 150 uploaded = 150 printed. In otherwords, if I make a file that is 12 inches at 150DPI, I will get a printed design that is 12 inches. No more, no less. So how do I set up the file?
3. Figure out how many pixels that is.
Resolution is the number of pixels per inch. Since we know how many inches we need (12″) and we know how many pixels per inch (150 DPI) we can figure out how many total pixels that is. And we need to know the total number of pixels because that’s the number our graphics program will ask for.
inches x resolution = pixels
12 inches x 150 pixels per inch = 1800 pixels
That means if I want a file that will print exactly 12 inches wide, I need to make a file in my graphics program that is 1800 pixels wide.
Remember that number. 1800 pixels. Write it down on a scrap of paper.
Create a new blank file.
For this design, I am going to use a program called PicMonkey because I think it is the ideal tool for this design. It’s going to make it easy. You can use any program you want to to make your designs, but PicMonkey has some built in tools that I know will work really well for this. That’s why I picked it. It’s a free online graphics software that works right in your web browser. You don’t need to download anything.
Go to PicMonkey.com. At the top of the screen you will see a menu bar.

Click on the option on the right that says Collage.
Set up the Layout.
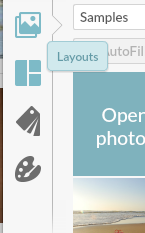
 The reason that PicMonkey is such a great tool for this project is because of this collage tool. Look at the left sidebar on your screen for the icon that looks like a grid. If you hover your mouse over it, it will say “Layouts”. Click the Layouts button.
Feel free to explore the options in this panel! These are all of the different ways that PicMonkey can layout a collage for you.
(There are some options that are marked with a crown – those are part of the upgraded “Royale” package that PicMonkey offers, which is an annual fee of $40/year. We will use a free layout option for this project but that $40 per year membership is totally worth it. Note: I don’t get anything from PicMonkey for telling you that; it’s just my personal opinion. I just love PicMonkey.)
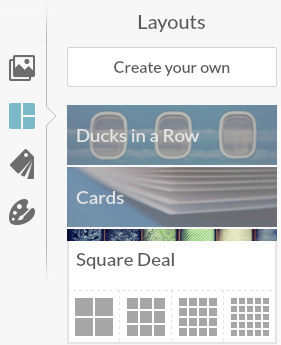 Click on the option called “Square Deal” out of that list and then pick the little icon at the very far right (a grid of 25 squares.)
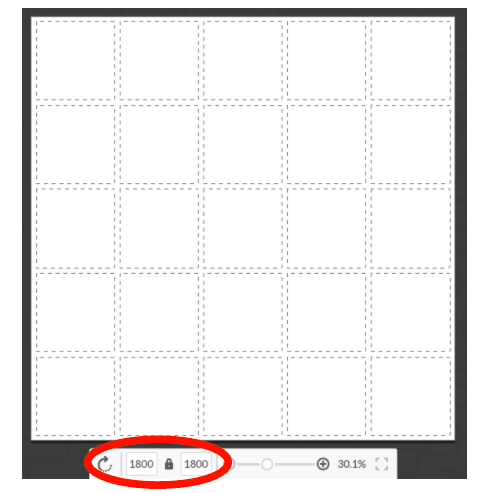
Remember when I told you to write down “1800 pixels”. The very next thing you want to do is set this file to be 1800 pixels. Look at the bottom center of the screen and you will see where to type that in. I put in 1800 for both the width and the height, so I will have a 12 x 12 inch square as my file size. (See how easy that was!) Hint, if you click the Lock Icon after you do this, it will keep it at this size while you are doing the next steps and rearranging things.
Add your photos.
The dotted lines in this layout represent the places I can drop in my photos and graphics to make up this design. But first I need to load them into Picmonkey.
 Look back again at the left sidebar. Choose the top icon that looks like a picture of mountains and is labeled “Images”. The very first thing in the panel of thumbnails will be a button (top left) that says “Open Photos”. Click that and it will pop up a window for you to find the files on your hard drive.
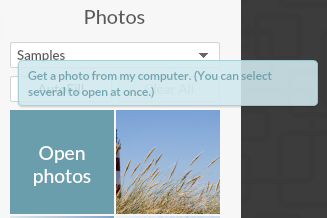
A hint: It’s super helpful if you collect everything you want to use for this design and put it all together in a folder on your Desktop (or somewhere else handy). Then you can select and upload them all at once instead of needing to hunt and peck all over your computer to find what you need. Load all of the photos you want to use right now. You can click that “Open Photos” button more than once to keep adding photos.
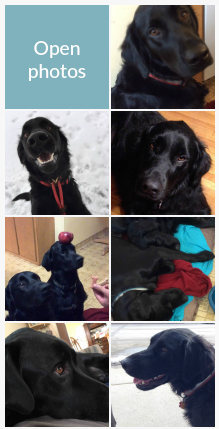 You will see all of your photos pop up in the thumbnails along the left side of the screen. They don’t have to be photos. Anything in a .jpg format will work, like little graphics or screenshots. Just make sure you have permission to use them.
Now the photos are ready to use. I chose a bunch of photos of my dogs for this example.
Fill in the blanks.
You can now click and drag the photos from the left sidebar and drop them in the boxes in the template on the right. If I look back to the sketch my friend made, she has photos scattered all around the design, so I am not going to fill in every box in the template, but I will leave some spaces.
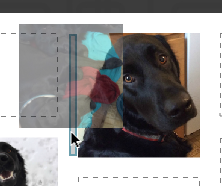
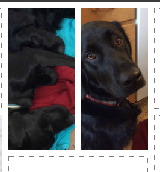
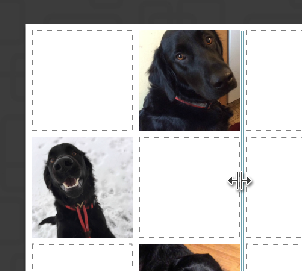 Want to vary the sizes of the boxes a little? You can click and drag to change the size and shape of the rows and columns. Hover with your mouse between a couple of boxes and you will see a double arrow pop up. You can drag with that double arrow to make the columns and rows bigger and smaller.

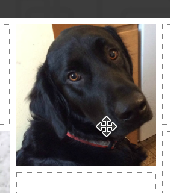
Recenter a photos? Hover over a picture and wait for your cursor to change to a 4-pointed arrow. Now you can move the photo around within the box (to recenter it).
Want to add another photo and insert an extra box into the template? Grab a photo from the thumbnails, drag it over to where you want to add it and wait for a blue outlined box to pop up. When you drop the photo it will add a new box where that blue outline was. Now there are two photos in that space.


Zoom? Click any photo in the collage to see an Edit button (top left) or an “X” (top right). Click the “Edit” button and a menu will pop up that will let you zoom and rotate that photo you have selected. Click the “X” to remove the photo.
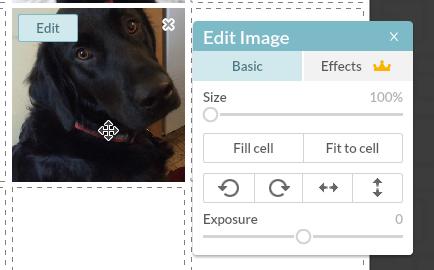
How do you know if the photos you are using are going to work and not look pixellated? Pretty much it is what-you-see-is-what-you-get. I could help you do the math to check that you have enough pixels in each of these photos and so on, but honestly, if it looks blurry, or pixellated, or in any way yucky when you look at it in this step, it’s going to look that way when you print it. It’s pretty simple. Your best bet is: if it looks yucky, choose a different picture. You can’t fix blurry or pixellated.
(more…)
 I wanted to be a costumer because I wanted to make costumes for movies like that. (Nevermind that I was a generation too late.)
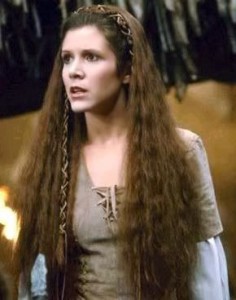 I saw Return of the Jedi in the theater when I was 9, because my dad thought my sister and I would like the Ewoks. (He was right.) I am not a huge Star Wars fan, but I don’t know a single girl my age that didn’t want to be Leia. We all wanted her hair. We all wanted to ride around on a speeder and shoot like the boys. We all wanted to tell Han Solo he was being an idiot and hug Chewie. She was the princess that kicked ass and not one that needed to be rescued. There are a few more princesses like that now. (Thanks Joss and JJ.) I have seen and read interviews that Carrie was a little uncomfortable knowing that she was the slave bikini pin-up poster for a whole generation of boys but we girls knew she was so much more than that. And Carrie was. Turns out maybe Leia was too.






 I am going to call this tutorial the first in what I hope will be a series of “Suggestion Box Tutorials“.


