16 June, 2016

Work in Progress: Everyday Objects from Everyday Objects
2016-06-16T09:03:06-05:00Everything Else|Comments Off on Work in Progress: Everyday Objects from Everyday Objects

Screen Shot 2016-06-14 at 11.24.05 PMI’ve been wrapping up two huge projects this week and this is my favorite one. I started working on this “I Spy” artwork last year as part of a grant from a local neighborhood. Together we are creating wraps to cover 3 sets of utility boxes; I make the art, they get the permits and approvals. I have told you a little about the program that makes these art-covered-utility-boxes happen and my original concept for these designs, now I can tell you a little more about where that ended up.

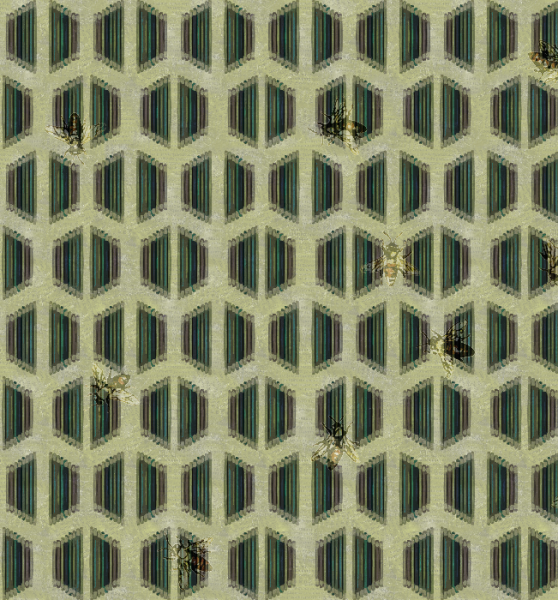
I collected hundreds of photos from the neighborhood and started playing with the designs I could make from them. I use photos in my work all the time. One of the designs I put in my proposal to the neighborhood was something like this one, which is created from a photo on pencil erasers.

Screen Shot 2016-06-16 at 8.40.50 AM

But these boxes are big: 77×44 inches. And thinking about that pattern covering the whole box was boring. I like the pattern, but that wasn’t going to draw people over to look at my art. That pattern was designed for a garment (I have a dress made out of it.) and that’s what it works for. The new patterns I was playing with were kind of the same. I really wanted people to connect with this art and these weren’t cutting it.

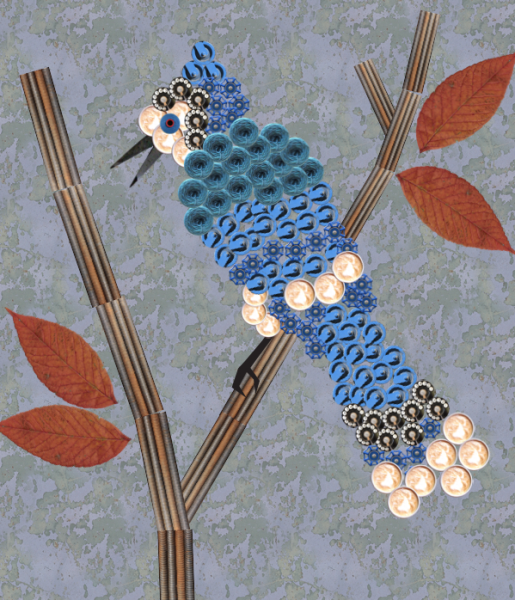
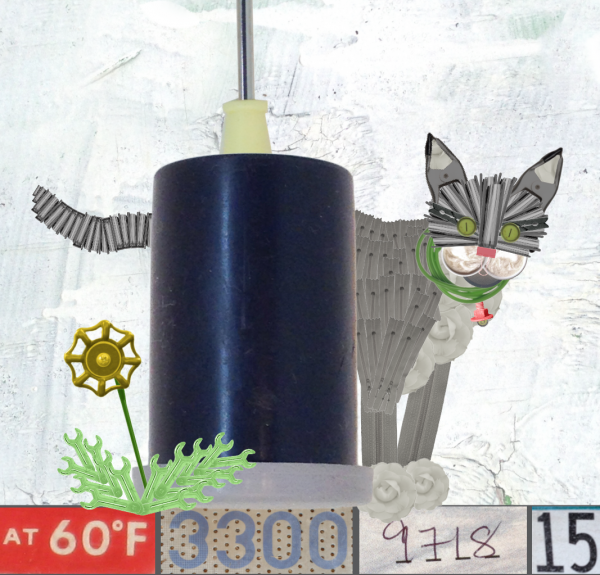
The theme of my project was making art from everyday objects. As I was driving somewhere and thinking about it, I suddenly had an idea. (Driving is the best place to work out ideas.) What if I made everyday objects from everyday objects? Make a fire hydrant, but make it all out of “I Voted” stickers, roses, and bolts. Butterflies from coffee cups? I liked where this was going. So, I started with a blue jay.

Screen Shot 2016-06-16 at 8.47.09 AM

I noticed that I had a lot of blue things in my collection of photos and I think bluejays are beautiful and they are certainly everyday in my neighborhood. I found a photo to use as a reference and started assembling my bluejay. He is made from the wheel from a dumpster, a faucet handle, a ball of yarn, a rotary telephone dial, a latte, a pair of scissors. I thought using all circles would give him a feathery texture. His branch is made from a stack of rusted springs from the antique store in the neighborhood (also the source of the telephone). It’s all photos from the neighborhood: the yarn came from the Weavers Guild of MN, the latte from the coffee shop, the faucet from the community garden. I cut each of the images out in Photoshop, so I had just the object with a transparent background and then placed them all into a bigger file. And let me tell you these were big files (and that caused some problems). By the time I was finished, several of them were at least 1GB. A typical photo is 1/1000th that size.

More to come…

19 May, 2016

A New Class in August & A Look Back at the Spoonflower Handbook Master Class

2016-05-19T12:32:37-05:00Everything Else|Comments Off on A New Class in August & A Look Back at the Spoonflower Handbook Master Class

Screen Shot 2016-05-19 at 11.54.07 AM

This is seriously the best class I have ever taken. Tons of great information presented clearly and enthusiastically. Inspiration everywhere from Becka, and Spoonflower!

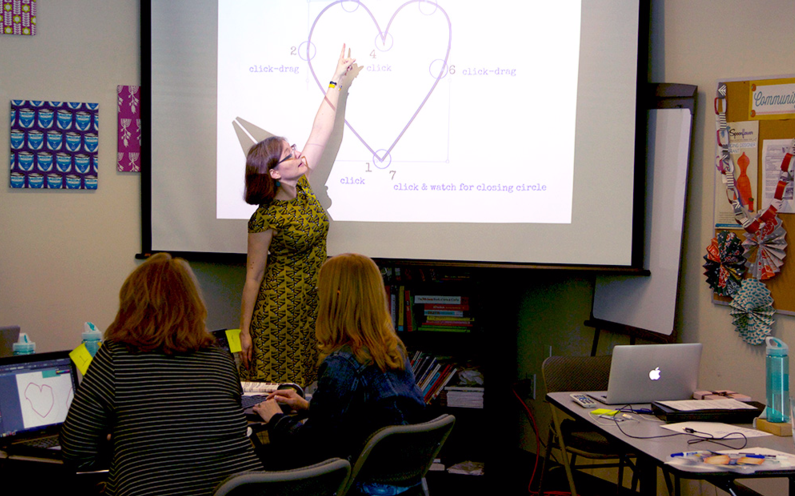
It was one of the best classes I have ever taught and I wrote about it for the Spoonflower blog. It’s up today! I laughed at that photo because I look like I am wearing a Pen Tool Party Hat.

Also I am thrilled to announce the next Spoonflower Handbook Master Class in August 2016! You can read up on all the details here and registration opens tomorrow.


11 May, 2016

Find your sound.

2016-05-11T10:19:00-05:00Everything Else|Comments Off on Find your sound.

Spoonflower posted this video today and I am re-posting it so I can find it again. It’s fun and I love the sneak peeks at all the little parts of the process of printing, cutting, shipping.

9 May, 2016

New Work: Shadows, Spoonflower & Davie

2016-05-09T19:29:07-05:00Everything Else, Gallery Exhibitions, Spoonflower & Fabric Design|1 Comment

shadows

Shadows

2016

Digitally printed polyester pique.

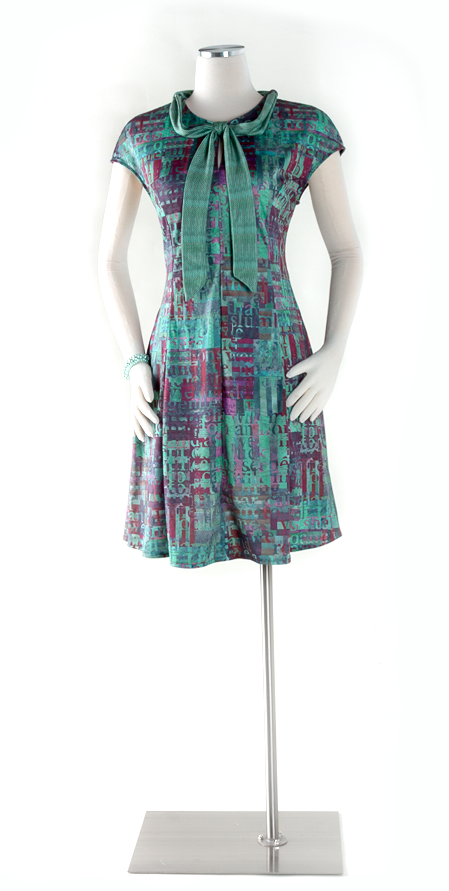
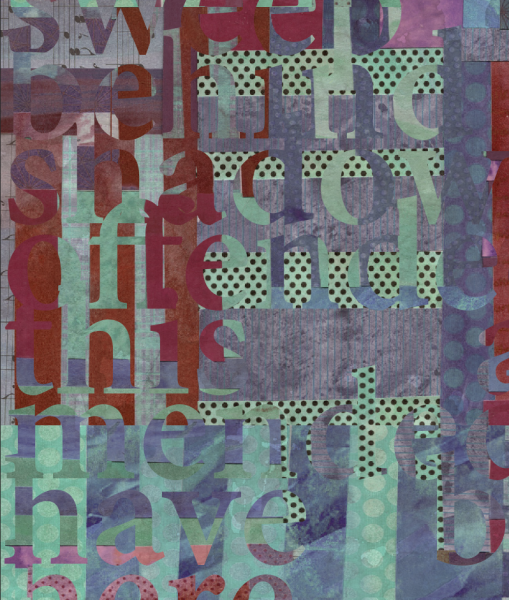
I had the photo studio set up for another big project shoot, and I realized that I hadn’t had a chance to talk about this dress that I made this spring. The pattern is a modified version of the Davie dress by Sewaholic. I love the way this one fits and I have made several versions of it. The fabric is Spoonflower’s performance pique.

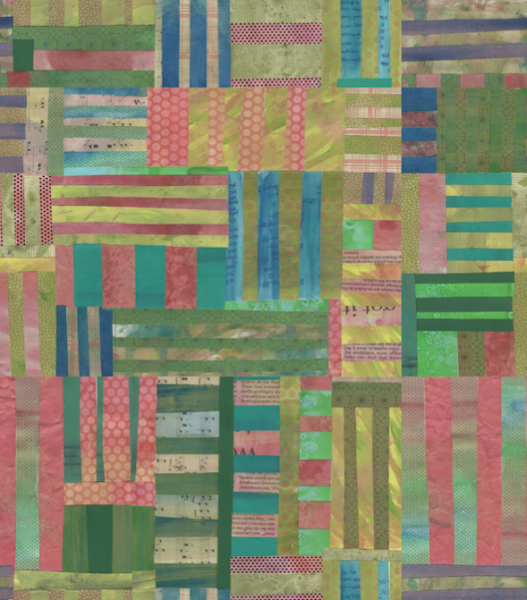
The design is a combination of cut painted paper and text. The paper design started out like this and I actually used it in a fabric collection of “Fish Market” designs that I have up at Spoonflower.

Screen Shot 2016-05-09 at 10.37.35 AM

I layered two copies of that cut paper together and then cut text from one layer. The text is the closing speech delivered by Puck from A Midsummer Night’s Dream:

“If we shadows have offended,
Think but this, and all is mended,
That you have but slumber’d here
While these visions did appear…”

Why that text? Because I like it. And Midsummer is my favorite Shakespeare play. I wanted to do a text based design, where it wasn’t something necessarily readable, but text was a design element.

I manipulated the colors, but you can still see all of the texture of the painted papers in the design. The tie is made from a small repeated section of that aqua with black polkadots pattern you see below.

Screen Shot 2016-05-09 at 11.01.47 AM

A little note about the fabric. It’s polyester, and I feel like I spend a lot of time defending things for being polyester. This is awesome polyester. Seriously. Comfy, soft, breathable, unwrinkleable, machine wash, amazing print quality. There’s nothing negative on that list. I understand that there are yucky polyesters. There are also horrific wools, nasty nylons and even some unwearable cottons. So this is a little bit of a soap box and a little bit encouragement to not judge a fabric by its label.

23 March, 2016

Three Ways to make a NEW Etsy Banner using PicMonkey (A tutorial)

2016-03-23T18:50:57-05:00Etsy, Everything Else, Tutorials|Comments Off on Three Ways to make a NEW Etsy Banner using PicMonkey (A tutorial)

Etsy is rolling out a whole new look for your shop in a couple of weeks. I will admit to some initial grumbling myself and thinking “now I have to redesign everything”, but I actually like the new design quite a bit.  I think it was time for a refresh and I think it will make it more appealing to buyers in the long run.  I know Etsy has put together some templates with Canva to help you create a new shop banner, but I have never used it and the idea of learning another new platform/software wasn’t really appealing.  I also, to be quite honest, hate something that makes you log in and give them information before you ever even see what it’s about.  Sorry, Canva.

So I thought I would put together a tutorial in PicMonkey, which I use here a lot, requires no logging in and I think is also really simple to use.  If you want just a single photo as a banner, you can upload it right to Etsy and reposition it live in the browser. For these three banner ideas, I have taken the photos and ideas just a little step further so you need to do a little design before you upload it.

Etsy Banner Version One: Just a Photo (with a little branding)

Go to PicMonkey.com and choose Design -> Custom from the menu at the top.

tutorial1

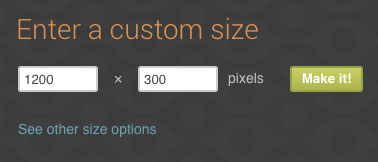
A set of boxes will pop up and ask you for the size.  The new Etsy banner has a minimum size of 1200 x 300 pixels.

Screen Shot 2016-03-23 at 10.39.51 AM

Now you have a blank canvas that is the right size.

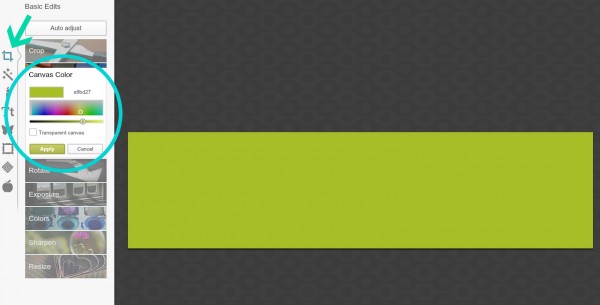
I started by adding a canvas color to this blank canvas. PicMonkey has sets of tools you can choose from that appear down the left side of the screen.  Choose the Basic Edits tool set (it’s the top one that looks like a crop box) and then choose Canvas Color just to the right.  Don’t forget to hit apply.

tutorial2

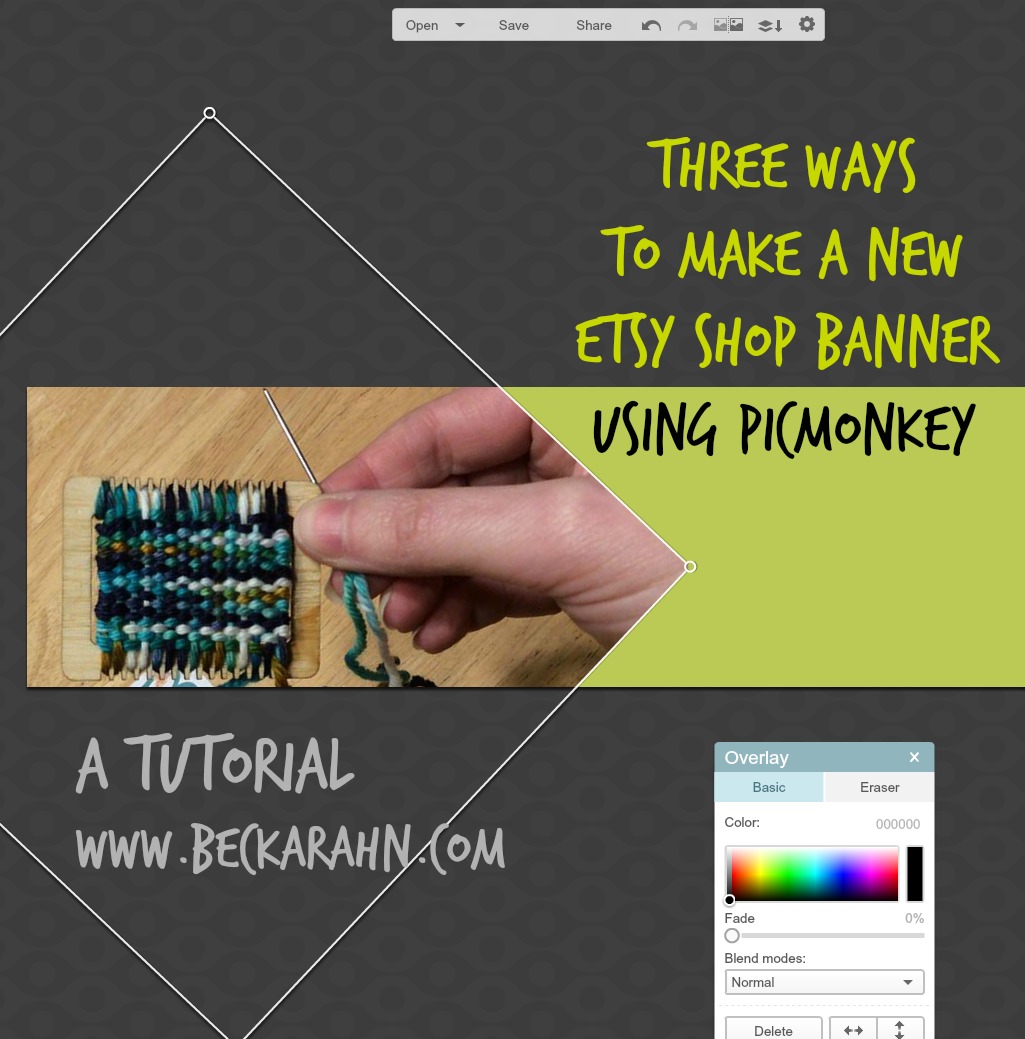
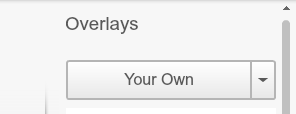
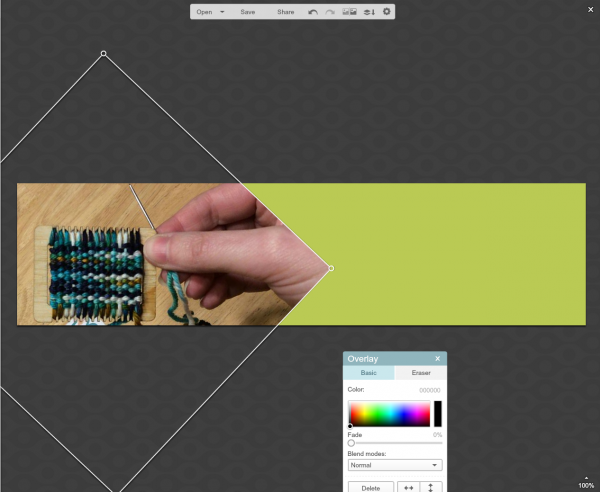
I chose one of the colors that is in my “brand” color palette. This banner is an opportunity for me to personalize my Etsy shop, so I want to tie it in to my branding.  I’m going to add a photograph on top of this, because I think that this new banner style really lends itself to photos.  To add a photo, choose the Overlays Tool Set from the left sidebar, which has an icon that looks like a butterfly.  And then pick Your Own from that dropdown menu at the very top.  I chose the photo I wanted and PicMonkey placed it on my canvas. I used the corner toggles on the photo to make it a little larger and the rotate tool (a knob on the top center of the photo) to turn it 45 degrees, which makes an interesting chevron shape against my background.

Screen Shot 2016-03-23 at 9.52.30 AM

Screen Shot 2016-03-23 at 10.53.25 AM

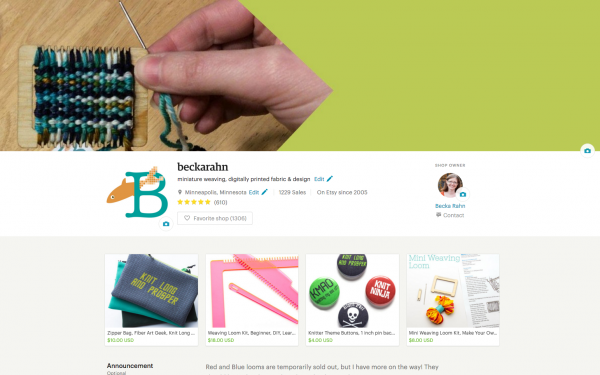
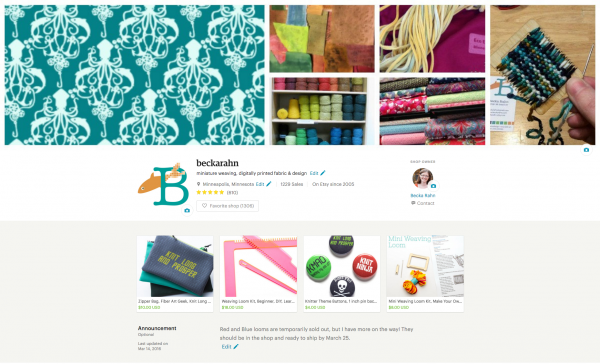
I saved this file and uploaded it to my Etsy shop.  Here’s what that simple banner looks like in my new shop homepage.

Screen Shot 2016-03-23 at 11.27.18 AM

Etsy Banner Version Two: Not a Photo

Maybe you don’t have a photo that you think really represents your shop very well and you would rather have something a little more graphic. Here’s an idea for that.  Start the same way by choosing Design -> Custom and sizing it to 1200 x 300.

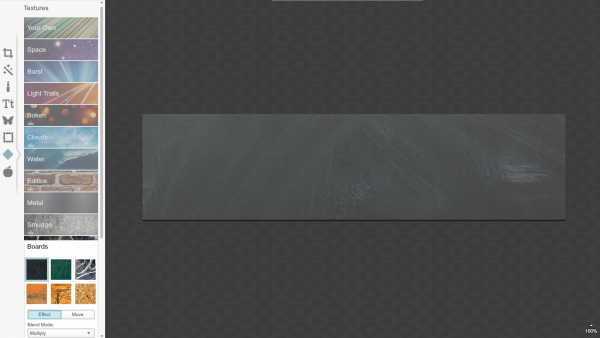
Instead of adding a canvas color, we will add a textured background.  Choose the Textures Tool Set from the left sidebar.  The icon looks like a diagonal grid.  For this example, I picked the Boards textures from the list and added a chalkboard texture to my canvas.  Be sure to click Apply.

Screen Shot 2016-03-23 at 10.02.25 AM

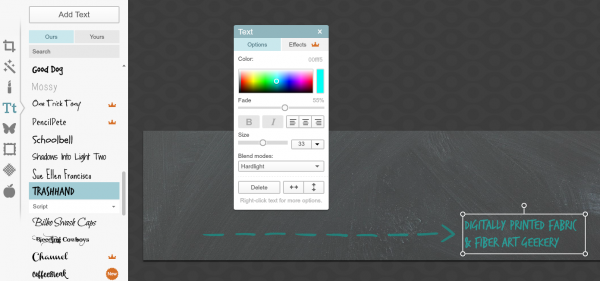
For this version, I thought I might want to add some text to this design that talks about what’s in my shop.  First I went to the Overlays Tool Set and picked an arrow from the Dashed & Lined options.  Then I added Text with the Text Tool (Tt icon) in the left sidebar.

Screen Shot 2016-03-23 at 11.47.21 AM

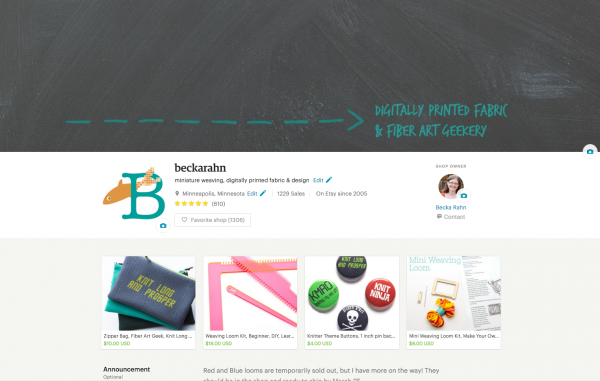
Save and upload to Etsy and here’s what this version would look like.

Screen Shot 2016-03-23 at 11.50.34 AM

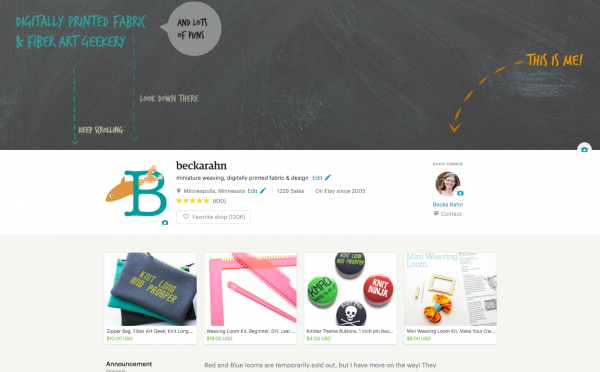
Or a little bit silly version with just a few more overlays and text.  (I haven’t actually designed my own new banner and I am really liking the idea of this one.)

Screen Shot 2016-03-23 at 12.01.07 PM

Etsy Banner Version Three: A Collage

PicMonkey also has a really simple collage tool that would make a great banner.  Go back to the main PicMonkey menu and choose Collage.  It will immediately pop up a window asking you to choose some photos for the collage.  Find some photos and click open.  (You can add more later.)

tutorial4

Before you start adding photos to the design, choose a collage arrangement under the Layouts Tool set (the icon looks like a collection of rectangles).  The preset for a Facebook Cover works great for this, but you can choose any layout you like.

Screen Shot 2016-03-23 at 10.17.30 AM

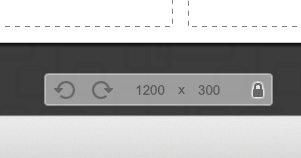
At the bottom of the screen there is a box which shows the dimensions of your collage.  Click the lock icon on the right to unlock it and then change it to 1200 x 300 pixels.

Screen Shot 2016-03-23 at 12.09.24 PM

Now you can add your photos by clicking the Photos Tool Set (mountains icon) and dragging the thumbnails of the photos to the empty boxes in the collage. Clicking on a photo in the collage will bring up a tool to resize it.  Drag them to move them within the collage box.  You can also adjust the background color of the collage and the spacing of your boxes by using the Background Tool Set (icon looks like a paint palette).  PicMonkey has a great collage tutorial that shows you a few more things like how to add more boxes and resize them.

Here’s a collage style banner that has been uploaded to my shop.

Screen Shot 2016-03-23 at 12.15.15 PM

I hope this has given you a great starting point and some ideas that might make this update little more fun and less of a chore.  I’d love to see what you come up with!  Share a screenshot with me on instagram or twitter @beckarahn.

pinterestTutorial

23 February, 2016

I Spy Utility Boxes Project: Collecting

2016-02-23T10:09:00-06:00Everything Else|Comments Off on I Spy Utility Boxes Project: Collecting

everydayWhen last I posted about the utility box wraps project I am working on, I was on my way to the meeting of the neighborhood advisory group for their approval on my designs.  They loved them! (Thank goodness!)  So I can share a little more about them now that we have made it past that step.

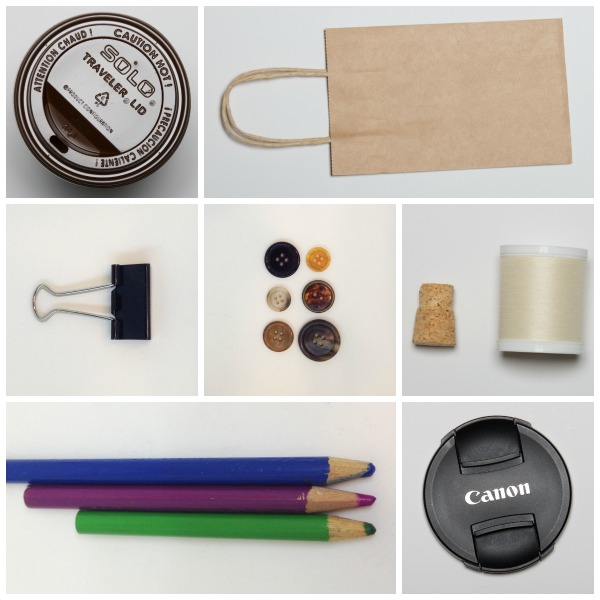
I spent several afternoons walking around the neighborhood taking photos of things in the neighborhood: manhole covers, address numbers, bricks, peeling paint, leaves and plants.  Then I spent a couple of afternoons at home photographing everyday objects.  My idea for this project is that the designs on those utility boxes should be made up of things you might see every day and not notice them.  They might be things you have in your house or business.  They might be things laying on the sidewalk.

texture

I also looked for texture, like peeling paint and weathered styrofoam, that I could layer on top of designs.  I really like to work in layers.  And these are some textures from some pretty definitive buildings in the neighborhood: Pratt School, Tierney Bros, the Witch’s Hat Tower, Cupcake.  So I wanted to include those as well.  I had about 450 photos collected when I got done.

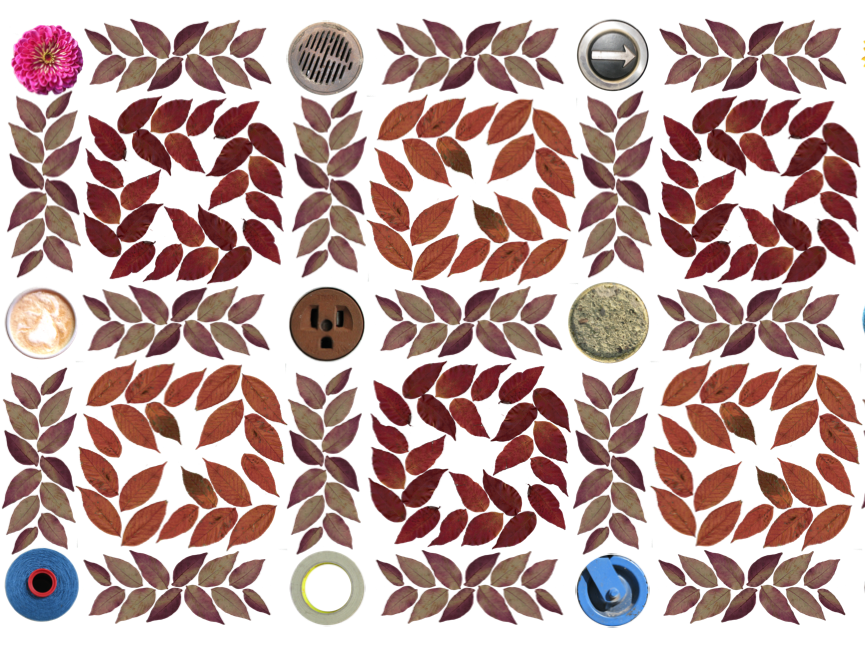
Once I had collected all of these images, I started to make designs.  These were the first two I came up with.

Screen Shot 2016-02-23 at 9.45.48 AM

Screen Shot 2016-02-23 at 9.58.31 AM

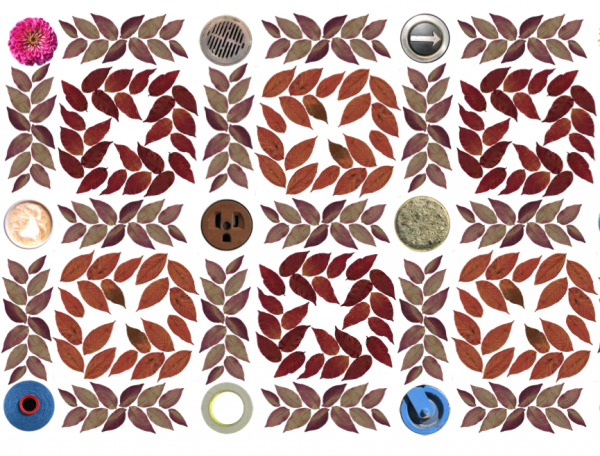
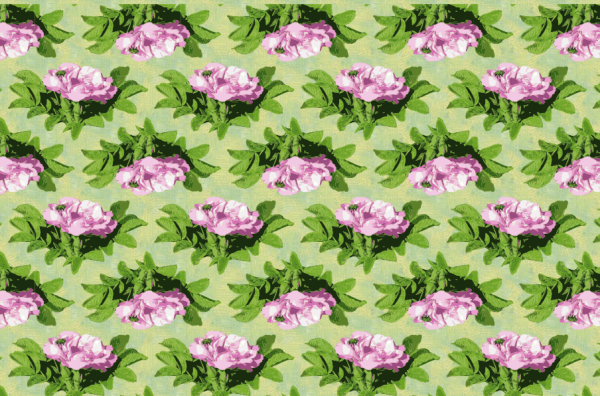
The first is made from leaves that I picked up and scanned in patterns, combined with all of the circular objects I had in my photos: wheels, flowers, latte, outlets, yarn, masking tape. The second is a photo of a pink rose with a honeybee.  These roses are iconic to me as they grow all over the neighborhood in road medians and they are always full of bees in the summer and fall.  I love these patterns, but then I imagined them covering a 4×5 ft box and I thought….  snore.  It’s interesting, but it’s not enough to draw people in.  It looks like a quilt.  Which is beautiful, but not exactly exciting. And it seems cliche. I am usually a fabric artist and what do I design when I get a chance to do something a little unusual? A quilt.  Argh.  It just wasn’t working for me. It was definitely a love-hate relationship that struggled with for days until I had an idea.  But that idea is a story for another post.


Go to Top