Digital Design Tutorial: Inspiration Bonus
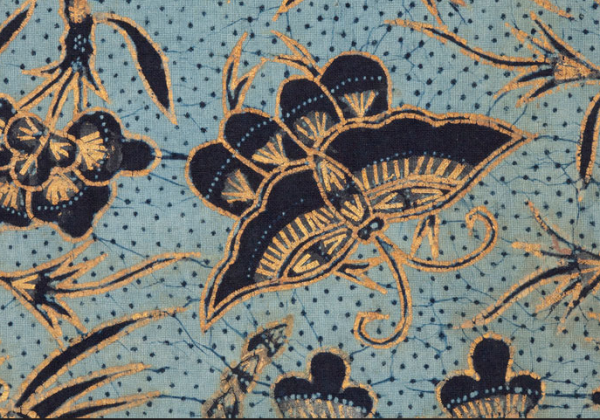
This is a little bonus post for my tutorial series on creating a faux batik. I know that it is hard sometimes to know where to start a design. It’s the dreaded blank page syndrome! If you don’t have a favorite faux batik bag like mine for inspiration, you might need a little help coming up with design ideas. These are a few places you might look for inspiration:
Ta Ta Indian Stamps at Etsy. She has a great collection of beautiful wooden stamps for sale. Plenty of eye candy here!
e-Quilter Fabric store has a huge selection of batik fabrics. We used to live really close to them when we lived in Boulder but I didn’t know it at the time!
Batik Exhibition from the Asian Art Museum. Some lovely examples, especially of patterns filling a space.
Digital Design Tutorial: Faux Batik Part Two
This is the second post in a series: a digital fabric design tutorial making a faux batik print. Yesterday I painted some batik-inspired designs on paper and today I am going to show how to scan and clean up the designs.
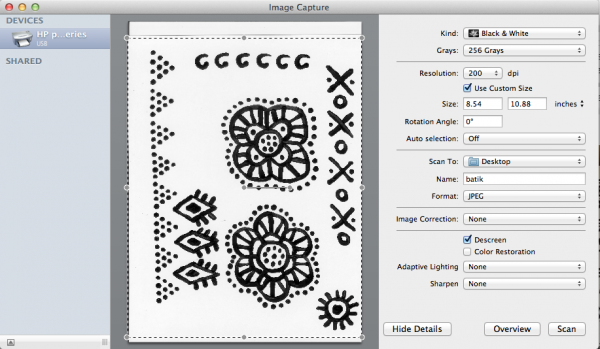
Part Two: Scanning and preparing your paintings
This (above) is the program I use with my scanner. It’s called Image Capture and is built in to the Mac. You can use whatever scanner software you have – they are really pretty much the same. I scanned each page of my paintings. I chose to scan them as black and white at 200 dpi. (This scanner software has a drop down menu with defaults set, so I couldn’t scan to 150 dpi exactly as I mentioned in the previous post.) I scanned the whole page and then saved it.
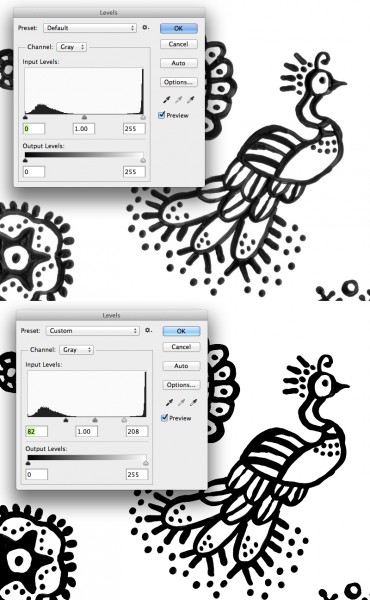
Next I opened up the scanned painting in Photoshop to do a little touchup. I am going to adjust the Levels in my design, which basically makes the blacks blacker and the whites whiter. It will help smooth out anywhere where the paint was uneven or lighter and get rid of a few smudges on the paper. In Photoshop I choose the Image menu, then Adjustments, then Levels. You don’t have to do this in Photoshop. There are a number of really great (and somewhat more affordable) graphics programs out there that have tools that do the same things. The tools are sometimes labeled slightly differently, but if you are willing to experiment, you can usually find a tool to do what you need. (Photoshop is 100% worth the price, but I get that not everyone can make that work for them.)
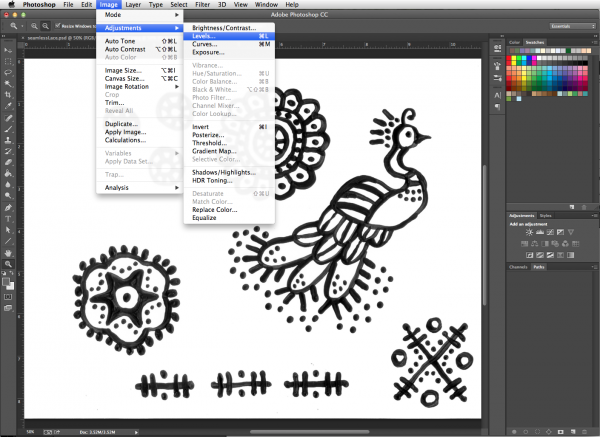 Here’s a side-by-side comparison before and after I adjusted Levels. You can see in the tool box that I dragged the triangle sliders under Input Levels from the outside edges towards the middle until it looked right and then clicked OK. Here’s the simple techie explanation for what’s going on. Look at the Levels tool box. The left side of the controls (black arrow) adjusts the blacks and the right side (white arrow) adjusts the whites. All of the colors in the image fall somewhere between black and white and that’s what the spiky mountains in the diagram are showing you. There is a lump of blacks – they are spread out because there are a lot of variations in black in our painting. There is tall spike of all the whites, which are all very similar. When I drag the arrows, I tell Photoshop that anything to the outside of those arrows should be all the same. In otherwords, I tell Photoshop to make all of the blacks to the outside of the black arrow just be pure black. That gets rid of any cloudy/grey/faded parts of the design and makes it pure black and white. Now that you know what the tool is doing, don’t be afraid to slide the arrows around and see what happens.
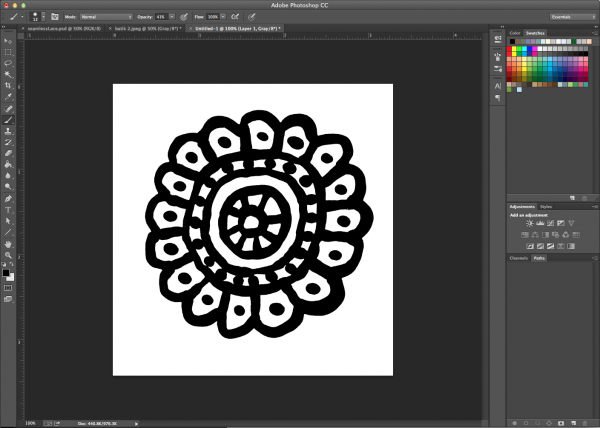
I wanted to work with just one element at a time instead of the whole page, so I cut out one of the elements using the Lasso Tool to draw a loop around it and select it. Then I used Cut & Paste to paste it into a new blank document. I saved that rosette as a .jpg all by itself. I repeated the select, cut and paste steps for all of the design bits on this page and saved them all in a folder together.
 In the next post, I will show you how to convert these designs to vector shapes, but I wanted to talk a little first about why I am going to do that. Just adjusting levels is enough to make these look pretty great and I could just go on cutting and pasting to make a whole design with new big canvas in Photoshop using these exactly as they are. That is a great way to do it. But, I want to bring everything over to use as vectors for a couple of different reasons and those are things that are really hard to do in Photoshop. First, I want to make repeating patterns with some of these elements. Illustrator has a killer pattern tool. Next, I want to be able to play with the colors on these a whole bunch – I don’t want to make a black and white design and I think that is going to be easier to work with in Illustrator. Finally I want to combine a lot of these smaller elements into bigger ones, and I think copying and manipulating them will be easier in Illustrator. Stay tuned for more.
More in this series: Part One • Part Two • Part Three • Part Four • Part Five • Part Six
Back to School 2014 & New Beginnings
My big back to school news is that this is my last week at Textile Center. I have been at Textile Center for 11 years as a teacher, summer camp instructor, artist in residence, administrator, designer and much much more. There have been a lot of changes there in the last few years and as I was looking ahead to this coming school year, it was like a little voice said to me “It’s time to move on”.
Several friends have asked me if I am sad and I don’t think I am. I have had some of the most fun I have ever had working there. I have met wonderful people who will continue to be friends for many many more years. I have learned skills I never thought I would need to know. It has been an amazing journey. But right now, I realize that the things that I am excited about doing and the creative directions I want to go are heading on a path that doesn’t include Textile Center.
So what are my plans? I am going to have a vacation. I am going to remodel my kitchen and my studio, which may require a blow torch or a small explosive device to sort through the mountains of “why do I have this?” I am going to finish that book I am working on. I am going to say “yes” to some projects and see where they take me. I am going to spend some time with my family.
It’s the time of year for new beginnings. What’s new for you?

