24 January, 2022

Ask the Artist: Questions from the Spoonflower Webinar

2022-01-24T15:15:14-06:00Everything Else|Comments Off on Ask the Artist: Questions from the Spoonflower Webinar

Last week I had a really great time doing an Artist Talk webinar for Spoonflower about my process, my long friendship with Spoonflower, and about my art. There’s a link to the replay below. There were a collection of questions in the chat that we didn’t get to (and some on my social channels), so I thought it would be fun to write a follow up post and answer some of those.

Q: What type of scanner (and other tools) do you use?

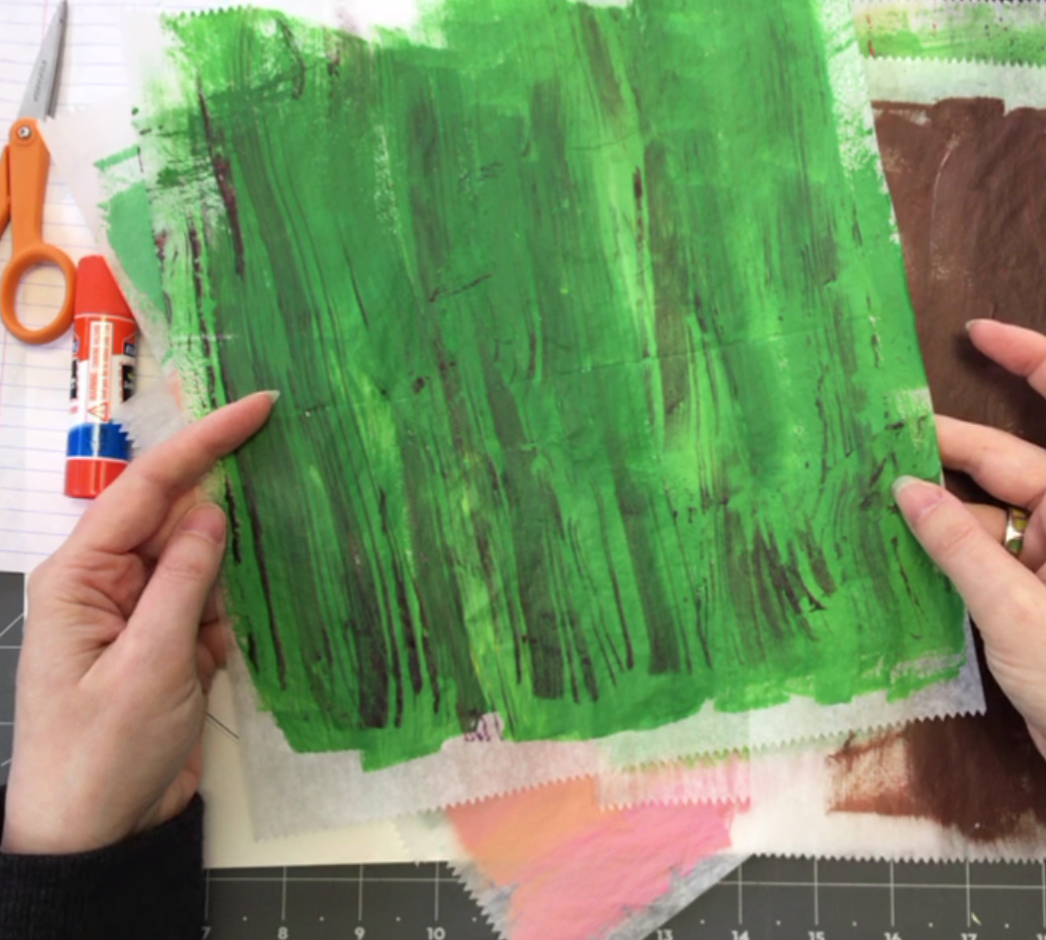
Scanner: My scanner is super simple. It’s an all-in-one printer/scanner made by Brother and it’s probably 15 years old. You really don’t need a high tech or fancy scanner, you just need a few settings and clean glass. I very often create designs that are larger than I ultimately want the finished fabric scale to be because it’s hard to make tiny fine details in cut paper. So I most often scan things at 150 or 300 DPI knowing that I will be printing them at 150 DPI (Spoonflower’s resolution).

Sewing Machine: I do all of my sewing for everything: exhibition pieces, things for sale in my Etsy shop, samples. I have a Pfaff Expression 3.2 that is an awesome machine.

Software & Apps: I do most of my editing in Photoshop and Illustrator. Because I know them and they work for me and that’s the most important part. There’s no one right tool to make art. I teach using Pixlr, because it is a free app and that makes it the most accessible for my students. I don’t use tablets or Procreate because I just don’t like drawing/painting my designs. That’s just not the way that I work, so those are not the right tools.

Q: I think it’s so clever how you’ve designed into your Shop Header to “be sure to click NEW to see my latest designs.” A “steal-worthy” tip for sure!

You are right: it is a steal worthy tip and I know because I stole it! Credit for that idea goes to my friend Anda Corrie, who was the author of Spoonflower’s “Quick Sew Project” book. She shared it on her social media somewhere and I totally copied her.

Q: Do you teach on Skillshare too?

No I don’t, for a couple of reasons. I know Skillshare is super popular, but I don’t like their teaching format (which is only video like a TV show) and the way that teachers are compensated. I also don’t like the idea that my classes would be only accessible via a monthly membership fee paid to another company. I feel like it just makes them inaccessible for too many people.

I DO offer online classes that I host through Teachable! I am in the middle of moving classes over to Teachable from another platform, so it’s a little bit in transition right now but they should all be migrated in the next couple of weeks and I can start adding more.

Q: What recommendations do you offer for expanding your marketing reach beyond social media?

Don’t we all wish we had an answer to this question? I talked a little about this in my webinar, but get your work in places that people will see it. Make things you can exhibit, get it into shops on consignment or wholesale, wear it, use it, talk about it. If you don’t sew or make things, partner up with someone who does. See if you can come up with a partnership that is a win for both of you. Enter the Spoonflower weekly contest.

No one likes to be sold to. Think about all of the jokes about used car salesmen. So don’t focus on “selling” your work but on telling the stories. Talk about what you do and why. Share the inspiration for the design or the colors. People love to see behind-the-scenes and sneak peeks. I can spend half an afternoon watching “making of” videos from artists on Instagram but I can’t think the last time I clicked through to see someone’s post about a “new collection for sale”.

Q: I want to take a class from you, starting with the mosaic, to the finished fabric!

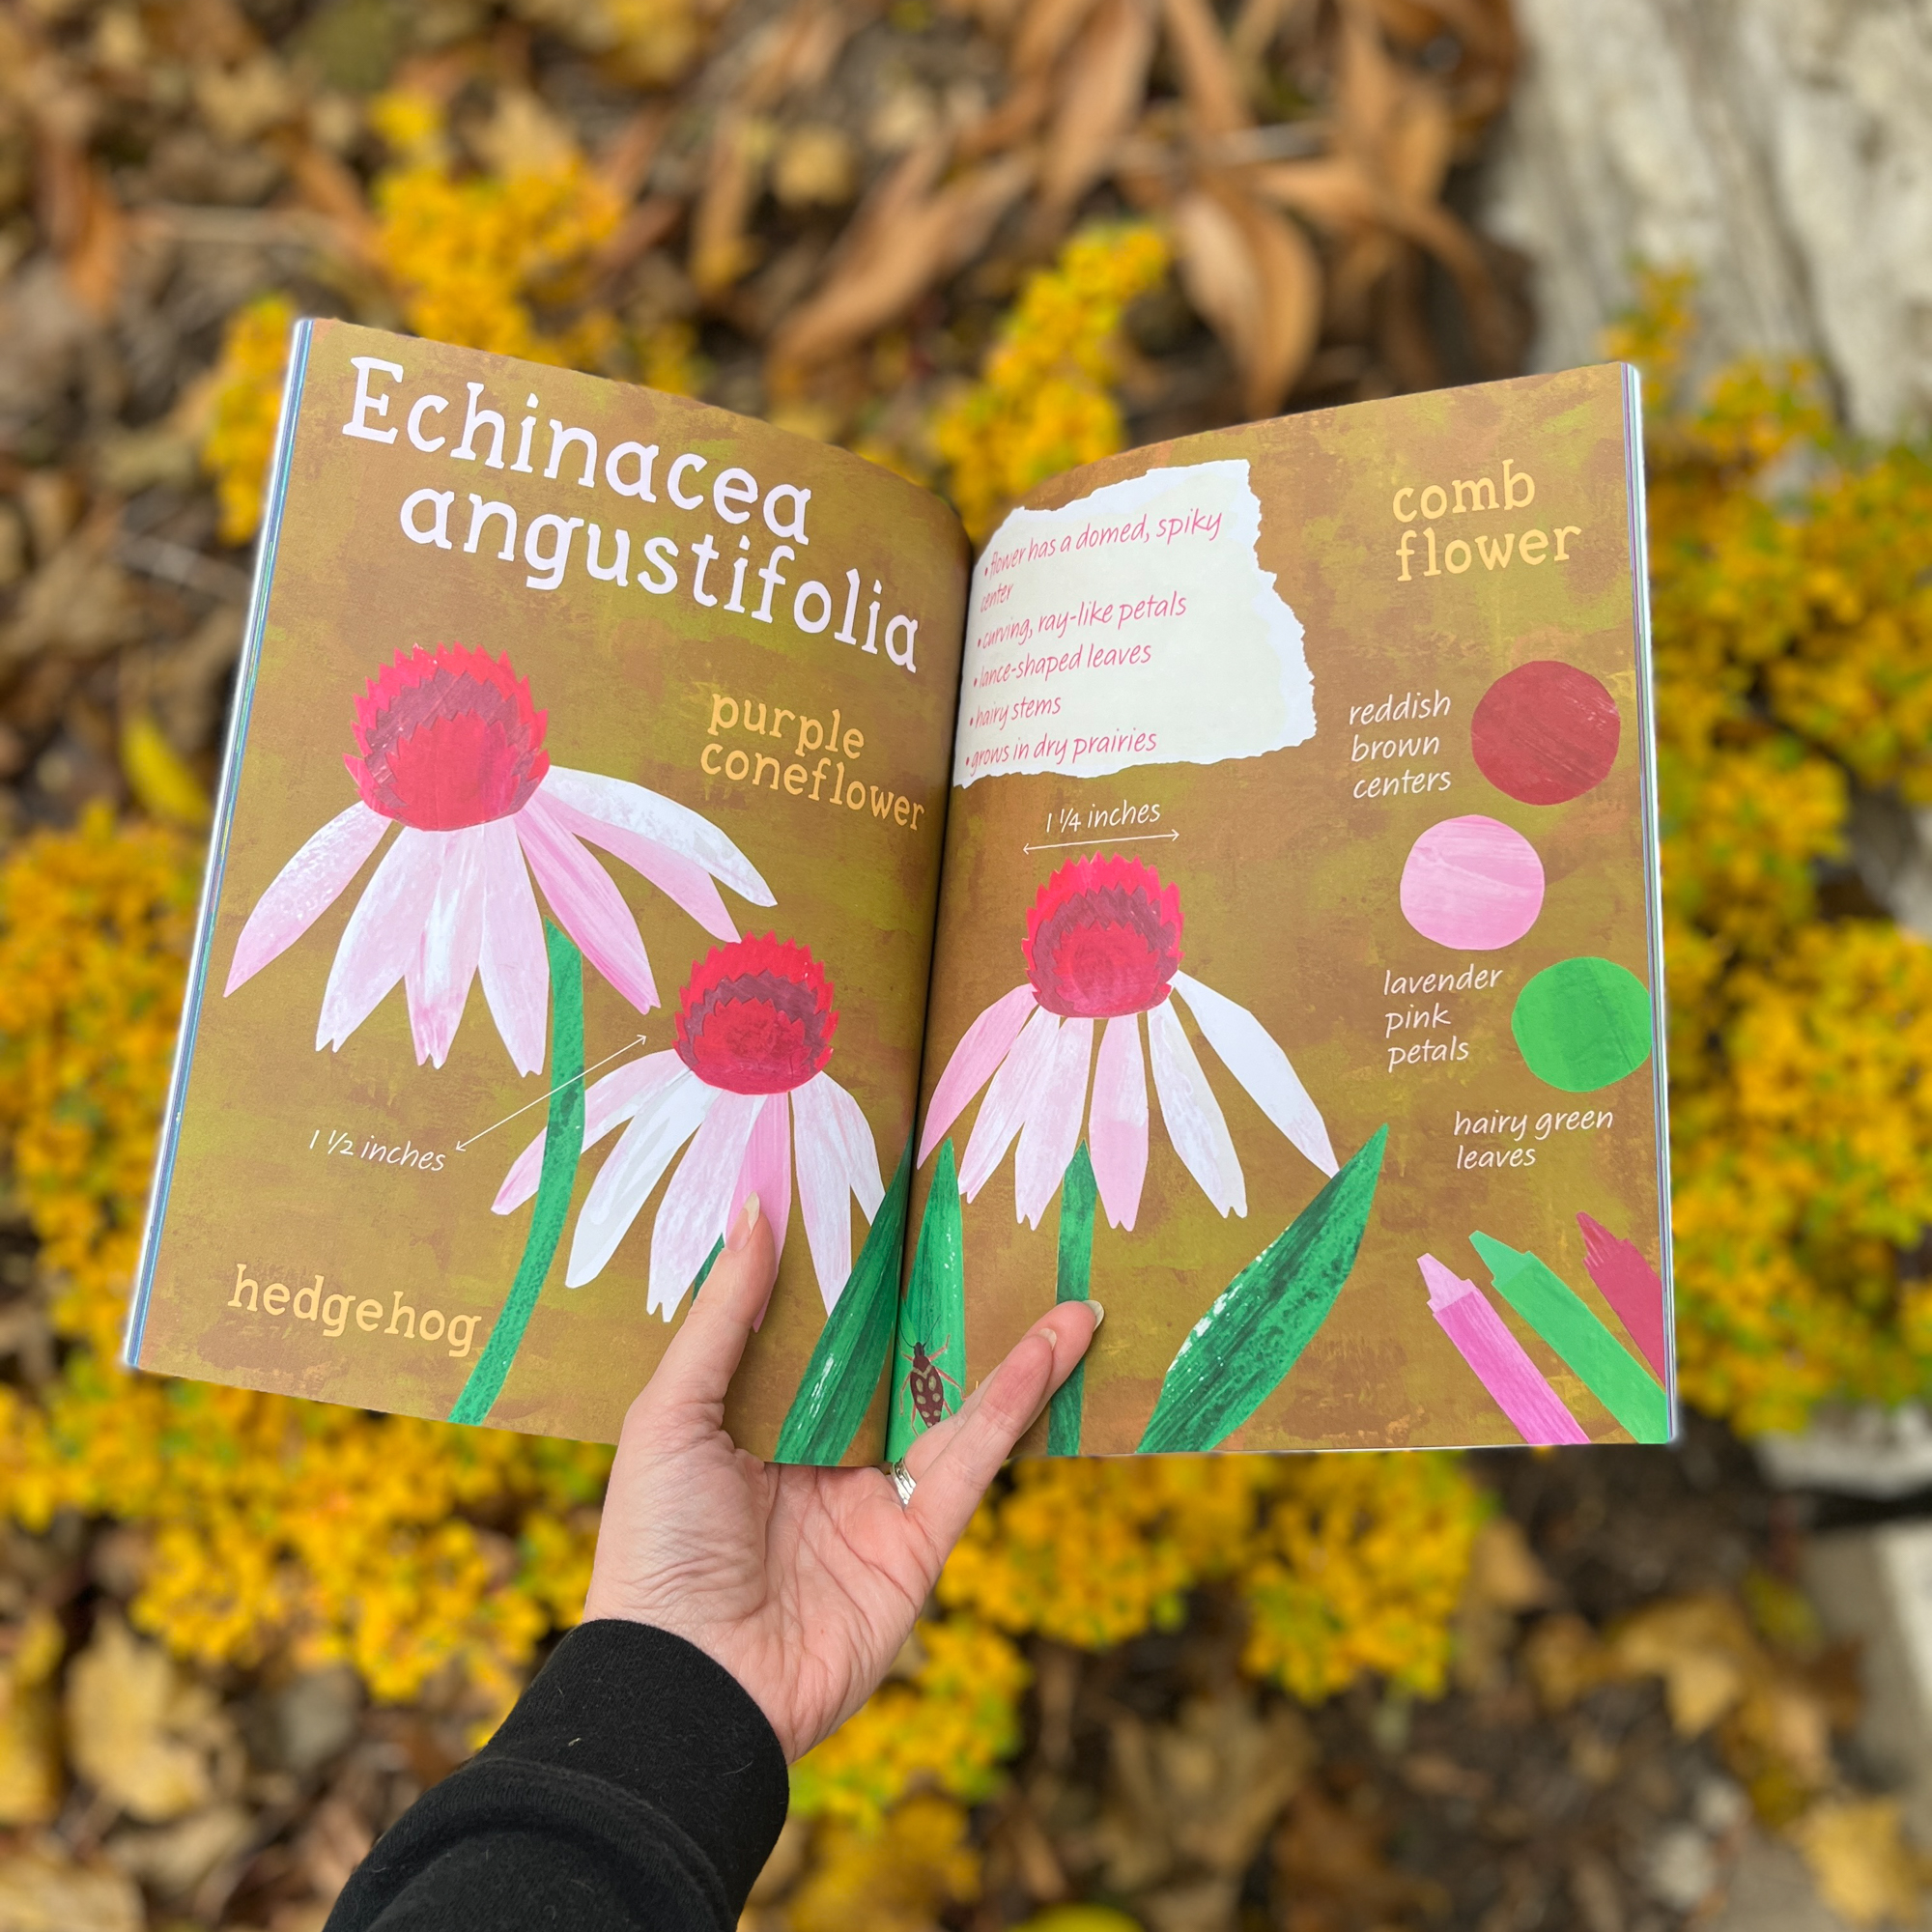
Noted! Mosaics are SLOW so I think it would make a really boring in-person class but I have thought about translating it into an online class so you can do some of the time consuming part offline. That mosaic toad design I showed you in the webinar probably took me 5-6 hours to create from start to finish. I have a design of mosaic waterlilies that I think took more than 40 hours.

Q: Is there a blog post on Spoonflower that explains how to do this? Is this possible still on Spoonflower, such a ‘placed’ print? [This refers to printing a design as a placed/engineered print for clothing rather than a repeating design.]

Not on Spoonflower’s blog, but there are several projects like this in the Spoonflower Handbook. In the simplest terms, the way to design like this is to not think about making a repeat but to think about designing a whole yard (or more) of fabric all at once. I do this alot. Instead of setting up a canvas that is 8 inches square or something like that, I set up a canvas that is 42×36 inches, or that will fill a whole yard of fabric. Then I design what I want that yard to look like. It’s not any harder than making a repeat (in fact I think it’s easier) but it’s just a different way of thinking about it. If you want to design to place something on a dress, for example, you have to do a little math to know what pieces you need to cut out (bodice, sleeves, skirt) and to design blocks that are the size you need to cut out those pieces.

12 January, 2022

Moving my classes to Teachable

2022-01-12T11:35:09-06:00Everything Else|2 Comments

Change is hard.

My very first project of 2022 wasn’t the thing I was planning on creating. In fact, it wasn’t even really making something new, but re-making something I didn’t want to redo.

At the end of 2021, Coursecraft, the platform I used to host my on-demand online classes decided to go out of business. They were a small company (which is part of why I loved them) but that means that I think they got a little burn out being constantly on the front lines of keeping everything up and running. I think many of us can relate to that. When they said that they were going to turn everything off in April, I spent a couple of days thinking.

  • Did I want to go to the trouble of moving everything to a new platform?
  • Are students going to be upset if I couldn’t automatically give them access to the new class?
  • Would they even notice if the classes just disappeared?
  • Were enough people registered for them that it made sense to continue? Would the additional time investment be worth it?
  • Could I find a new platform that didn’t cost a lot more?

It was the kind of unforeseen event that forces you to take a look at things in many different ways.

I decided that those on-demand classes are something I love to teach. Even though I am not right there talking to students in real time, it’s still a great teaching experience. I know that the students have so many more options. You can do the whole thing at once or come back and work on it whenever you have 10 minutes free. You can jump back and refer to something that you don’t quite remember. I know there are classes I wish I could do that with. I took a book binding class last year and I am certain that I couldn’t make another one on my own at this point. I took good notes, but I have forgotten so much because everything was so new. But most importantly when I look back at the last couple of years, those online classes are a big gold star in the “positive things that happened” column. There sure is a whole lot of negative that happened, so it really is nice to have something to celebrate.

Ultimately, I decided to move everything to Teachable. It was super similar to what I had before and I like a lot of the features it has. On the other hand, some things aren’t as good and I’ll have to change how a couple of lessons work. It’s slow going. There’s no tool to help you migrate something like this. Just a lot of copy and paste and waiting for videos to re-upload. I’ve listened to music and a book on tape. One morning I played an online game of Settlers of Catan while I waited on video uploads. It’s been great thinking time. I thought about new classes to teach for this spring and what I’d like to add to my new school at Teachable.

I even made a deal with a friend of mine who is working on a similar project right now: something she wants to get done, but at the same time dreads doing it. We’ve been sending each other progress photos and grouchy observations when things aren’t quite going as smoothly as we had hoped. That was the best idea ever. It makes it not quite as hard when you have someone to complain about it to.

So things might look a little topsy-turvy on that classes page right now, but I think more good things are to come. And it’s nice to take a minute to re-evaluate and come up with the same conclusion that I did when I started. Classes are a great way to connect with my community or artists and makers and I hope this is the start of more new great things this year.

29 November, 2021

On Sondheim: “Anything you do, let it come from you. Then it will be new.”

2021-11-29T21:45:36-06:00Everything Else|1 Comment

You might not know this about me, but I was a theater major for a few years in college. I was a huge highschool theater geek; the queen of the costume shop. I worked for five summers at a summer childrens’ theater and I fell in love with my husband in a truly ridiculous show where I played the Damsel in Distress and he played the giant sea monster that ate me. (It did have a happy ending.) That’s us in the photo above, right in the center.

I never wanted to be an actor; I was a designer. Sadly, I didn’t have the self-confidence I have now and when faced with the larger-than-life personalities in the department, I never found a place where I felt like I was contributing anything other than endlessly washing paintbrushes. So I drifted off and changed my major and found other creative channels.

But it was in my first class as a theater major that I met Stephen Sondheim. I don’t mean that literally of course, but the first thing we studied in “Theater Appreciation” was the musical Sweeney Todd and it was the first Sondheim musical I’d ever seen. I remember that we watched the “Great Performances” version and we had to split it up over about 3 classes to be able to see the whole thing. I sat with all of the freshman theater majors in a row in the front of the auditorium. It was a required class for theater majors and filled a humanities credit for a whole lot of other people, so we were surrounded by football players and business majors. Looking back, Sweeney seems like the strangest choice to introduce to Theater Appreciation, but I still remember it 30 years later.

I remember walking to dinner or somewhere after watching the first act of Sweeney and thinking seriously WTF. I had never seen theater like this. I am a HUGE musical theater fan. I have watched every big old Hollywood movie musical dozens of times. I think “My Fair Lady” was my first live show when I was 8 or 9 years old. I knew all the words to “Phantom of the Opera”, which all theater kids did in 1992, and the “Guys and Dolls” cast album was among the first half dozen cds I owned. I grew up in South Dakota, where touring companies don’t travel, so I didn’t see my first real Broadway show, “Thoroughly Modern Millie”, until I was an adult. This was not like those musicals.

If you don’t know the story, Sweeney Todd, in short, is a musical about a serial killer and Victorian era cannibalism. It’s creepy and full of dark humor and more than a little twisted.

Sweeney Todd, image from Playbill.com

So, walking back to my dorm room, I remember thinking “what is this demented thing they have us watching? This isn’t a normal musical.” and also “why haven’t I ever heard of this before?!”

It ends up that I love Sweeney Todd. I didn’t have a chance to see it live until a decade or so ago when a friend played the lead in a community theater production, but I’ve watched that same recorded version several more times and a concert version too. I’ve since discovered more Sondheim. My husband introduced me to “Into the Woods”, and I also watched the Great Performances version of that. I’ve never liked “West Side Story” although I’ve seen it a couple of times.

But my great Sondheim love is “Sunday in the Park with George”. A friend took me to see it a bunch of years ago and although I had heard of it, I really didn’t know much about it. It was breathtaking. I don’t think it’s too much of a spoiler to say that the musical centers around George Seurat and at one point in the production they make the painting “Sunday Afternoon on the Isle of La Grande Jatte” come to life in a way that’s purely magical. I don’t remember a lot about that production other than liking it. I do remember very vividly going on a trip to the Art Institute of Chicago a year or so later.

Sunday Afternoon on the Isle of La Grand Jatte, photo from the Art Institute of Chicago

I didn’t know the painting was there and I came around a corner and literally took a step backwards. It took my breath away. I stood for minutes in front of it just mesmerized.

Years later, I was contacted by the gift shop manager from the Guthrie Theater here in Minneapolis. She and I had met at an art show that I did and she had a brainstorm. Could I design some fabrics inspired by the musical they were doing for the summer and then they could carry that work in the gift shop? I jumped at the chance! She says, “You might not have heard of this show. It’s a little weird. It’s called “Sunday in the Park with George”.

So, I spent a couple of months studying it. I listened to different cast albums and watched the movie versions. I studied the painting and George Seurat. I designed a whole collection of designs inspired by elements from the show and the painting and they are some of my favorite designs I have ever done. I listened and read the lyrics to every song, looking for phrases and words to bring in to my designs. I named one design “Rue de Magenta” because that was the Paris street where Seurat had his studio. I made the black dog from the painting into one of my black labs posing to be painted.

After I had made the collection, we went to see the Guthrie’s production of course. I had tears running down my face at the moment that the “painting” snaps into place. I was a total wreck in the absolute best way possible. It was amazing.

I won’t forget those two breathtaking moments with the painting and the show. I think it’s because Sondheim and I shared a moment and understood something together about art and artists and this amazing painting. What a gift. Stephen Sondheim passed away this week and I am sorry that I won’t get to share more new moments with his art.

8 November, 2021

New Book: Native Plants of the North Woods

2021-11-08T22:05:54-06:00Everything Else|Comments Off on New Book: Native Plants of the North Woods

I started this collection of native plant illustrations in an art residency I did with The Bell Museum, a local natural history museum. My project was to study their herbarium collection of preserved plants native to Minnesota and create art inspired by it. I wrote all about that project here.

When I started to make my plant illustrations I realized there was something missing from the plant specimen sheets. You can see one pictured behind my mask, shown below. The plant’s habitat and person who collected the plant were well-documented by the museum. However, even though I could study the shapes and sizes of the plant from the preserved sample, they all looked dull, flat, and brown; there was very little information about the color or texture. As an artist, those two qualities are very important to me!

I went in search of more reference material. I studied local field guides and resources from non-profit organizations that focused on native plants, like MNWildflowers.org. I looked for shapes, colors and tiny details that make each plant unique. By using these details to craft a more complete picture of each plant, I could bring them back to life.

I used hand-painted deli paper to make each cut paper illustration. Deli paper might not seem like an obvious art material, but it’s thin and strong so it’s easy to cut out fine details and make layered shapes. As I painted, I designed one-of-a-kind papers for my plants. I blended colors and created textures with the brush. I drew stripes and speckles. I even cut out a paper alphabet to make a custom typeface for my plant labels. I chose to make the plants larger-than-life rather than try to make things actual size because some of them are tiny! I really wanted the reader to be able to see the details that I would never be able to render in cut paper when the blossoms were only 1/4 inch wide. I also decided to picture each plant as you would see it in early summer, so most of the pictures show the flowers you would see in the summer time but not the berries or seed pods you might see in the autumn.

For the final project for the residency, I scanned and printed the illustrations on to fabric. I made a set of face masks. I was inspired by native plants with medicinal properties and how, like face masks, these plants can help protect us from disease. The museum displayed a small collection of these masks, but I knew that exhibit was just a seedling, so to speak.

The seedling grew into this book: an artist’s field guide to native plants. Native Plants of the North Woods features 21 different plant species and 11 native pollinators in a family-friendly field guide. Each page has details and quirky facts about each kind of plant and is geared at an upper-elementary age reading level. I started studying Minnesota species because that’s where I live. My parents are from upstate New York and remember the plants they grew up with too. As I showed each finished illustration to my mom, we realized that many are common to the north woods all the way from Minnesota to New York. She remembers walking through the woods with her parents, finding huge patches of trillium and popping the seed pods of touch-me-nots. I hope you will take a walk in the woods where you live to see if you can find these plants. And I hope you’ll make a little art inspired by them too.

15 July, 2021

Sewing with Spoonflower’s Cotton Lawn

2021-07-15T16:12:37-05:00Everything Else|2 Comments

I was really excited to get a yard of Spoonflower’s new Cotton Lawn to try out. This new fabric is a very finely woven lightweight cotton. It’s very smooth and has a crispness that makes it feel really nice in your hand. I got just a yard of fabric printed in one of my designs and decided to make my favorite tank, which is the Gemma by Made By Rae. I have probably made a dozen of these tanks over the years and if you have ever taken an in-person class from me, you probably have probably seen me wearing one. It’s my go-to teaching outfit.

Usually I make this tank in the poly crepe de chine because it has always been the lightest weight and most drapey of Spoonflower’s fabric options (I am not counting chiffon, which is very transparent and not so appropriate for this kind of garment.) So I thought that lawn would also be a great option, but I have to say that I have mixed feelings about this version in lawn.

Print Quality

The sharpness and color of the printing on the cotton lawn is just outstanding. As I talked about in my earlier review of Spoonflower’s Signature/Poplin/Sateen, some of the finer details can get lost on the more textured fabrics. The lawn has such fine threads that it really captures all of the texture. This is a design that I made with cut paper mosaic tiles made from handpainted deli paper. You can see all of the brush strokes and color depth really well. This might be a new favorite for me when we are talking strictly the look of the printing.

Sewing with the Cotton Lawn

Since this is a pattern I have made many times before, I just got out my pattern pieces and set right to work. I made the size I usually make. Because I noticed when I washed this fabric that it really didn’t fray at all going through the washer and dryer, I chose to just leave the seam allowances unfinished. I usually serge them when I am working with the poly crepe de chine.

Where I started to have issues was when I started sewing. The first seam totally shredded the thread about half way through the side seam. I thought that was a little weird, but I figured I probably just needed a new needle, so I ripped out the stitches and traded needles on my machine. For the kind of sewing I do most often, I use a standard Schmetz Universal 80/20 needle, so that was what was in the machine and also the new needle I put in, but after the second seam I was still having issues with the thread. So I unthreaded and rethreaded my machine and tried again. I was starting to get a little frustrated.

Then I decided that maybe lawn needed a finer needle than what I normally use. Trading out needles project by project isn’t something I do often but I decided that was worth a try. I dug through the drawer where I keep my needles and came up with a 70/10 Universal needle, which is just slightly smaller. The 70/10 was somewhat better, but let’s just say that I wouldn’t show anyone the stitches on the inside of this top. The trick I discovered was to stitch really slowly and steadily with this smaller needle and it seemed to do just fine. If I went too fast, the thread would start to shred again.

Probably a microtex/sharp needle would be even better, but I didn’t have any of those in my stash and I didn’t feel like a special trip to the store made a lot of sense for this one project. I will for sure get some if I decide to sew another project with lawn.

Do I love my finished project?

The thing that surprised me the most about my finished tank was that I totally don’t like the way it drapes in the lawn fabric. Like I mentioned earlier, this lawn has a crispness to it which means although it is soft and lightweight, it is not very fluid. When I put on the tank top, it feels like it stands away from my body a little bit too much and the same size that I always make felt like it was too big. It feels frumpy and a little like I am wearing a maternity top, to be honest.

Here’s a photo of the exact same tank in cotton lawn and poly crepe de chine, side by side. You can see how differently the two fabrics hang in this finished garment. I knew the crepe de chine was a much more fluid/flowy fabric, but I didn’t think it would make as much difference as it does. After I looked at the version in lawn I decided that I am going to add some darts to reshape the underbust/waist a little so it hangs a little better, but I wanted to get this photo in its original version first. I think that will help take out some of the extra fabric that is letting it bell out away from my body and it will feel more like it fits. The fabric feels really nice to wear, but I think if I was choosing a pattern for cotton lawn next time, I would pick something slightly more fitted or structured to take advantage of that fabric crispness.

Other things to note

A few other details I noticed. The lawn irons beautifully. It came out of the washer and dryer with very few wrinkles and even after I made this and had it sitting folded on my studio table for a few weeks, the creases were minor. One of my big issues with a previous cotton lawn that Spoonflower had years ago was that it wrinkled like crazy and it held on to creases and wrinkles. This one is a great improvement over that.

I occasionally need to print labels for garments or projects and I think that cotton lawn may be my new favorite fabric for that. Because of the fine smooth surface I think text will be more easily readable and the relative lack of fraying means it may be able to hold up to leaving raw edges exposed.

Overall impressions

I think it’s a lovely fabric and a nice addition to the Spoonflower line-up, but I think it might require a little more patience or careful choice of sewing tools/threads to sew it well. I will plan ahead a little more before I tackle my next project.

The fabric design for this top is my Storm Clouds Mosaic and it is available in my Spoonflower shop. The crepe de chine fabric pictured is a personal design, made as a gift for a friend.

9 June, 2021

Fabric Review: Spoonflower’s Minky, Celosia Velvet and Performance Velvet

2021-06-09T15:02:49-05:00Everything Else, Fabric Reviews, Sewing & Design, Spoonflower & Fabric Design|2 Comments

Spoonflower just introduced their new Performance Velvet fabric and I thought that it was a great time to do a fabric review of the Three Plush Fabrics of Spoonflower. As always with my other reviews of Spoonflower fabrics, I just want to say that these are my own opinions and experiences with these fabrics. I don’t get any kind of promotional, incentive, or other kickbacks; I just like to be able to share some in-depth info with students in my classes and all of you out there trying to get started designing your own fabrics.

Spoonflower has three great fabrics with a napped or plush finish: Minky, Celosia Velvet, and Performance Velvet. You can click through any of those links to see the detailed specs on each of those fabrics.

What they have in common.

All three of the fabrics have several things in common. All three are 100% polyester and 54″ printable width. All three have a plush or napped surface, which vary in pile length from .5mm (celosia) to 2mm (minky). All three are heavier or thicker weight fabrics compared to quilting cotton.

All of the printed designs are technically sharp, because the plush fabrics move around as you brush your hand over the surface, that can make fine details disappear and edges look softer than if you print on a smooth fabric like Sateen or Poplin.

Key Differences.

Here are some of the key differences I noticed that might help you choose which fabric is best for your project.

Fabric Base Color

Minky and Performance Velvet are bright white, where Celosia has a little more cream undertone. I don’t think it effects the print colors substantially, but you would notice if your design had a lot of white space or lighter colors in it. You can see in the photo above that the pale blue on the bottom of the design is slightly greener on the Celosia Velvet because of the warm base color underneath.

Look and Feel of the Fabrics

All three are very soft to the touch, but I think the Performance Velvet has the nicest hand feel with a very soft surface and a thick plush feeling fabric. Although Minky is very soft on the surface, it is also the thinnest of the fabrics, so it doesn’t feel as substantial. Celosia Velvet has a plush that feels slightly stiffer, more of what I think of as “upholstery velvet”.

Each fabric also has a distinct finish. Celosia Velvet has a subtle shine that is my personal favorite. I think that little bit of reflection gives it a more luxe look than the others. Performance Velvet has a matte finish. It reminds me of a vintage cotton velvet that you occasionally find in a thrift store. Minky looks “furry” to me and I think you see the nap or the fact that it’s a plush much more obviously than the others.

Drape

I think this is one of the most distinct differences between the three fabrics. In the photo above I tried to demonstrate so you can see how each fabric behaves. On the left, I pinched the fabric and picked it up, so you can see how the folds fall naturally. On the right, the fabric is laid flat, pinched and twisted.

Celosia Velvet is the stiffest, even though it’s about 2oz lighter per yard than the Performance Velvet. It has a more structural feel and no stretch. You can see it falls in very stiff folds.

Performance Velvet is the next softer drape. Although it is technically a thicker/heavier fabric, it falls in softer folds when you pick it up and it moves a little more freely.

Minky has the most drape of the three, with a more liquid sort of movement. It is only 6 oz per yard compared to Performance Velvet’s 11 oz, so even though it reads as “thick” it is really lighter weight. You can see the “furry” surface of Minky most when it is bent or rippled. Minky is also the only one of the three fabrics with a little stretch on the widthwise or cross grain.

The Back

One thing I think is always missing is a little info about what the reverse side of these fabrics look and feel like, which really is important for some projects.

Celosia Velvet is the most “upholstery” like with a plain woven back. Although Spoonflower’s site says it is a knit, it’s definitely not, as you can see the structure and it frays exactly as you’d expect a woven to do. It’s not exactly rough on the back, but it feels sturdy rather than soft.

Performance Velvet has a backing that feels and looks a lot like craft felt. It’s soft and has a slightly brushed look. The Performance Velvet is much creamier white on the back than it is on the front.

Minky has a smooth knit on the reverse.

What can you make with them?

I’ve used all three of these fabrics for different projects: Sara Coat (left), Filter Other Offset Jacket (middle), SeaSerpent Pillow (right). (you can click on any of those titles to read more and see larger photos)

Before Spoonflower had introduced either of the velvet options, I decided to try making a coat out of Minky. Because the Minky is so relatively light weight and stretchy, I actually backed all of the fabric with an inner lining of a lightweight twill before I sewed this coat so it looks much less drapey than it really is. That was a good choice for this project. It has a great texture, almost like a faux fur and the cuffs were made with velvet ribbon stitched in stripes. It was easy to sew, although I think my choice to line it also helped with that. If I were going to make a throw or a cuddly quilt, I would go for Minky with something else as a backing because it is so drapey; the others would make very stiff blankets.

The Filter Other Offset jacket is made from Celosia Velvet and I think the photo almost captures some of the sheen. Because velvet has a nap that wants to “push” the pieces out of alignment with each other as you sew, this took a lot of pinning and I really appreciated the walking foot on my sewing machine. I have also made a number of tote bags and other project bags from Celosia and everyone always comments on how nice it feels. I think Celosia makes a project look lush. I don’t think Celosia would be really great for clothing other than outerwear type uses. It really doesn’t have much drape so it’s good for structured or tailored shapes. I have also done a little upholstery with the Celosia Velvet.

The pillow was made from a sample fat quarter I ordered of the Performance Velvet. It’s a great pillow fabric! It was easier to sew than the Celosia (with much less slipping) and I really like the way it felt substantial and it went together so fast. I would really like to make a jacket from the Performance Velvet next. I think because it is a little softer/drapier than Celosia that it might make a great casual jacket or a winterweight skirt. I also think Performance Velvet would make great stuffed toys.

The fabric design featured in this post is called Wildflowers. It is made from a cut paper illustration made from handpainted paper and is available in my Spoonflower shop.

Go to Top