9 June, 2021

Fabric Review: Spoonflower’s Minky, Celosia Velvet and Performance Velvet

2021-06-09T15:02:49-05:00Everything Else, Fabric Reviews, Sewing & Design, Spoonflower & Fabric Design|2 Comments

Spoonflower just introduced their new Performance Velvet fabric and I thought that it was a great time to do a fabric review of the Three Plush Fabrics of Spoonflower. As always with my other reviews of Spoonflower fabrics, I just want to say that these are my own opinions and experiences with these fabrics. I don’t get any kind of promotional, incentive, or other kickbacks; I just like to be able to share some in-depth info with students in my classes and all of you out there trying to get started designing your own fabrics.

Spoonflower has three great fabrics with a napped or plush finish: Minky, Celosia Velvet, and Performance Velvet. You can click through any of those links to see the detailed specs on each of those fabrics.

What they have in common.

All three of the fabrics have several things in common. All three are 100% polyester and 54″ printable width. All three have a plush or napped surface, which vary in pile length from .5mm (celosia) to 2mm (minky). All three are heavier or thicker weight fabrics compared to quilting cotton.

All of the printed designs are technically sharp, because the plush fabrics move around as you brush your hand over the surface, that can make fine details disappear and edges look softer than if you print on a smooth fabric like Sateen or Poplin.

Key Differences.

Here are some of the key differences I noticed that might help you choose which fabric is best for your project.
Fabric Base Color

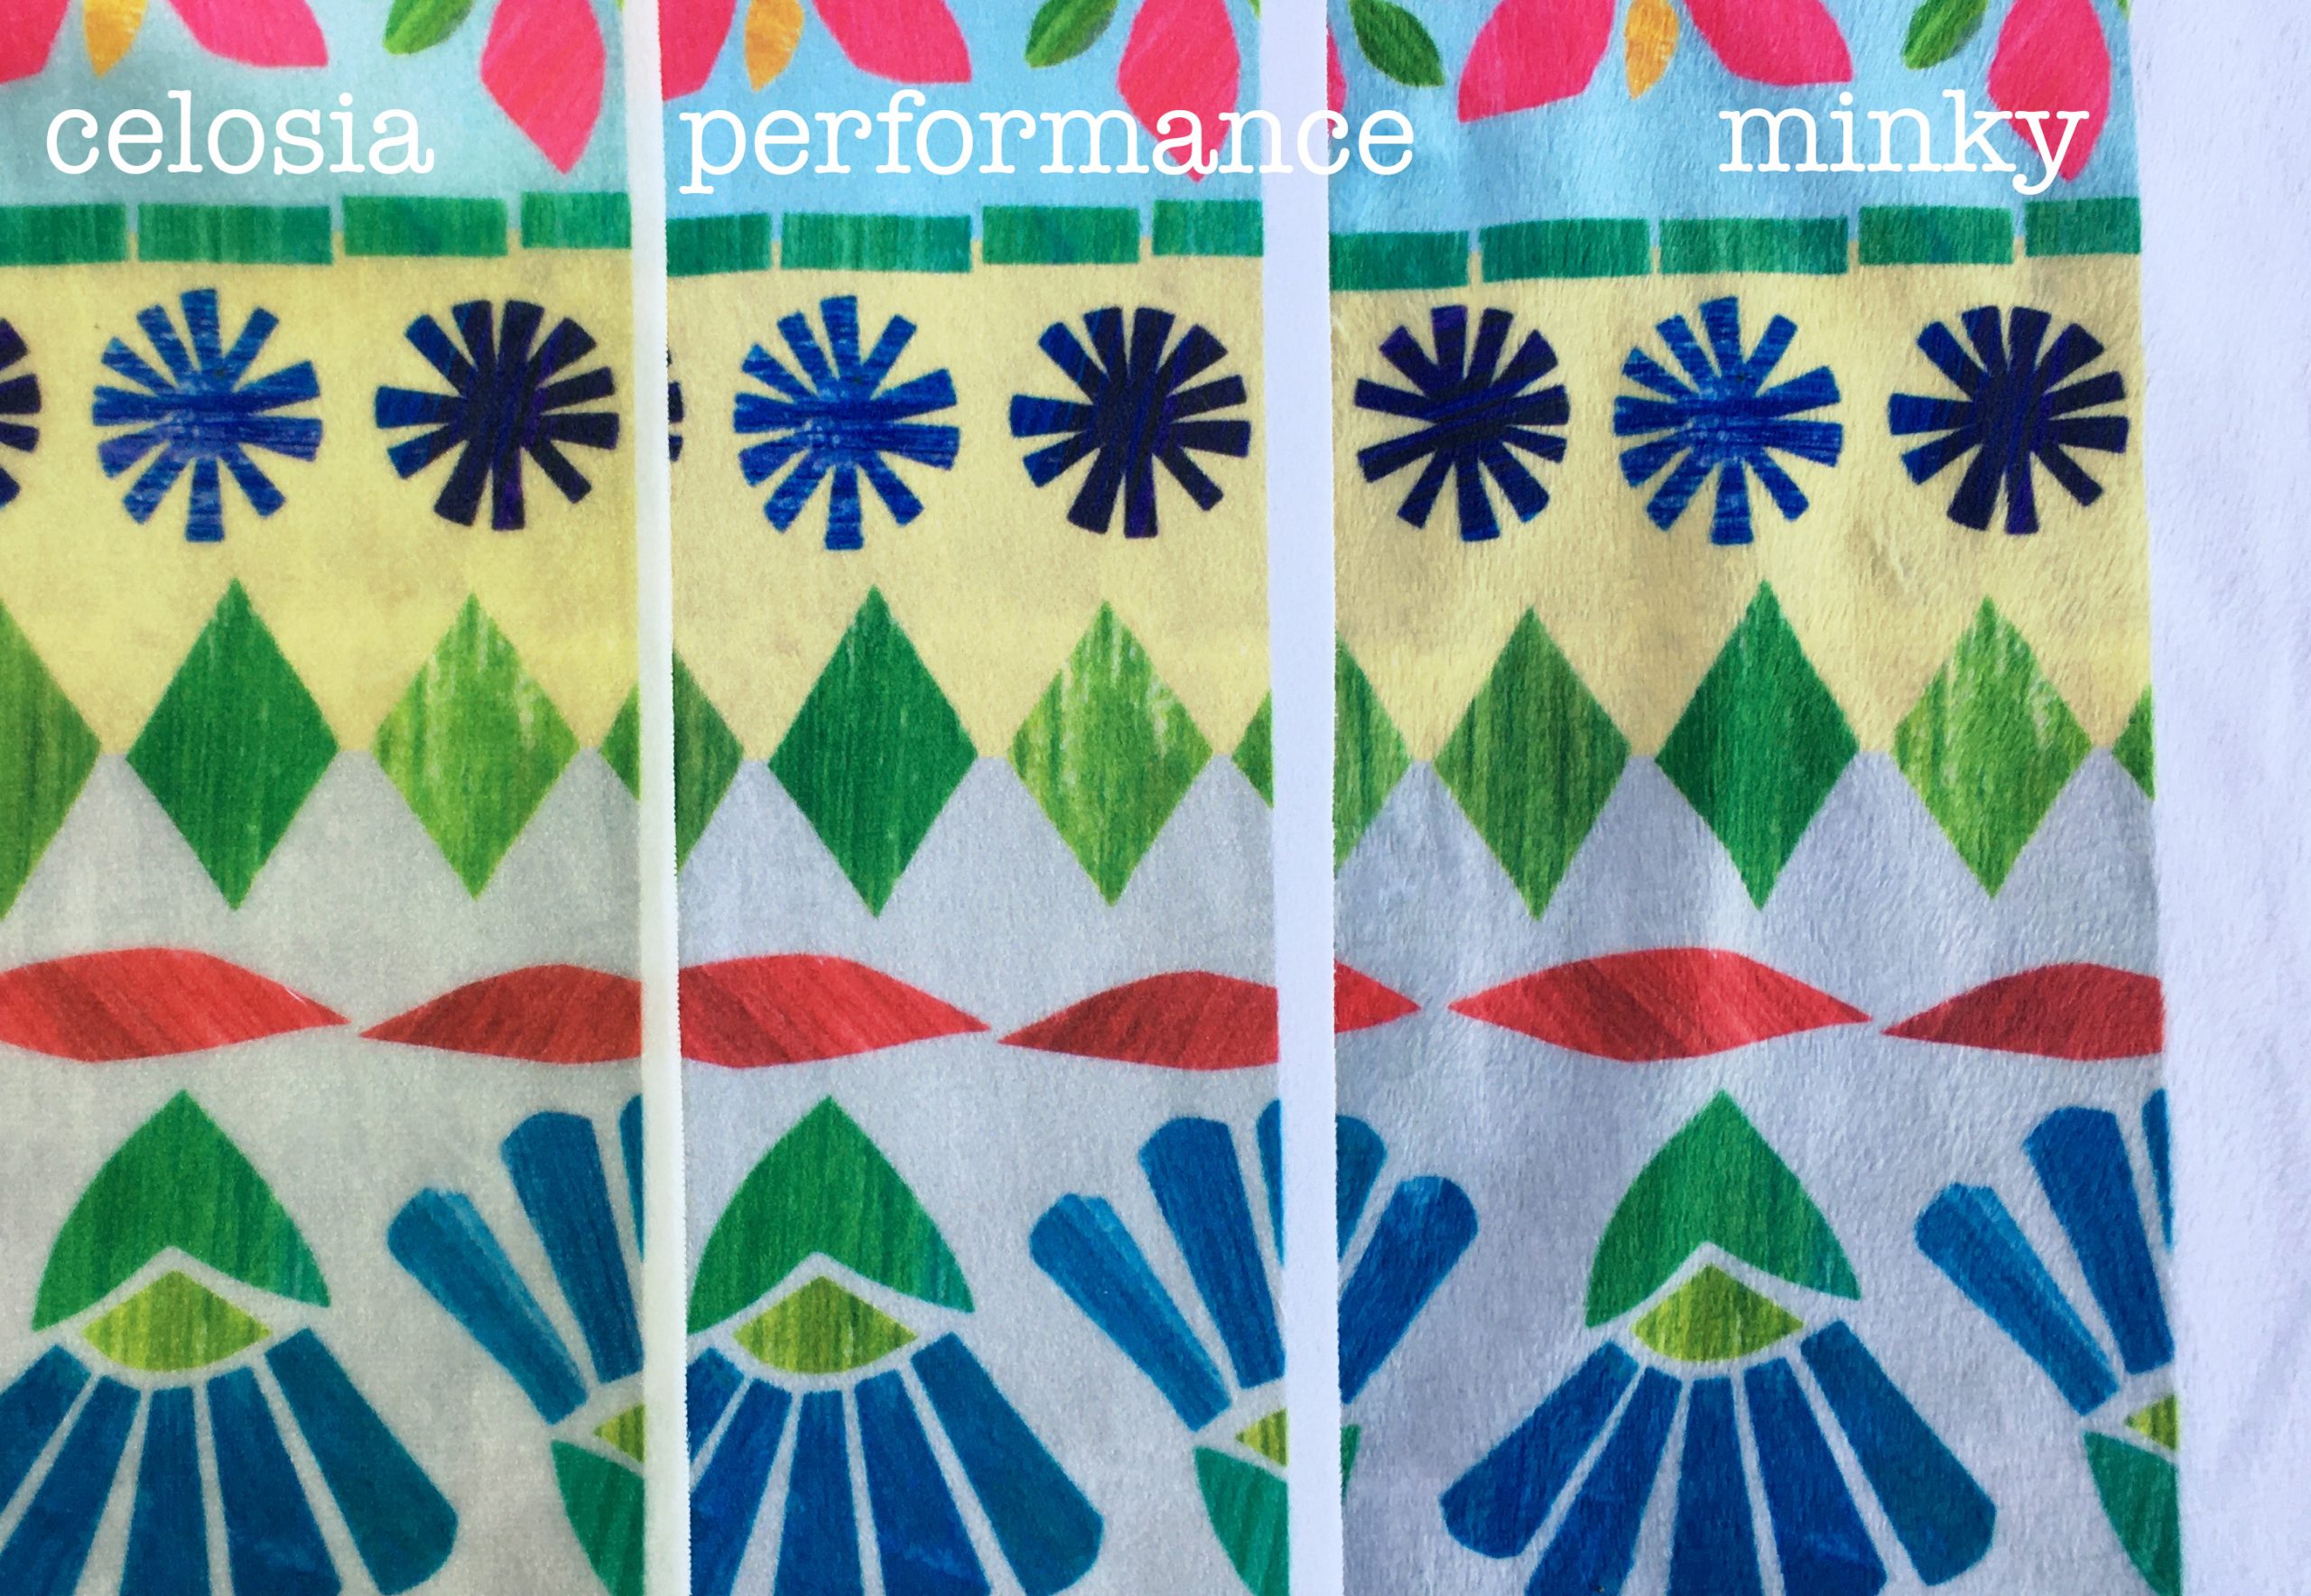
Minky and Performance Velvet are bright white, where Celosia has a little more cream undertone. I don’t think it effects the print colors substantially, but you would notice if your design had a lot of white space or lighter colors in it. You can see in the photo above that the pale blue on the bottom of the design is slightly greener on the Celosia Velvet because of the warm base color underneath.

Look and Feel of the Fabrics

All three are very soft to the touch, but I think the Performance Velvet has the nicest hand feel with a very soft surface and a thick plush feeling fabric. Although Minky is very soft on the surface, it is also the thinnest of the fabrics, so it doesn’t feel as substantial. Celosia Velvet has a plush that feels slightly stiffer, more of what I think of as “upholstery velvet”.

Each fabric also has a distinct finish. Celosia Velvet has a subtle shine that is my personal favorite. I think that little bit of reflection gives it a more luxe look than the others. Performance Velvet has a matte finish. It reminds me of a vintage cotton velvet that you occasionally find in a thrift store. Minky looks “furry” to me and I think you see the nap or the fact that it’s a plush much more obviously than the others.
Drape

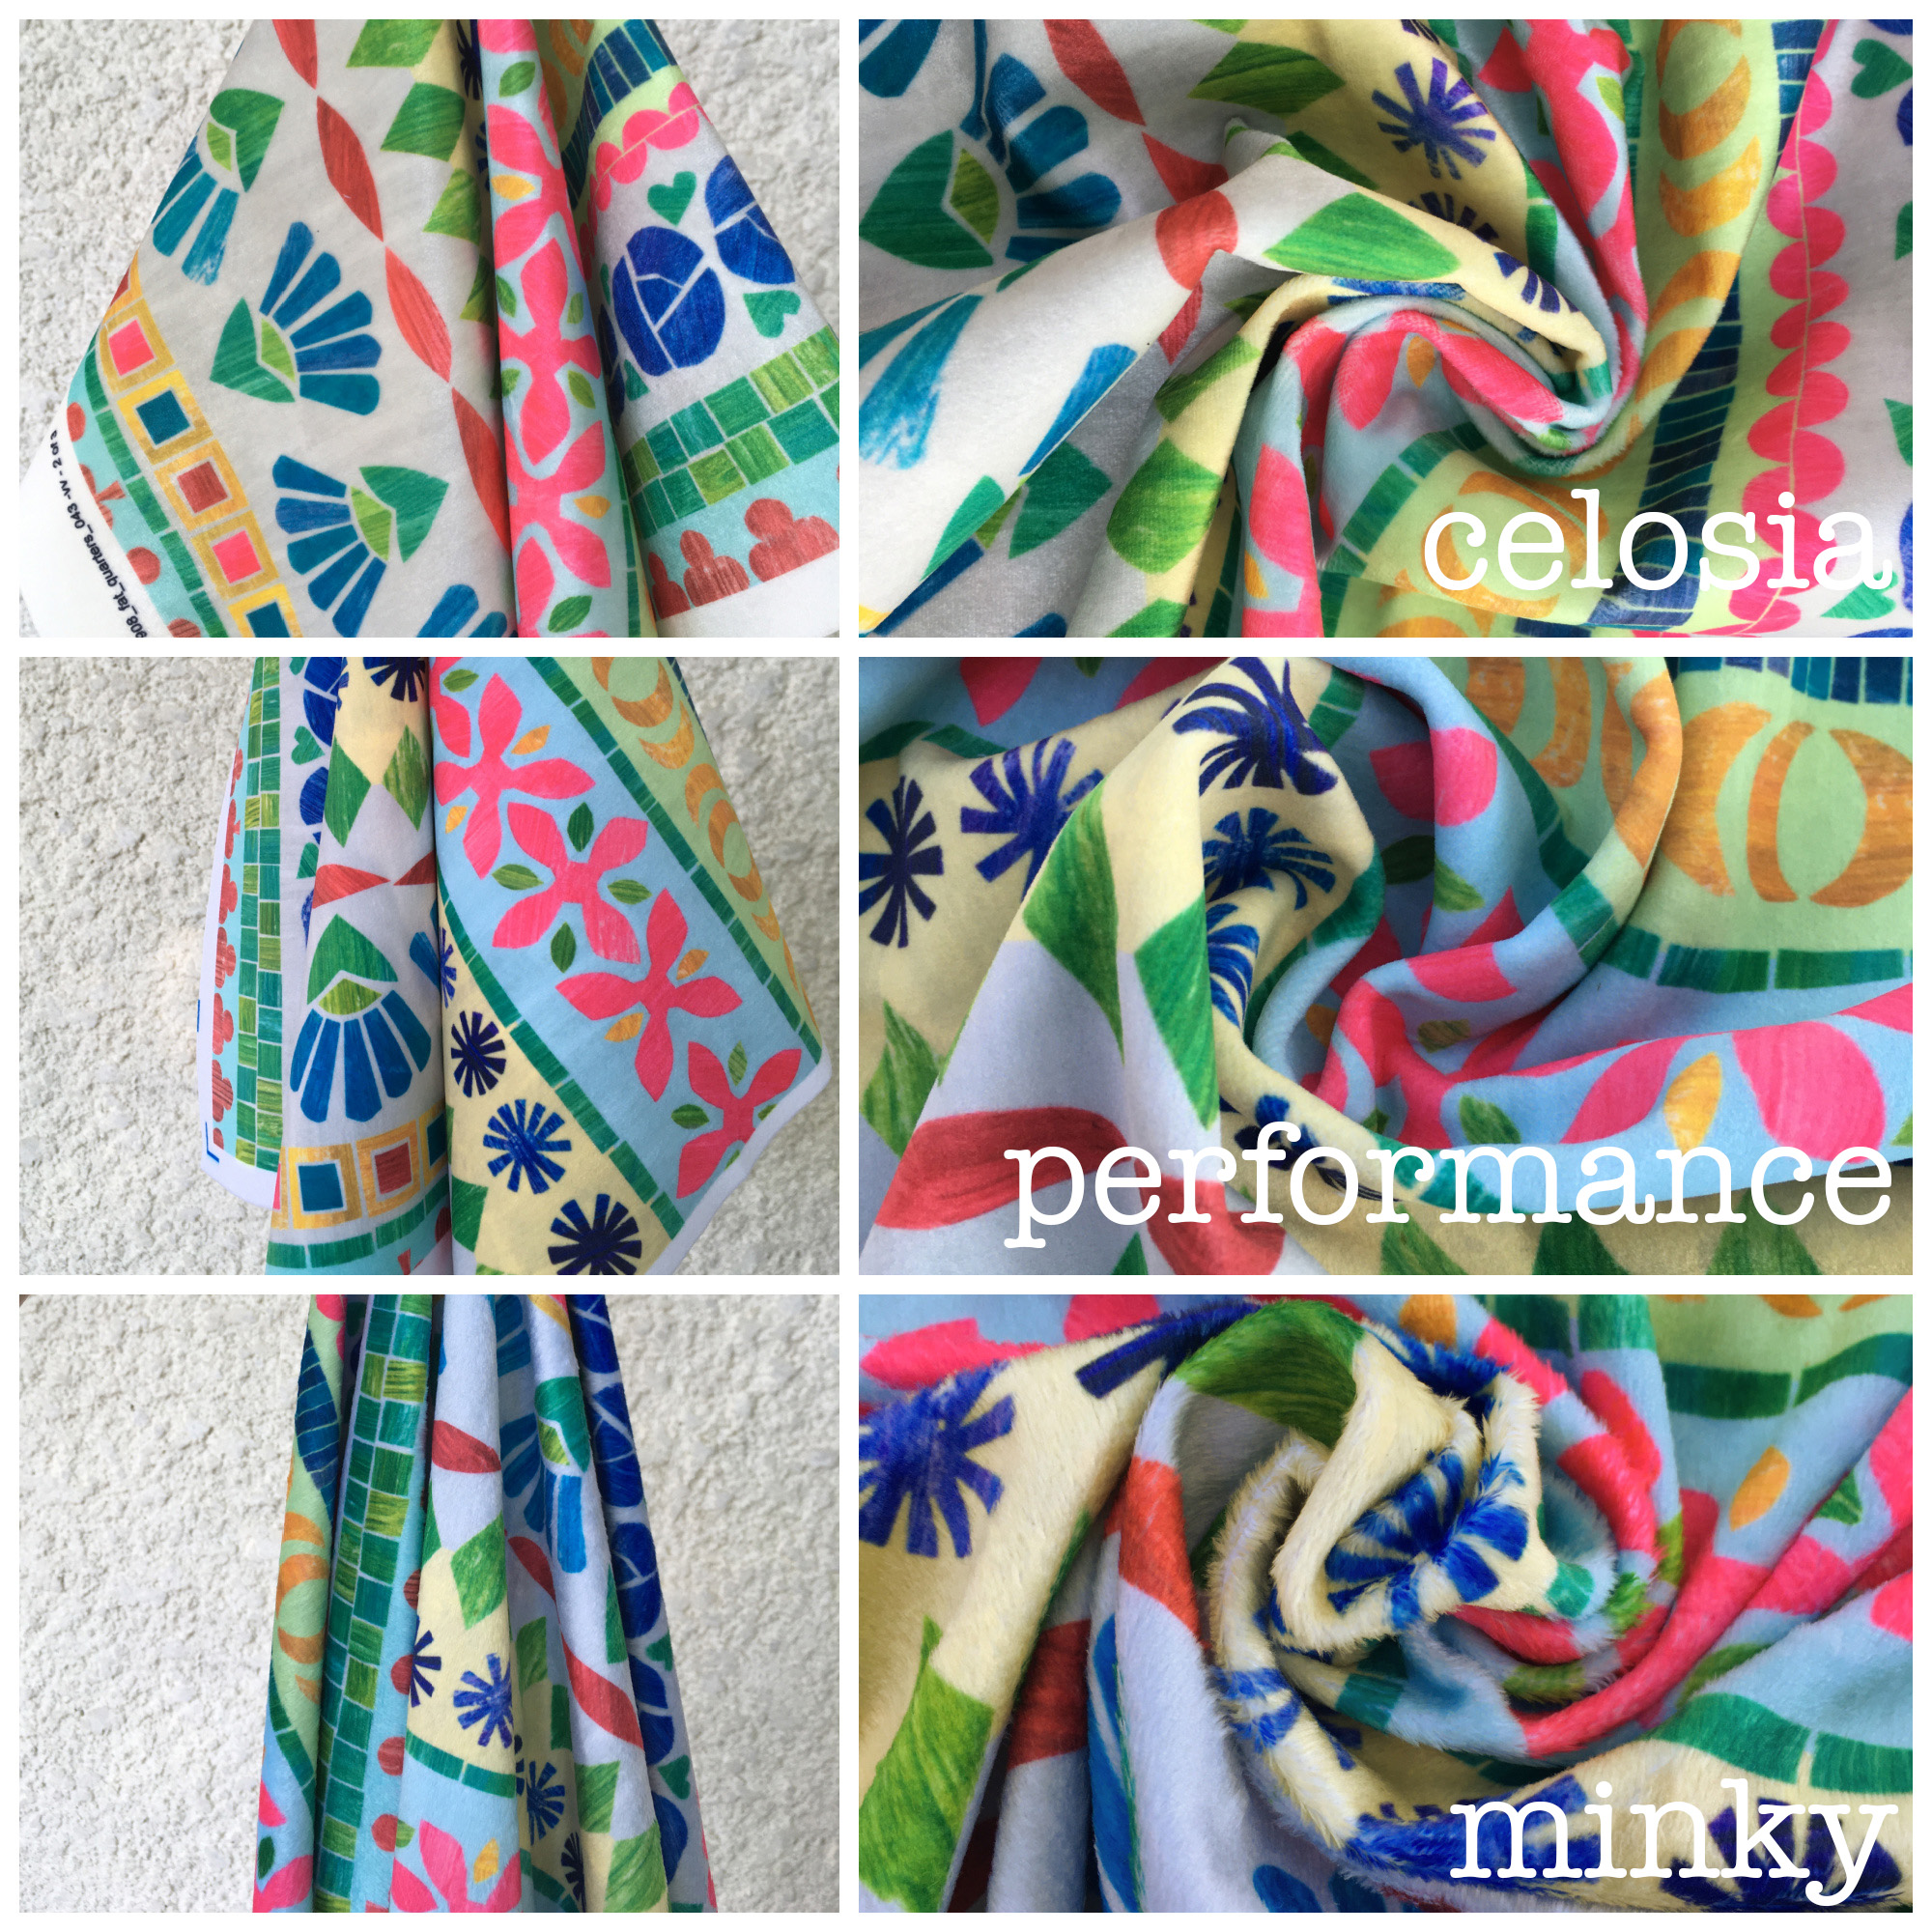
I think this is one of the most distinct differences between the three fabrics. In the photo above I tried to demonstrate so you can see how each fabric behaves. On the left, I pinched the fabric and picked it up, so you can see how the folds fall naturally. On the right, the fabric is laid flat, pinched and twisted.

Celosia Velvet is the stiffest, even though it’s about 2oz lighter per yard than the Performance Velvet. It has a more structural feel and no stretch. You can see it falls in very stiff folds.

Performance Velvet is the next softer drape. Although it is technically a thicker/heavier fabric, it falls in softer folds when you pick it up and it moves a little more freely.

Minky has the most drape of the three, with a more liquid sort of movement. It is only 6 oz per yard compared to Performance Velvet’s 11 oz, so even though it reads as “thick” it is really lighter weight. You can see the “furry” surface of Minky most when it is bent or rippled. Minky is also the only one of the three fabrics with a little stretch on the widthwise or cross grain.
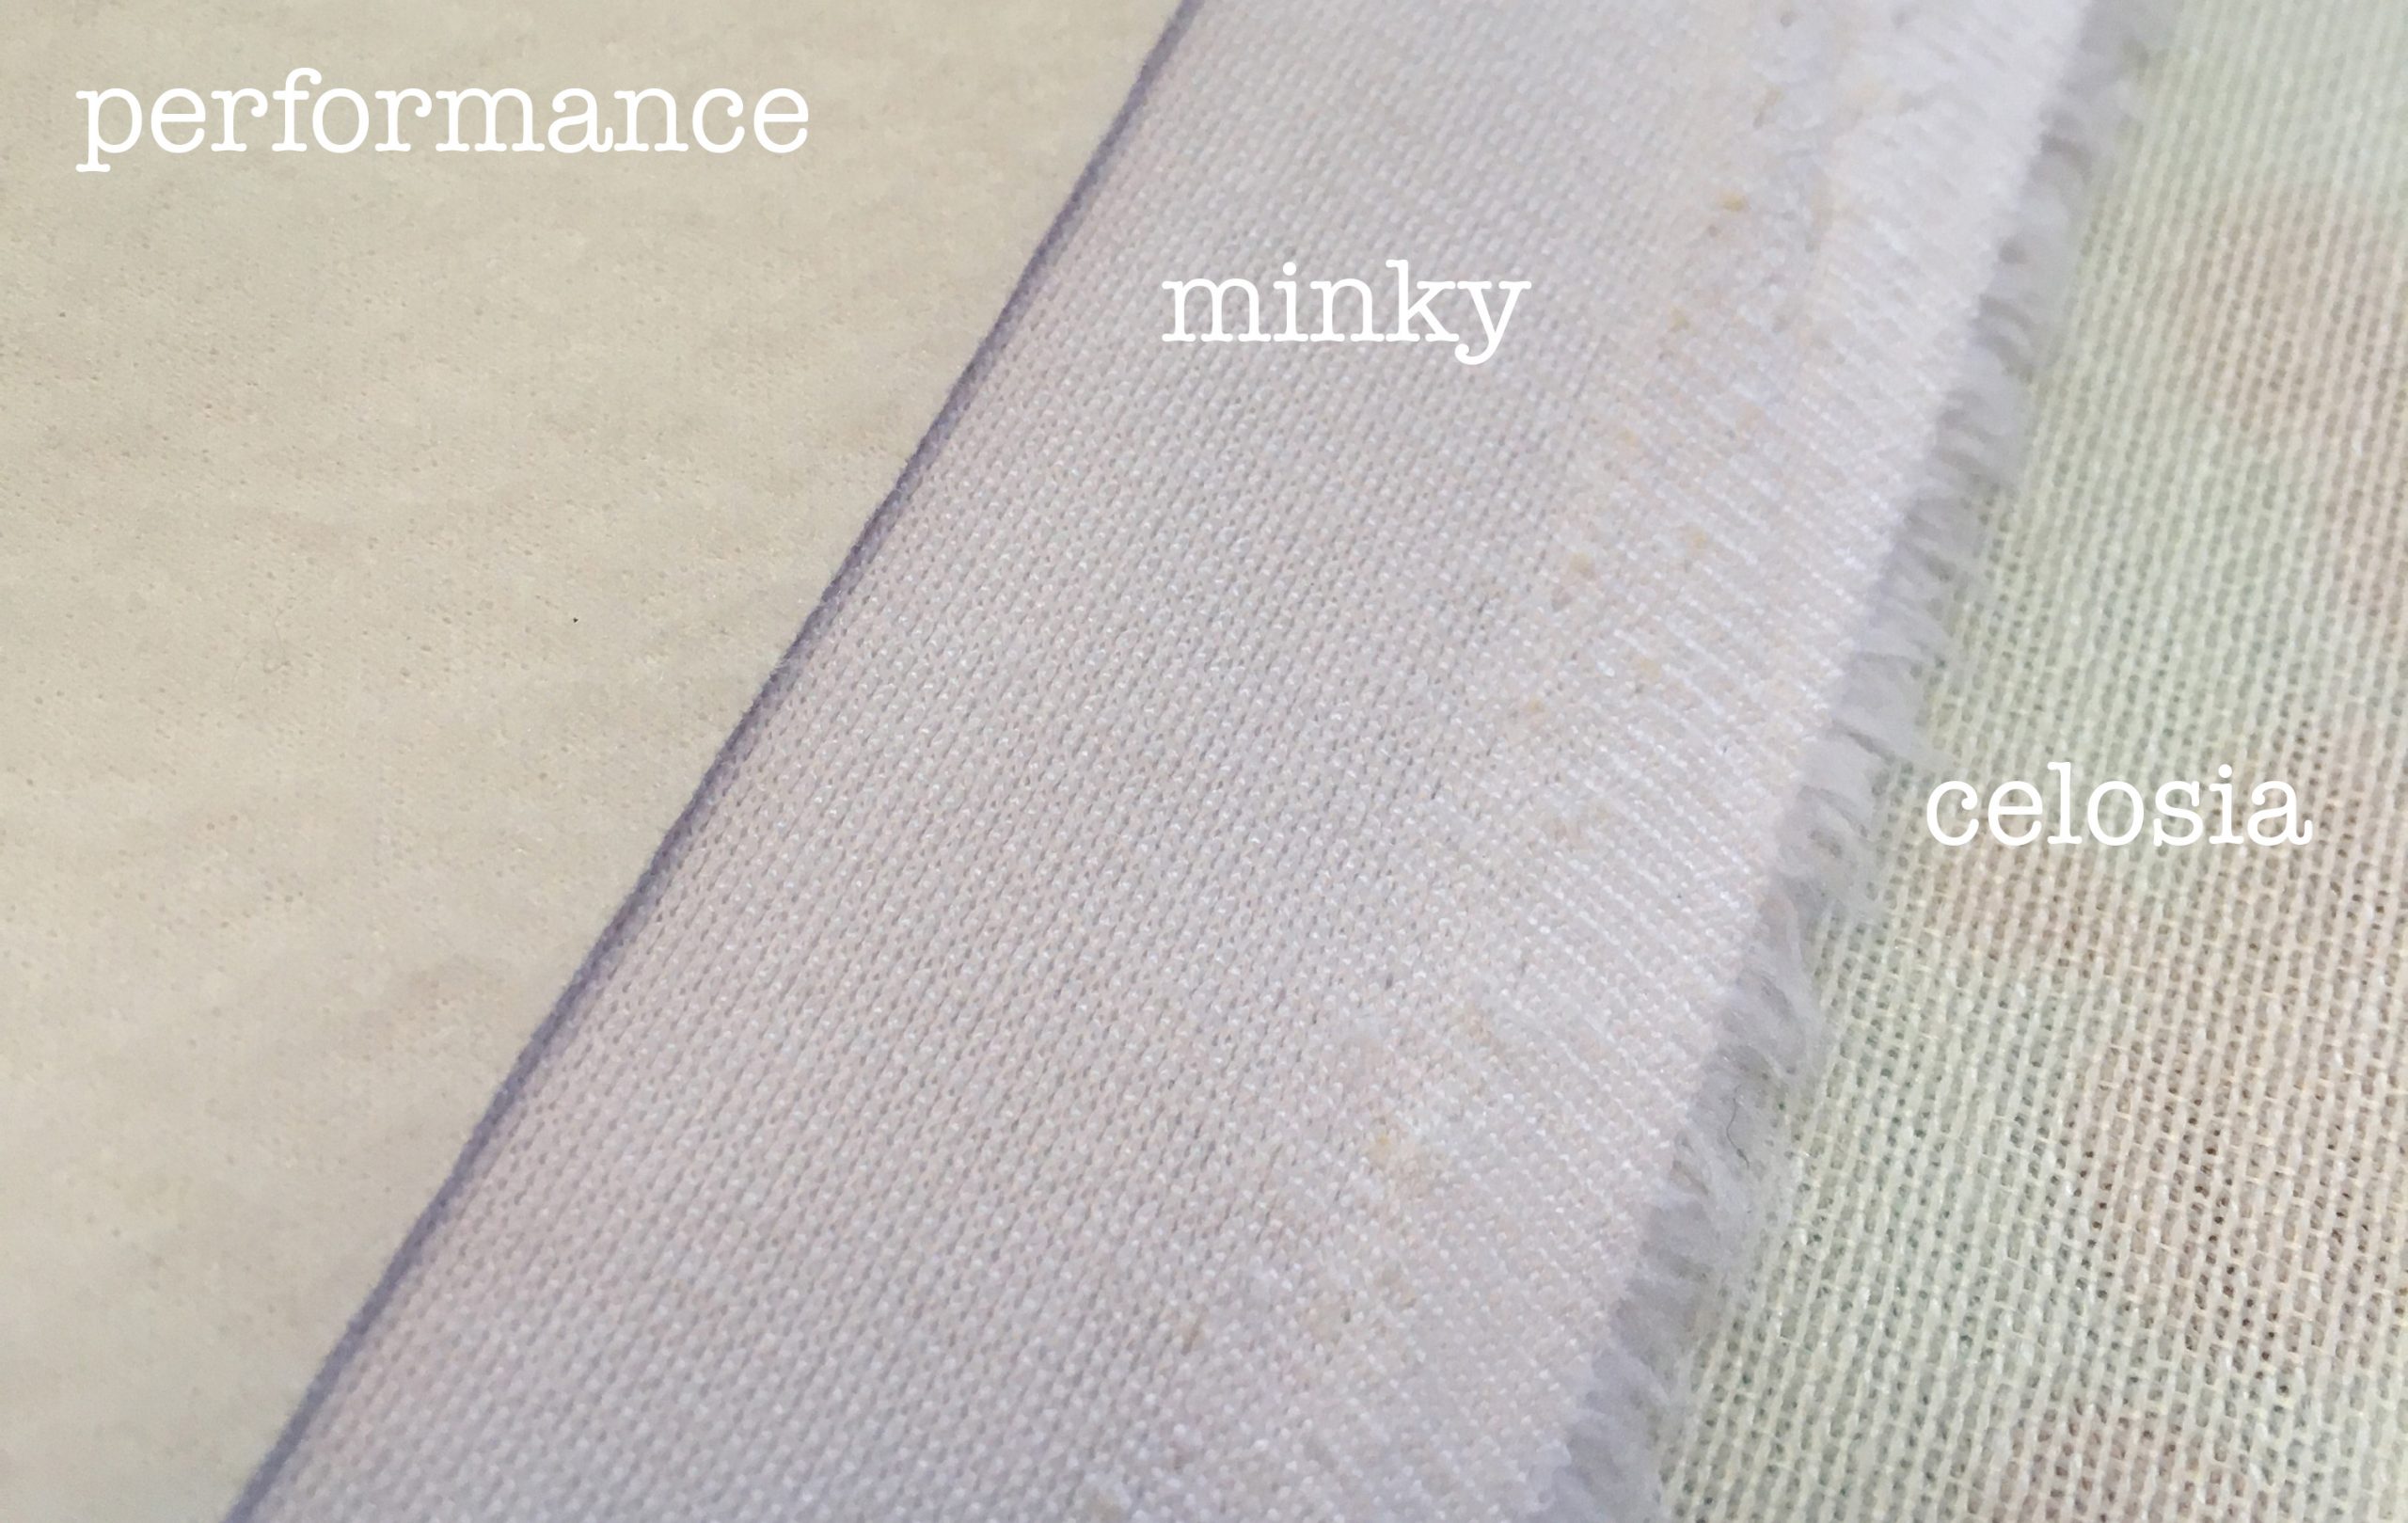
The Back

One thing I think is always missing is a little info about what the reverse side of these fabrics look and feel like, which really is important for some projects.

Celosia Velvet is the most “upholstery” like with a plain woven back. Although Spoonflower’s site says it is a knit, it’s definitely not, as you can see the structure and it frays exactly as you’d expect a woven to do. It’s not exactly rough on the back, but it feels sturdy rather than soft.

Performance Velvet has a backing that feels and looks a lot like craft felt. It’s soft and has a slightly brushed look. The Performance Velvet is much creamier white on the back than it is on the front.

Minky has a smooth knit on the reverse.
What can you make with them?

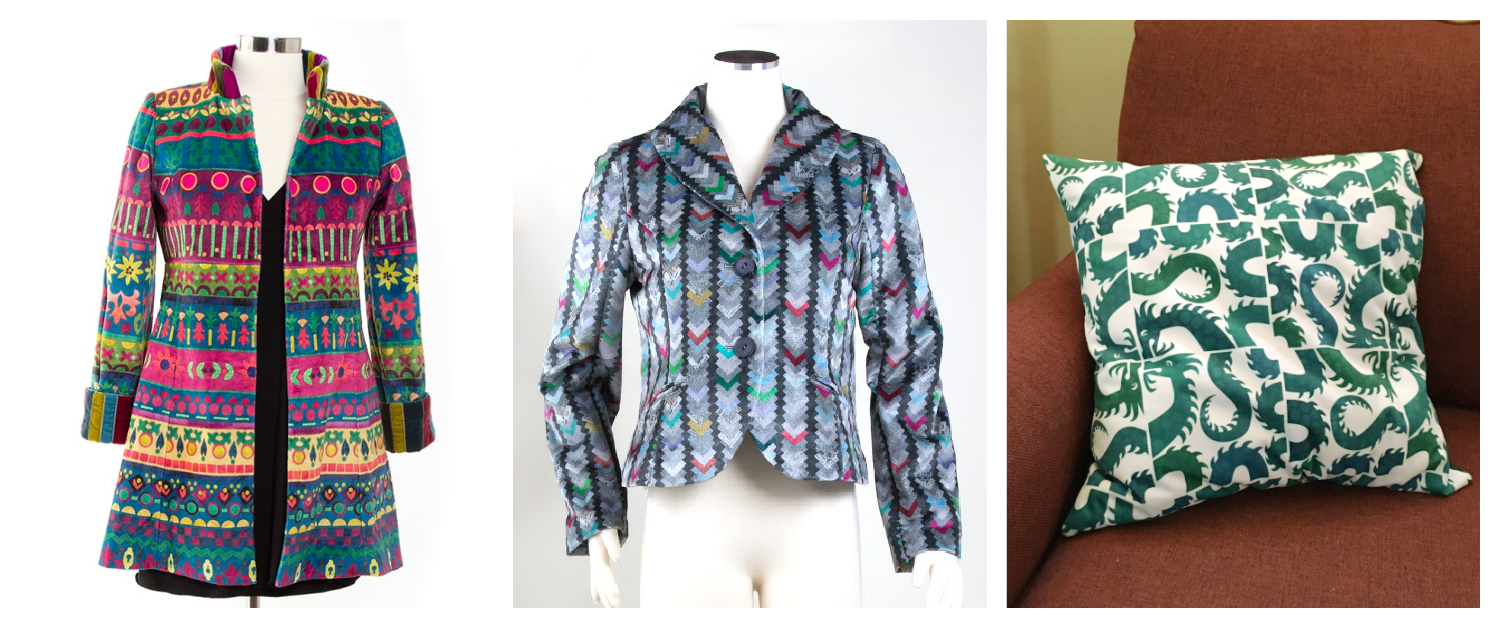
I’ve used all three of these fabrics for different projects: Sara Coat (left), Filter Other Offset Jacket (middle), SeaSerpent Pillow (right). (you can click on any of those titles to read more and see larger photos)

Before Spoonflower had introduced either of the velvet options, I decided to try making a coat out of Minky. Because the Minky is so relatively light weight and stretchy, I actually backed all of the fabric with an inner lining of a lightweight twill before I sewed this coat so it looks much less drapey than it really is. That was a good choice for this project. It has a great texture, almost like a faux fur and the cuffs were made with velvet ribbon stitched in stripes. It was easy to sew, although I think my choice to line it also helped with that. If I were going to make a throw or a cuddly quilt, I would go for Minky with something else as a backing because it is so drapey; the others would make very stiff blankets.

The Filter Other Offset jacket is made from Celosia Velvet and I think the photo almost captures some of the sheen. Because velvet has a nap that wants to “push” the pieces out of alignment with each other as you sew, this took a lot of pinning and I really appreciated the walking foot on my sewing machine. I have also made a number of tote bags and other project bags from Celosia and everyone always comments on how nice it feels. I think Celosia makes a project look lush. I don’t think Celosia would be really great for clothing other than outerwear type uses. It really doesn’t have much drape so it’s good for structured or tailored shapes. I have also done a little upholstery with the Celosia Velvet.

The pillow was made from a sample fat quarter I ordered of the Performance Velvet. It’s a great pillow fabric! It was easier to sew than the Celosia (with much less slipping) and I really like the way it felt substantial and it went together so fast. I would really like to make a jacket from the Performance Velvet next. I think because it is a little softer/drapier than Celosia that it might make a great casual jacket or a winterweight skirt. I also think Performance Velvet would make great stuffed toys.

The fabric design featured in this post is called Wildflowers. It is made from a cut paper illustration made from handpainted paper and is available in my Spoonflower shop.

11 January, 2021

Resting the Creative Brain through Stitching

2021-02-12T18:28:39-06:00An Artist's Life, Embroidery|1 Comment

I spent August stitching. And September. And October, November and December. In fact, I still have a box of stitchery on my dining room table and I pick up something almost every night. My job as an artist means that I am making things during most of the hours of my work days. Depending on the day I am writing, or photographing, or assembling kits or making things for my Etsy shops, or making art for one of half a dozen projects. But all of those things I do during my work day are “me powered”. I am the one designing, making the creative decisions, assembling the practice pieces, doing the edits. It’s a one-woman-show here and if I’m not doing the work, then nothing gets done. Most of the time I love it and I love being busy.

But with everything going on in 2020, my creative brain was feeling just tapped out. I’m sure this sounds familiar to some of you. I managed to keep a lot of my regular juggling balls in the air, so to speak, but I just didn’t have much capacity for taking on anything new or thinking of the next new thing or the next big art project. The class proposals that I used to put together in an afternoon were taking me a week (with a lot of procrastinating). I couldn’t think of anything to write here on the blog. I didn’t want to make art because it just felt like it was simultaneously too much to take on and why-bother-because-no-ones-going-to-see-it-anyway-because-everything-is-cancelled. It was really frustrating and exhausting, so I just kept getting sucked in to doomscrolling and reading Firefly novelizations because it was just easier.

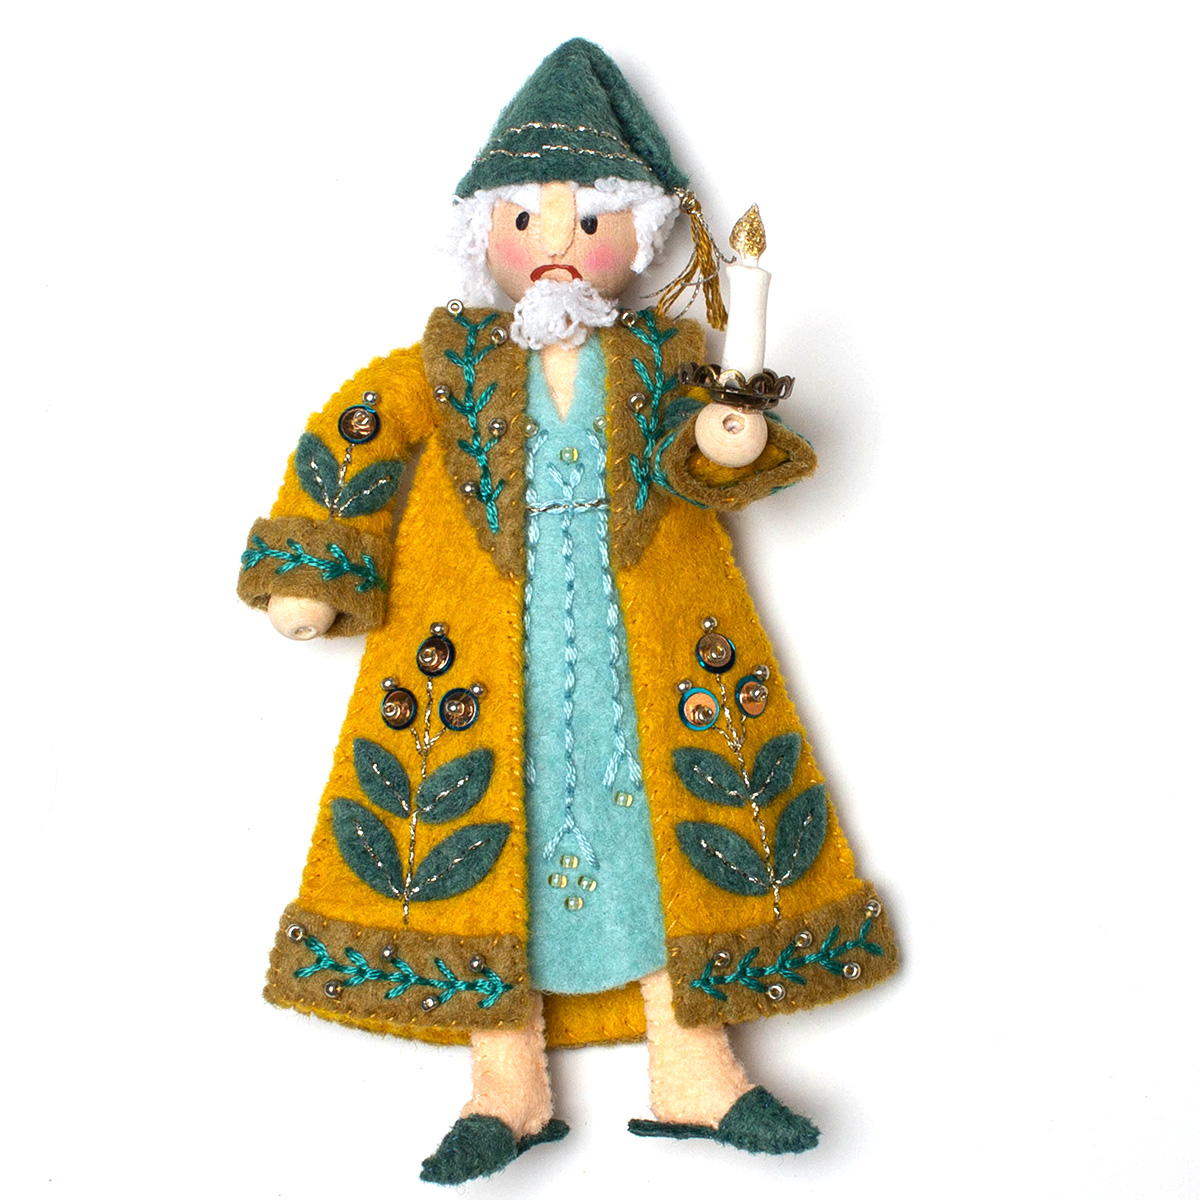
Mr Scrooge Ornament, pattern by Larissa Holland mmmcrafts.etsy.com

Let me introduce you to my friend Mr. Scrooge. He’s an ornament pattern designed by my friend Larissa Holland at mmmcrafts. (This one’s stitched by me.) He’s grouchy and “bah humbug”ish and utterly delightful. At least I think so. In August, I decided that Mr. Scrooge was the perfect metaphor-in-an-ornament-form for 2020, so I decided to make Scrooges for my sisters as a Christmas gift. He’s made from embroidered and beaded felt and entirely hand sewn, so really a perfect kitchen table kind of project while watching vintage episodes of All Creatures Great and Small.

What I realized as I started stitching was that it was exactly what my brain needed: to follow someone else’s pattern. There are lots of studies and reports about the physical act of stitching or knitting and the meditative effects it has on the brain. But what I also came to realize is that there is something really restful in following a pattern and letting someone else steer the creative ship. Although I got to do the fun part of picking out the colors, for everything else, I didn’t have to problem solve, troubleshoot, design, or choose anything. I just followed the directions. Stitch the beads to lower left coat trim, then go to step 5.

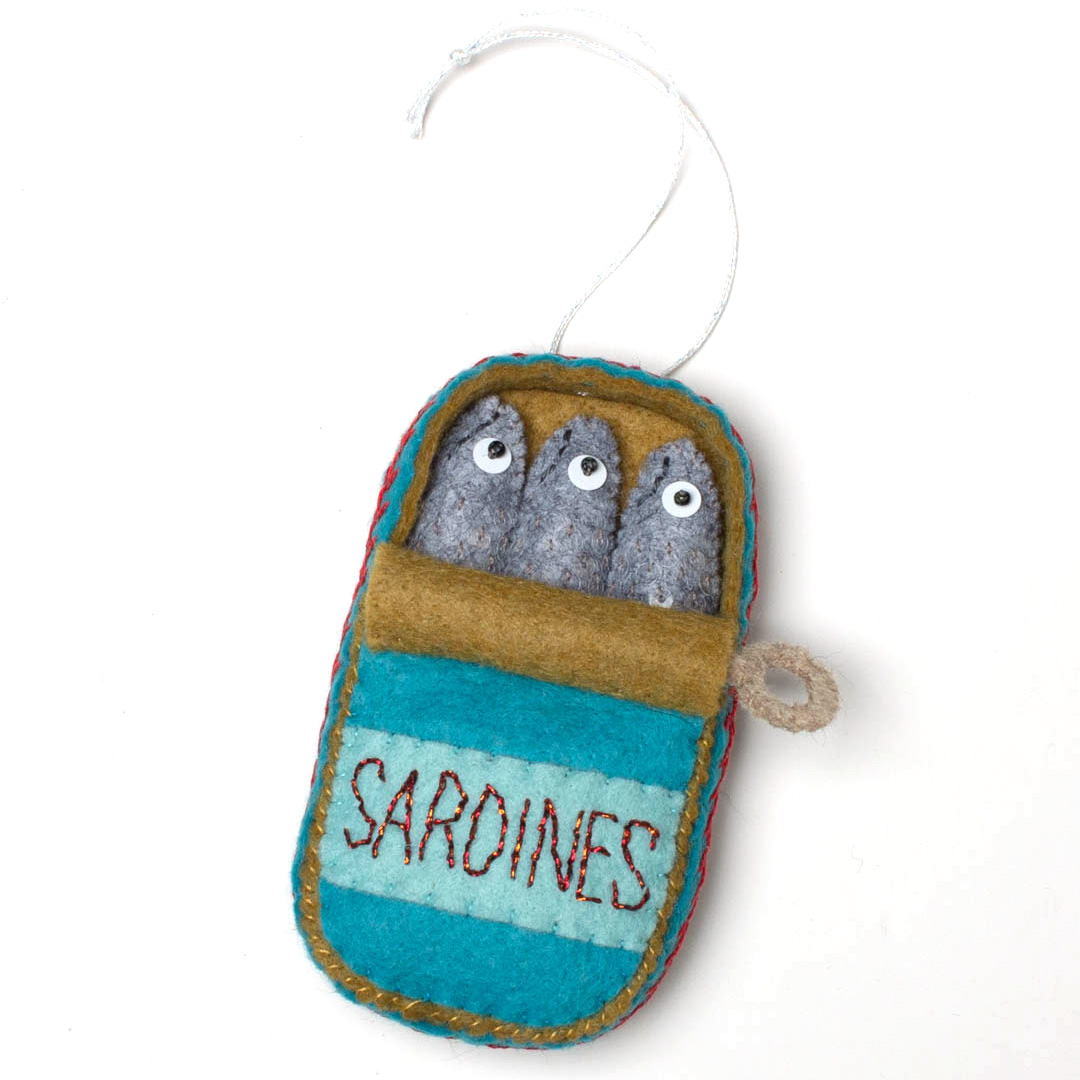
Soon, almost every night after dinner, I would turn off the news and the social media and pull out some felt to stitch. Although I don’t do embroidery or beadwork for my business (for many reasons), I love both things and my hands have years of practice. It was fun to have a reason to dive into my stash of beads and vintage sequins for the perfect shade of rosy pink or try out that Kreinik metallic thread. I made one Scrooge. And then another. I stitched my way through the rest of the autumn making Santas, Scrooges and sardines for friends and family. And even though it’s January, I started a partridge and a pear for myself this week.

I realized, as I was thinking about writing this post about my new-found daily stitch practice, that it was the practice of craft that I needed right now. I didn’t make a lot of art this past year, but instead I found myself drawn to the craft: the precise, detailed, fine craft work with my hands. That’s what made me feel grounded and my brain feel a little less overwhelmed. And it’s not just me. My mom took up cross-stitch again this year after a couple of decades. My dad made me a turned wood rolling pin for Christmas. I saw a good friend post a finished cross-stitch piece on her Facebook feed just this morning. Another friend made a delicate straw star ornament for me that I have hanging in my window and I Instagram chatted with someone else about learning to make our first hard covered books coincidentally on the same week. My friend MissChiff has assigned herself 1000 hours of painting to practice her watercolor skills.

So maybe if you’ve run out of Mandalorian episodes and you want to reduce your mindless phone surfing, try folding some origami. Or teaching yourself cross stitch. Or finger knitting. Or sketching. Or making friendship bracelets. Maybe it’s the thing your brain needs too.

20 April, 2020

Making masks. My version with some sewing tips.

2020-04-20T15:50:22-05:00Everything Else, Freebies & Patterns, Sewing & Design, Tutorials, Videos|3 Comments

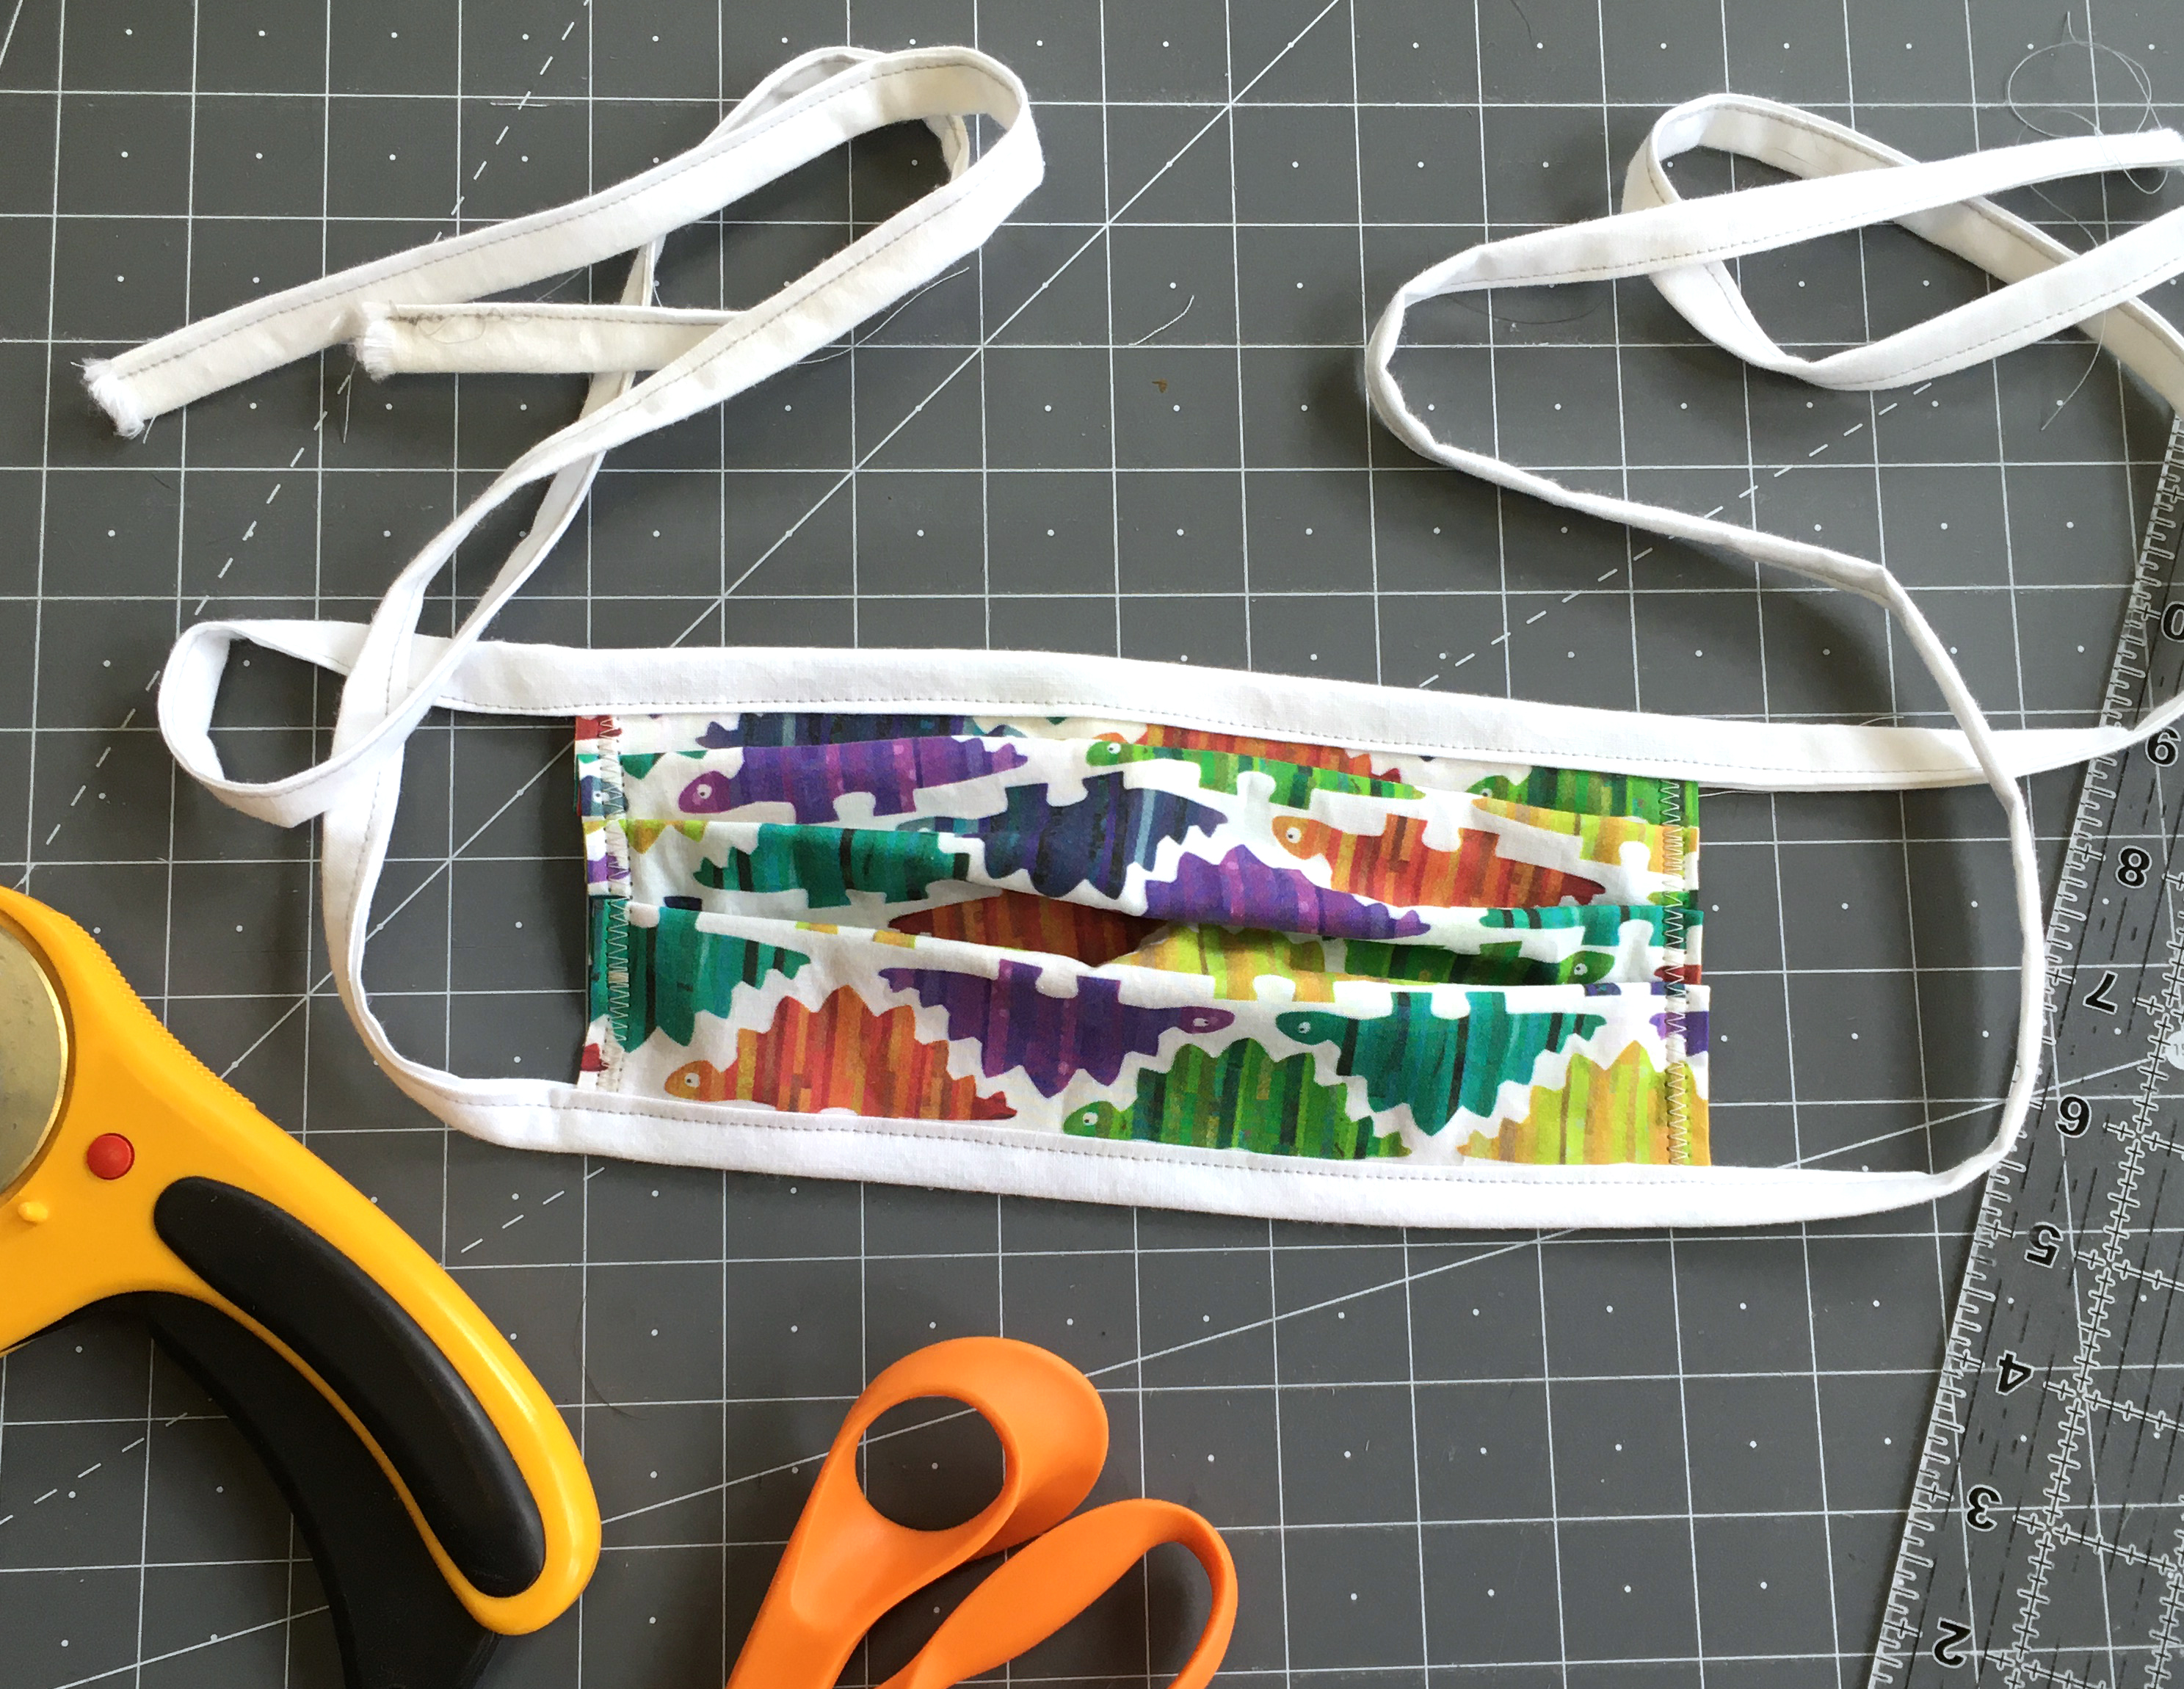
I posted a tutorial for working with a bias tape maker today on my social media channels (I will post that again below) and got a bunch of questions about how I was making masks and what pattern to use. So here is what I have been making. This is a version that is based on one that was posted by Fairview Health (associated with the University of MN). I have simplified the sewing instructions they provided because I saw a simpler and cleaner way to construct them. I am not going to provide a step-by-step tutorial here, but I will give you the basics.

Cut two rectangles that are 9 inches by 7 inches. They recommended using 2 different fabrics so you can easily tell the inside and outside of the mask if you need to take it off and put it back on.

Place the rectangles right sides together and stitch just the short sides, using about a 1/4 inch seam allowance. Turn right side out and press flat.

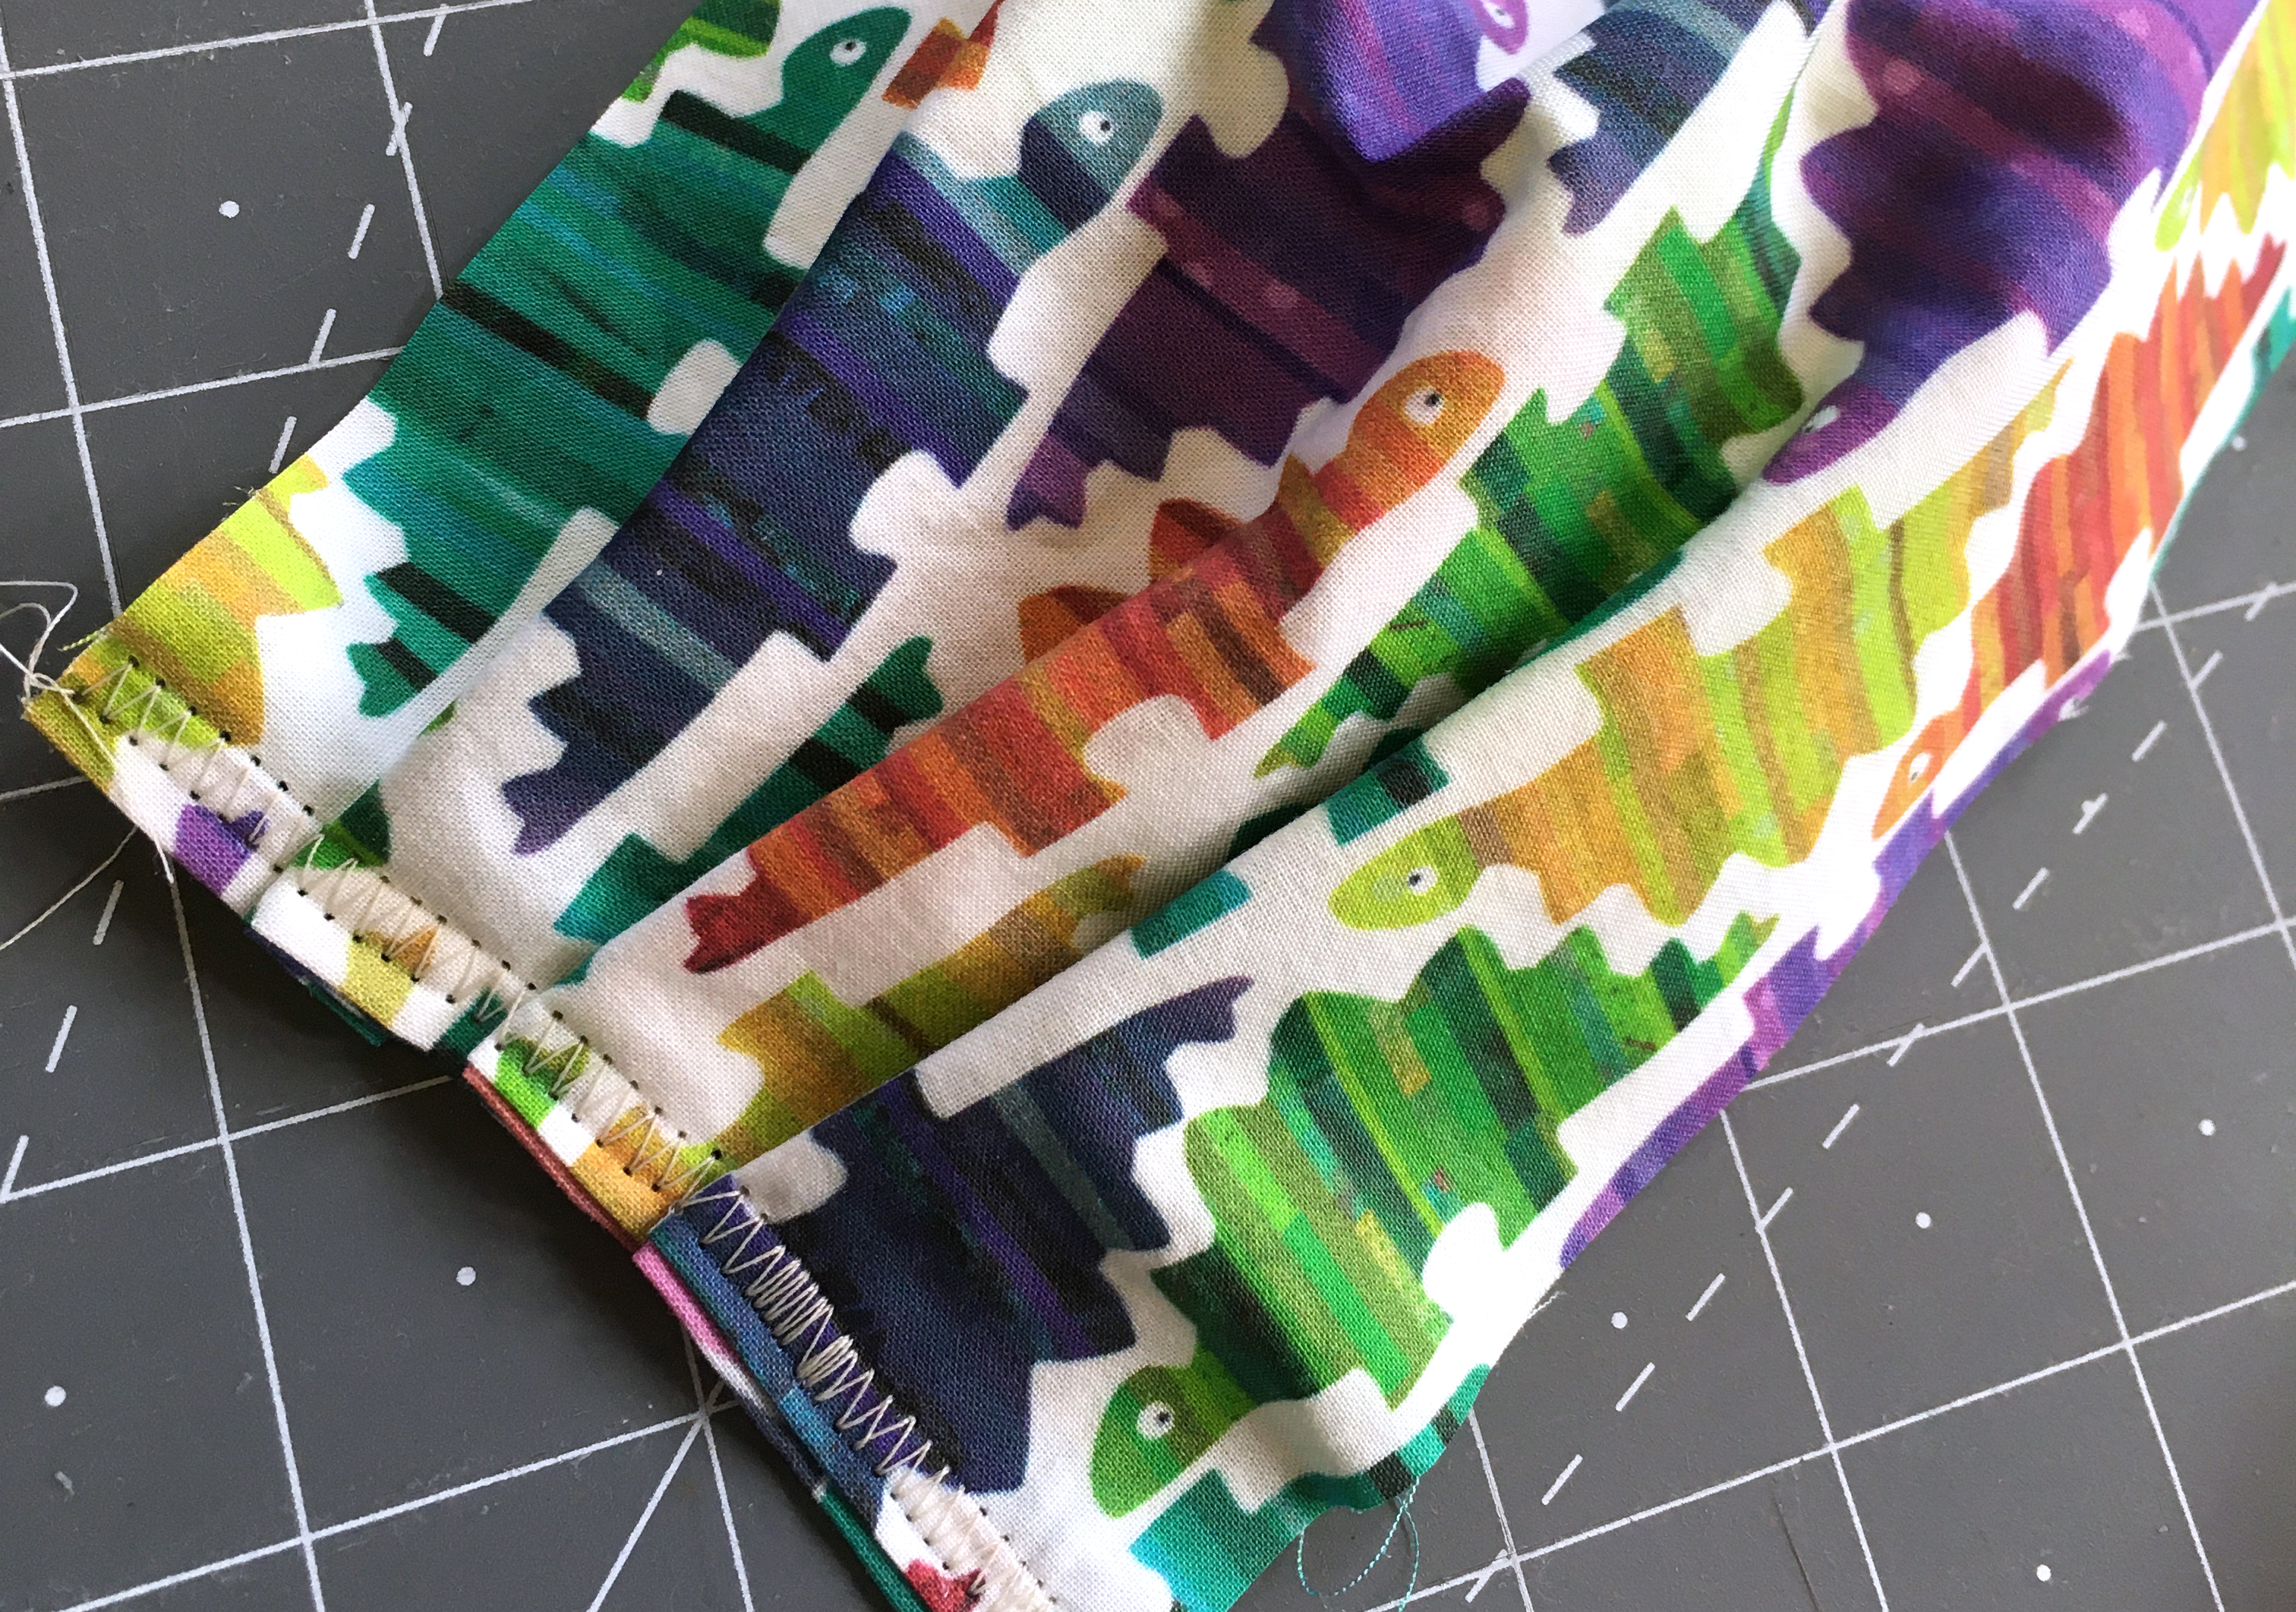
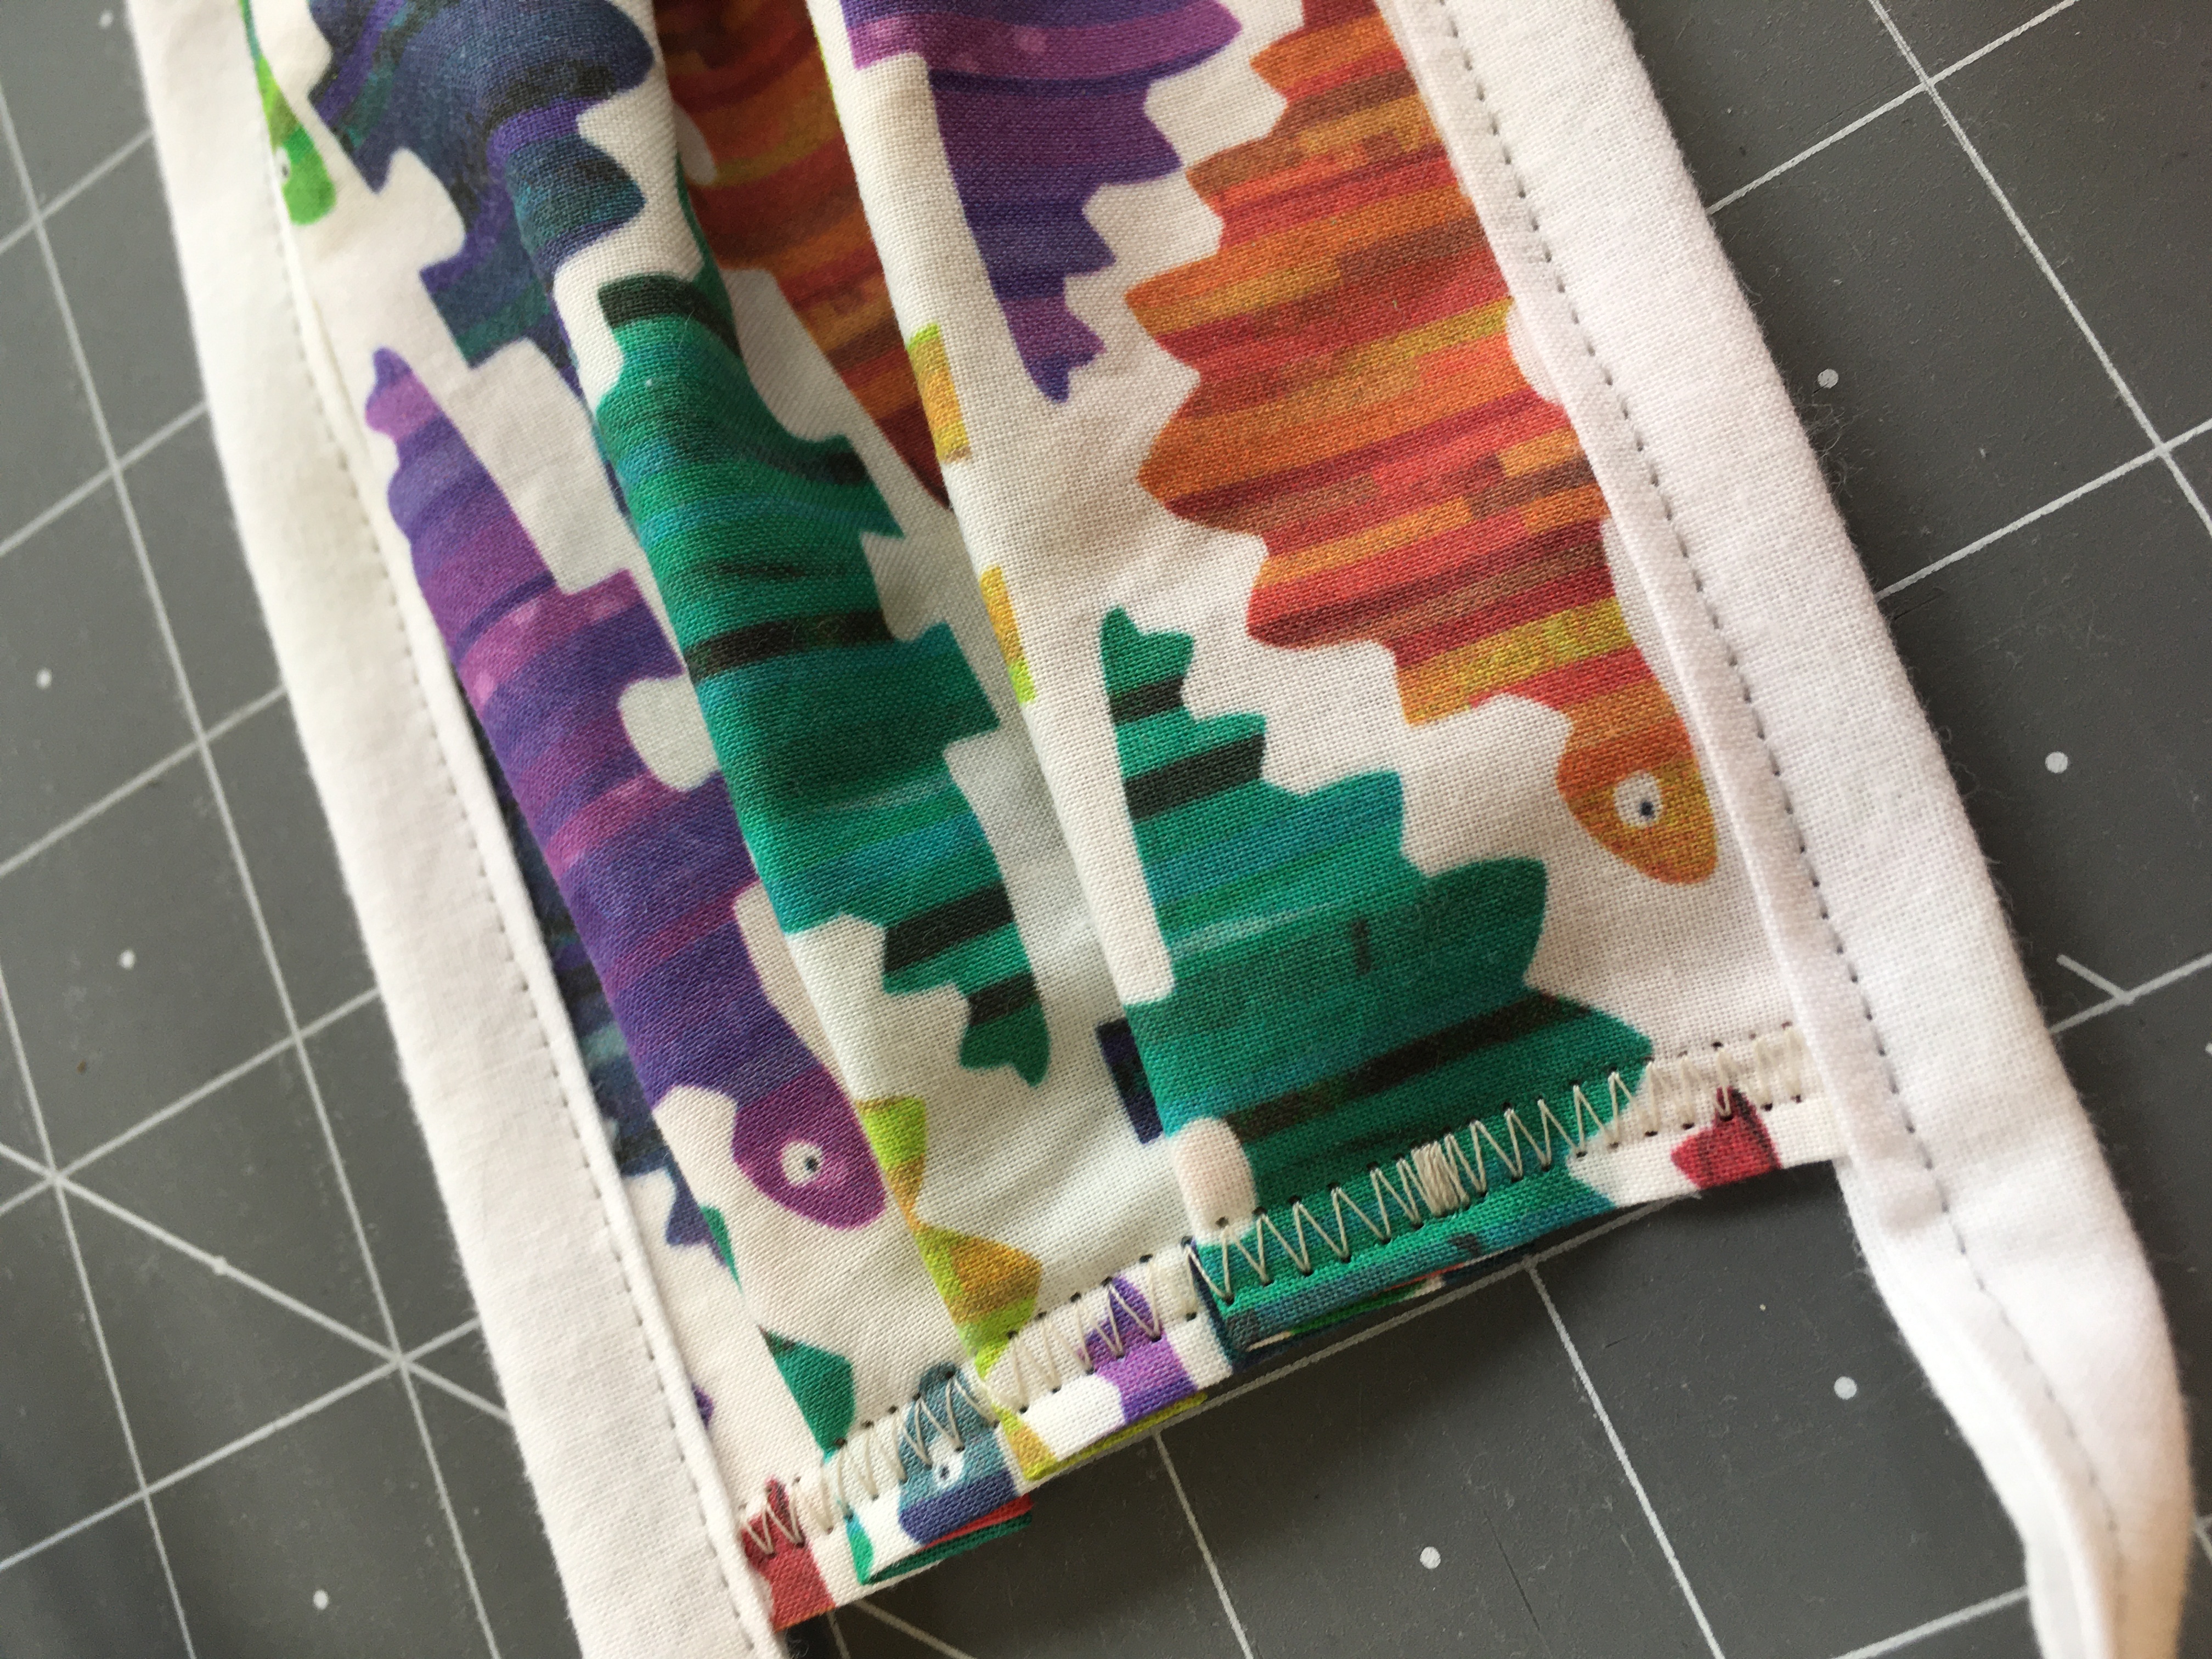
Make three tuck pleats about 1/2 inch each along each short edge of the rectangle. You can pin these. (I have a lot of practice at this kind of thing, so I just eyeballed them.) I used a wide zig-zag stitch to then stitch over the pleats about 1/4 from the edge. This is thick, so don’t force your machine or you will break needles at this step. Do this on each short edge. It doesn’t matter which way you pleat, as long as the pleats go the same way on each end.

Cut two strips of fabric to make ties. I use the full width of a piece of 45″ super soft muslin, cut 2 inches high. (I fold the fabric in half, matching the selvedge edges and cut it all the way across.) A 45″ fabric is a great length to make ties.

Use a 1 inch bias tape maker to press the long edges of your strips (see video below). Fold the strips in half (the short way) to find the center and pin that to the center of one long edge of the mask. Starting at the end of the tie strip, fold in half the long way (matching the folded edges) and stitch close to the fold. When you get to the mask (pinned to the center of the strip), slide the mask raw edge inside the folded strip and keep stitching all the way to the end of the tie. Repeat for the other long edge of the mask. You don’t need to worry about finishing the short ends of the ties, because they are the fabric selvedge, they won’t fray. These are reversible (top to bottom and inside outside)
If you’d like a wire/pipecleaner to help fit it to the top of the nose, that would be very easy to insert at the center as you are stitching the tie strips.

22 October, 2018

Designing stuffed toys with muslin mockups

2018-10-22T10:53:17-05:00Sewing & Design, Spoonflower & Fabric Design|1 Comment

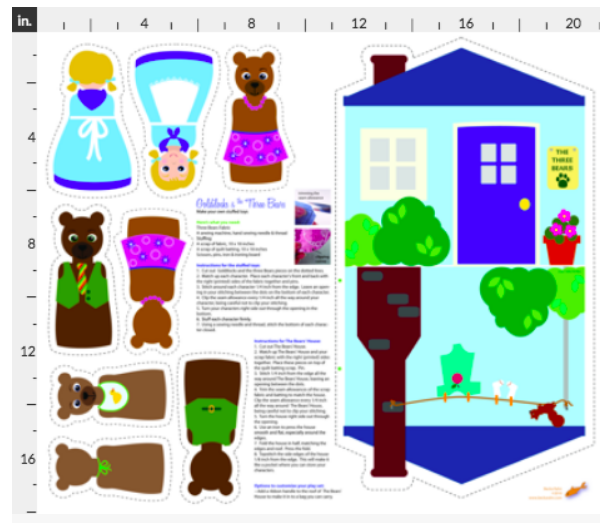
The Spoonflower design challenge this week was a cut-and-sew project that fit on a fat quarter. I love designing these kind of things. Some of my very first Spoonflower designs were sets of stuffed toys (Goldilocks and the 3 Bears, Red Riding Hood) where you could make all of the little characters as dolls or finger puppets and then they had their house which was a bag to store them all in. All of the pieces fit on a fat quarter and you just cut them out and sewed them together. The way this design challenge was set up you could make a cut-and-sew anything. Many people made stuffed animal toys, but you could do things bags, headbands or bibs as long as they fit on that 21×18 inch rectangle.

I struggled with this one a little bit. I was going to re-do a sheep stuffed toy pattern that I had in my Etsy shop years and years ago. I thought it would be easy to convert since I had already pattern tested it. But I just wasn’t excited about it and it’s a little fiddly to sew together.

Then I thought about a conversation I had with my friend Megan, who owns a local yarn and fabric store called Knit & Bolt. For a class I was teaching, I interviewed Megan about trends she saw in fabrics – what sells, what doesn’t sell, what do people come in looking for. One of the things that came up was cut-and-sew panels like these. They are popular at her shop, but one of the things she noticed about them is that although they seem like a really great beginner project for new stitchers, often the actual sewing parts are really difficult. She had an example of a cute cowboy doll, but the neck and arms were very skinny, which made it hard to turn right side out and stuff. The way that other parts attached to the body was complex. The shapes that you needed to sew were tight curves, which can be challenging for a beginner.

So I decided that I wanted to design something that was actually a beginner sewing project. Of course I came up with this pretty close to the deadline for the challenge (because don’t you always do your best work on a deadline?) So I thought about it and decided to rework some artwork I had already drawn.

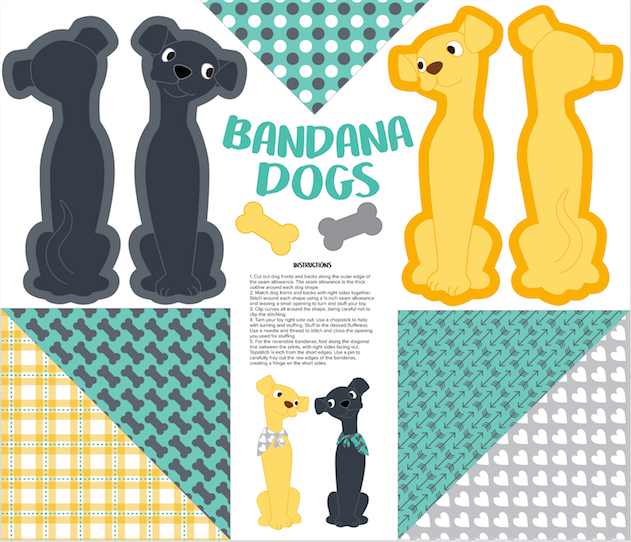
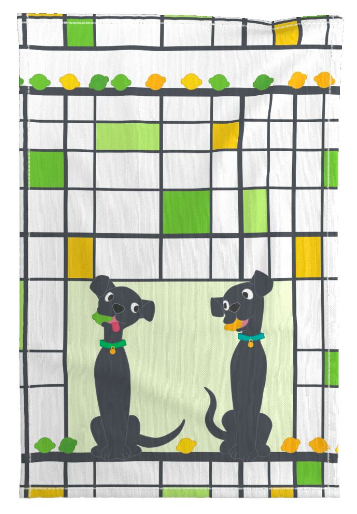
I drew these labradors for another design challenge entry for tea towels. They were inspired by a photo of a pair of mid-century ceramic statues of little black and white dogs. I thought they were really cute and it would be fun to rework them for a different kind of cut-and-sew design.

The best part is that they are really simple shapes, so they would be easy to stitch. I removed their tails and redrew them so that they were part of the artwork on the back of the dog. No skinny bits to stuff and sew. I added a wide seam allowance around each piece. The instructions say to sew with a 1/4 inch seam allowance, but I made my border a bit wider than that so there was a little room for wobbles in the sewing line. By making the seam allowance in the same color as all of the outlines in the art, you won’t see a white “gap” at the edges if your sewing isn’t quite perfect – the color will go all the way into the seam. There are still a few curves around the ears but they should be accomplishable for a novice stitcher. Then because I think that it’s always fun for your stuffed toys to be able to do something, I used the rest of the fat quarter to make reversible bandanas for the dogs, which you just fold in half, stitch the edge and then fray it out to make a fringe.

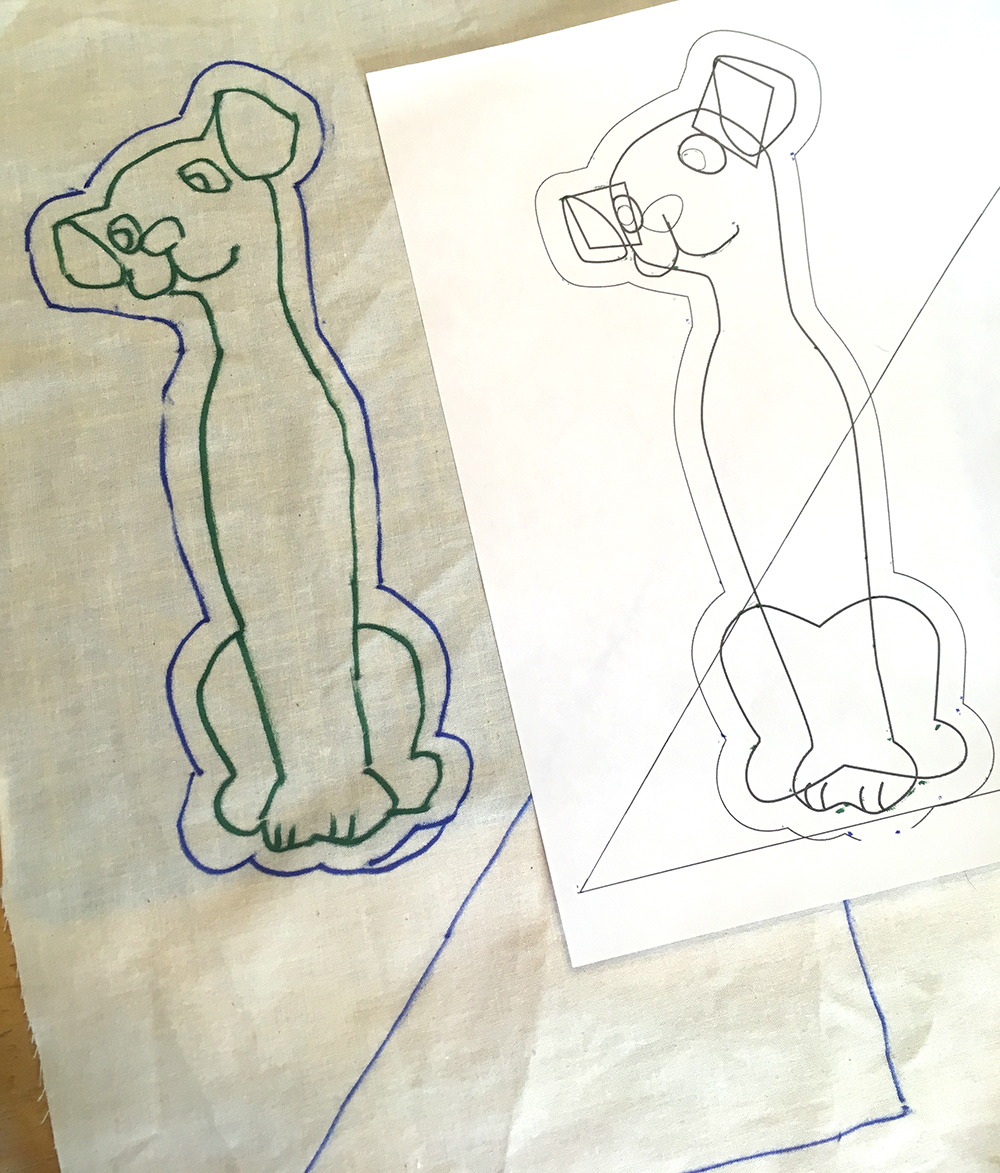
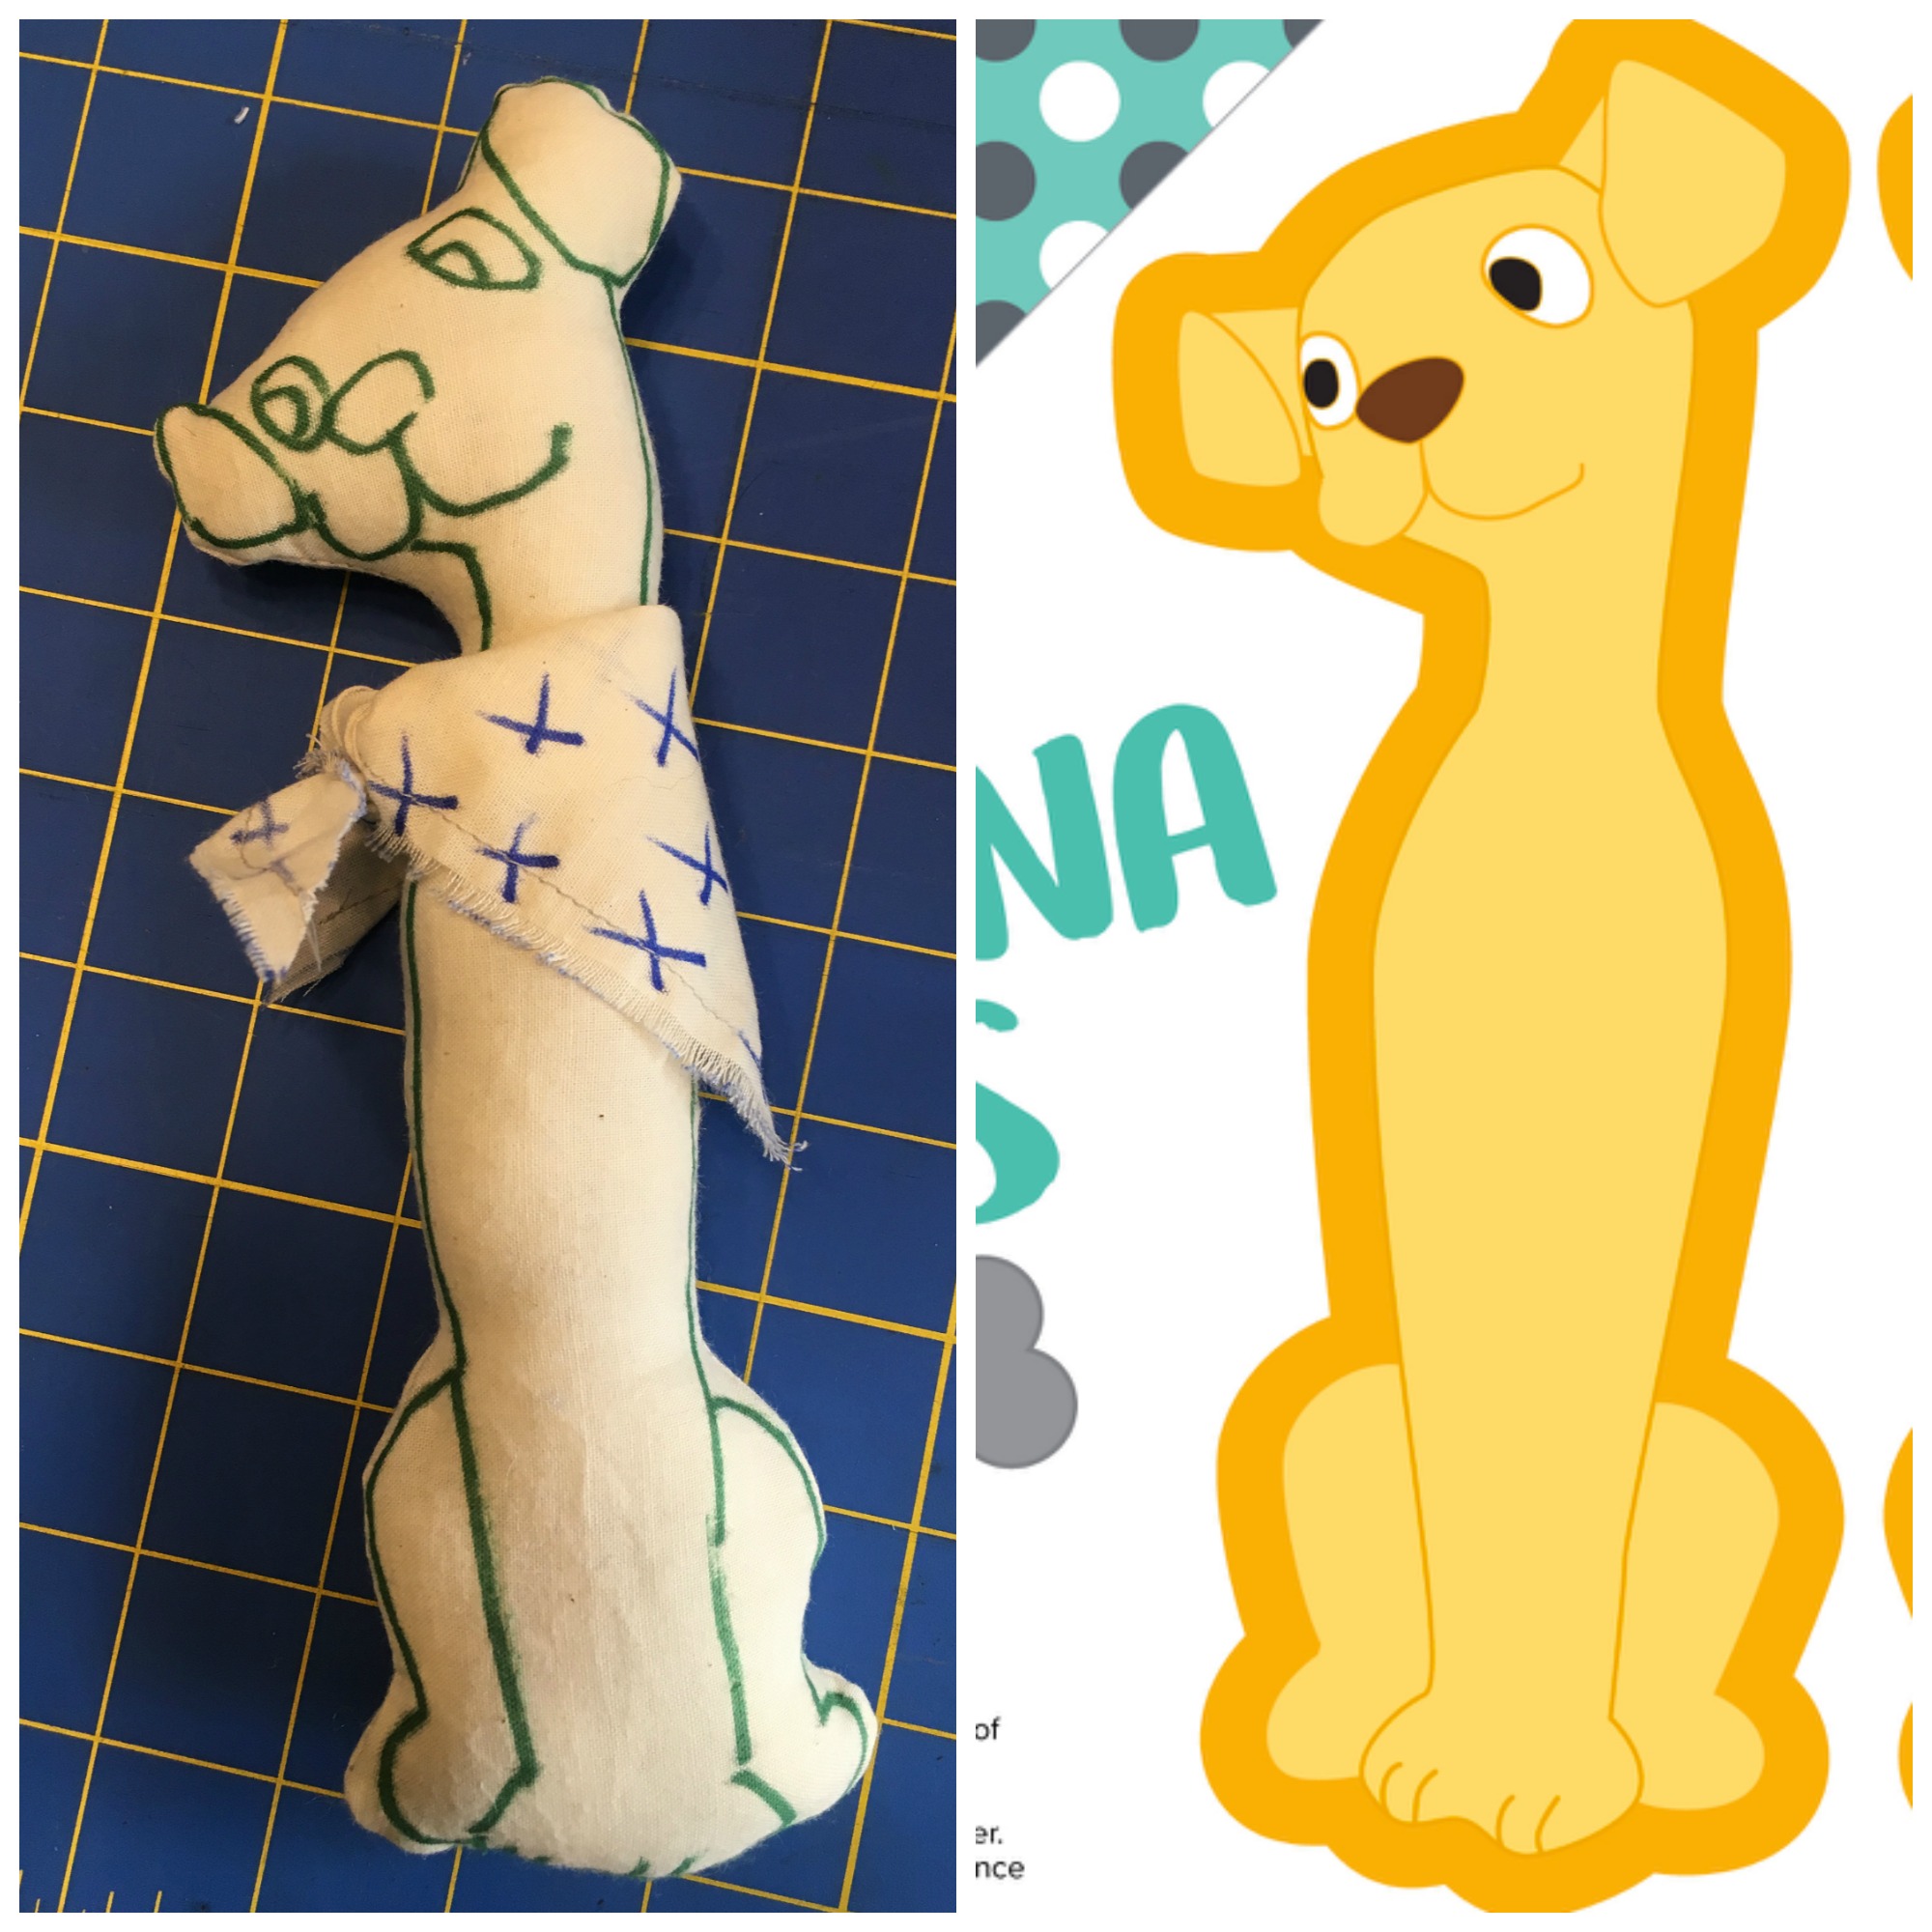
I didn’t have time to actually get these guys printed and tested before I had to turn in my design challenge entry, but I didn’t want to post something that was completely untested. So I made a muslin mockup. Because I drew this original design in Illustrator, I just converted my shapes into a line drawing and printed it out.

I taped the line drawing up to a bright window and traced my lines on to a piece of muslin with a sharpie. Then I could cut and sew a sample to scale and make sure everything worked out just right. Super fast prototyping! I can’t wait to get the finished printed sample so I can make up some with the final design, but this was enough for me to make sure everything worked and fit together.

16 October, 2018

Book Review: The NEW Spoonflower Quick Sew Project Book

2018-10-16T13:40:56-05:00Sewing & Design, Spoonflower & Fabric Design|Comments Off on Book Review: The NEW Spoonflower Quick Sew Project Book

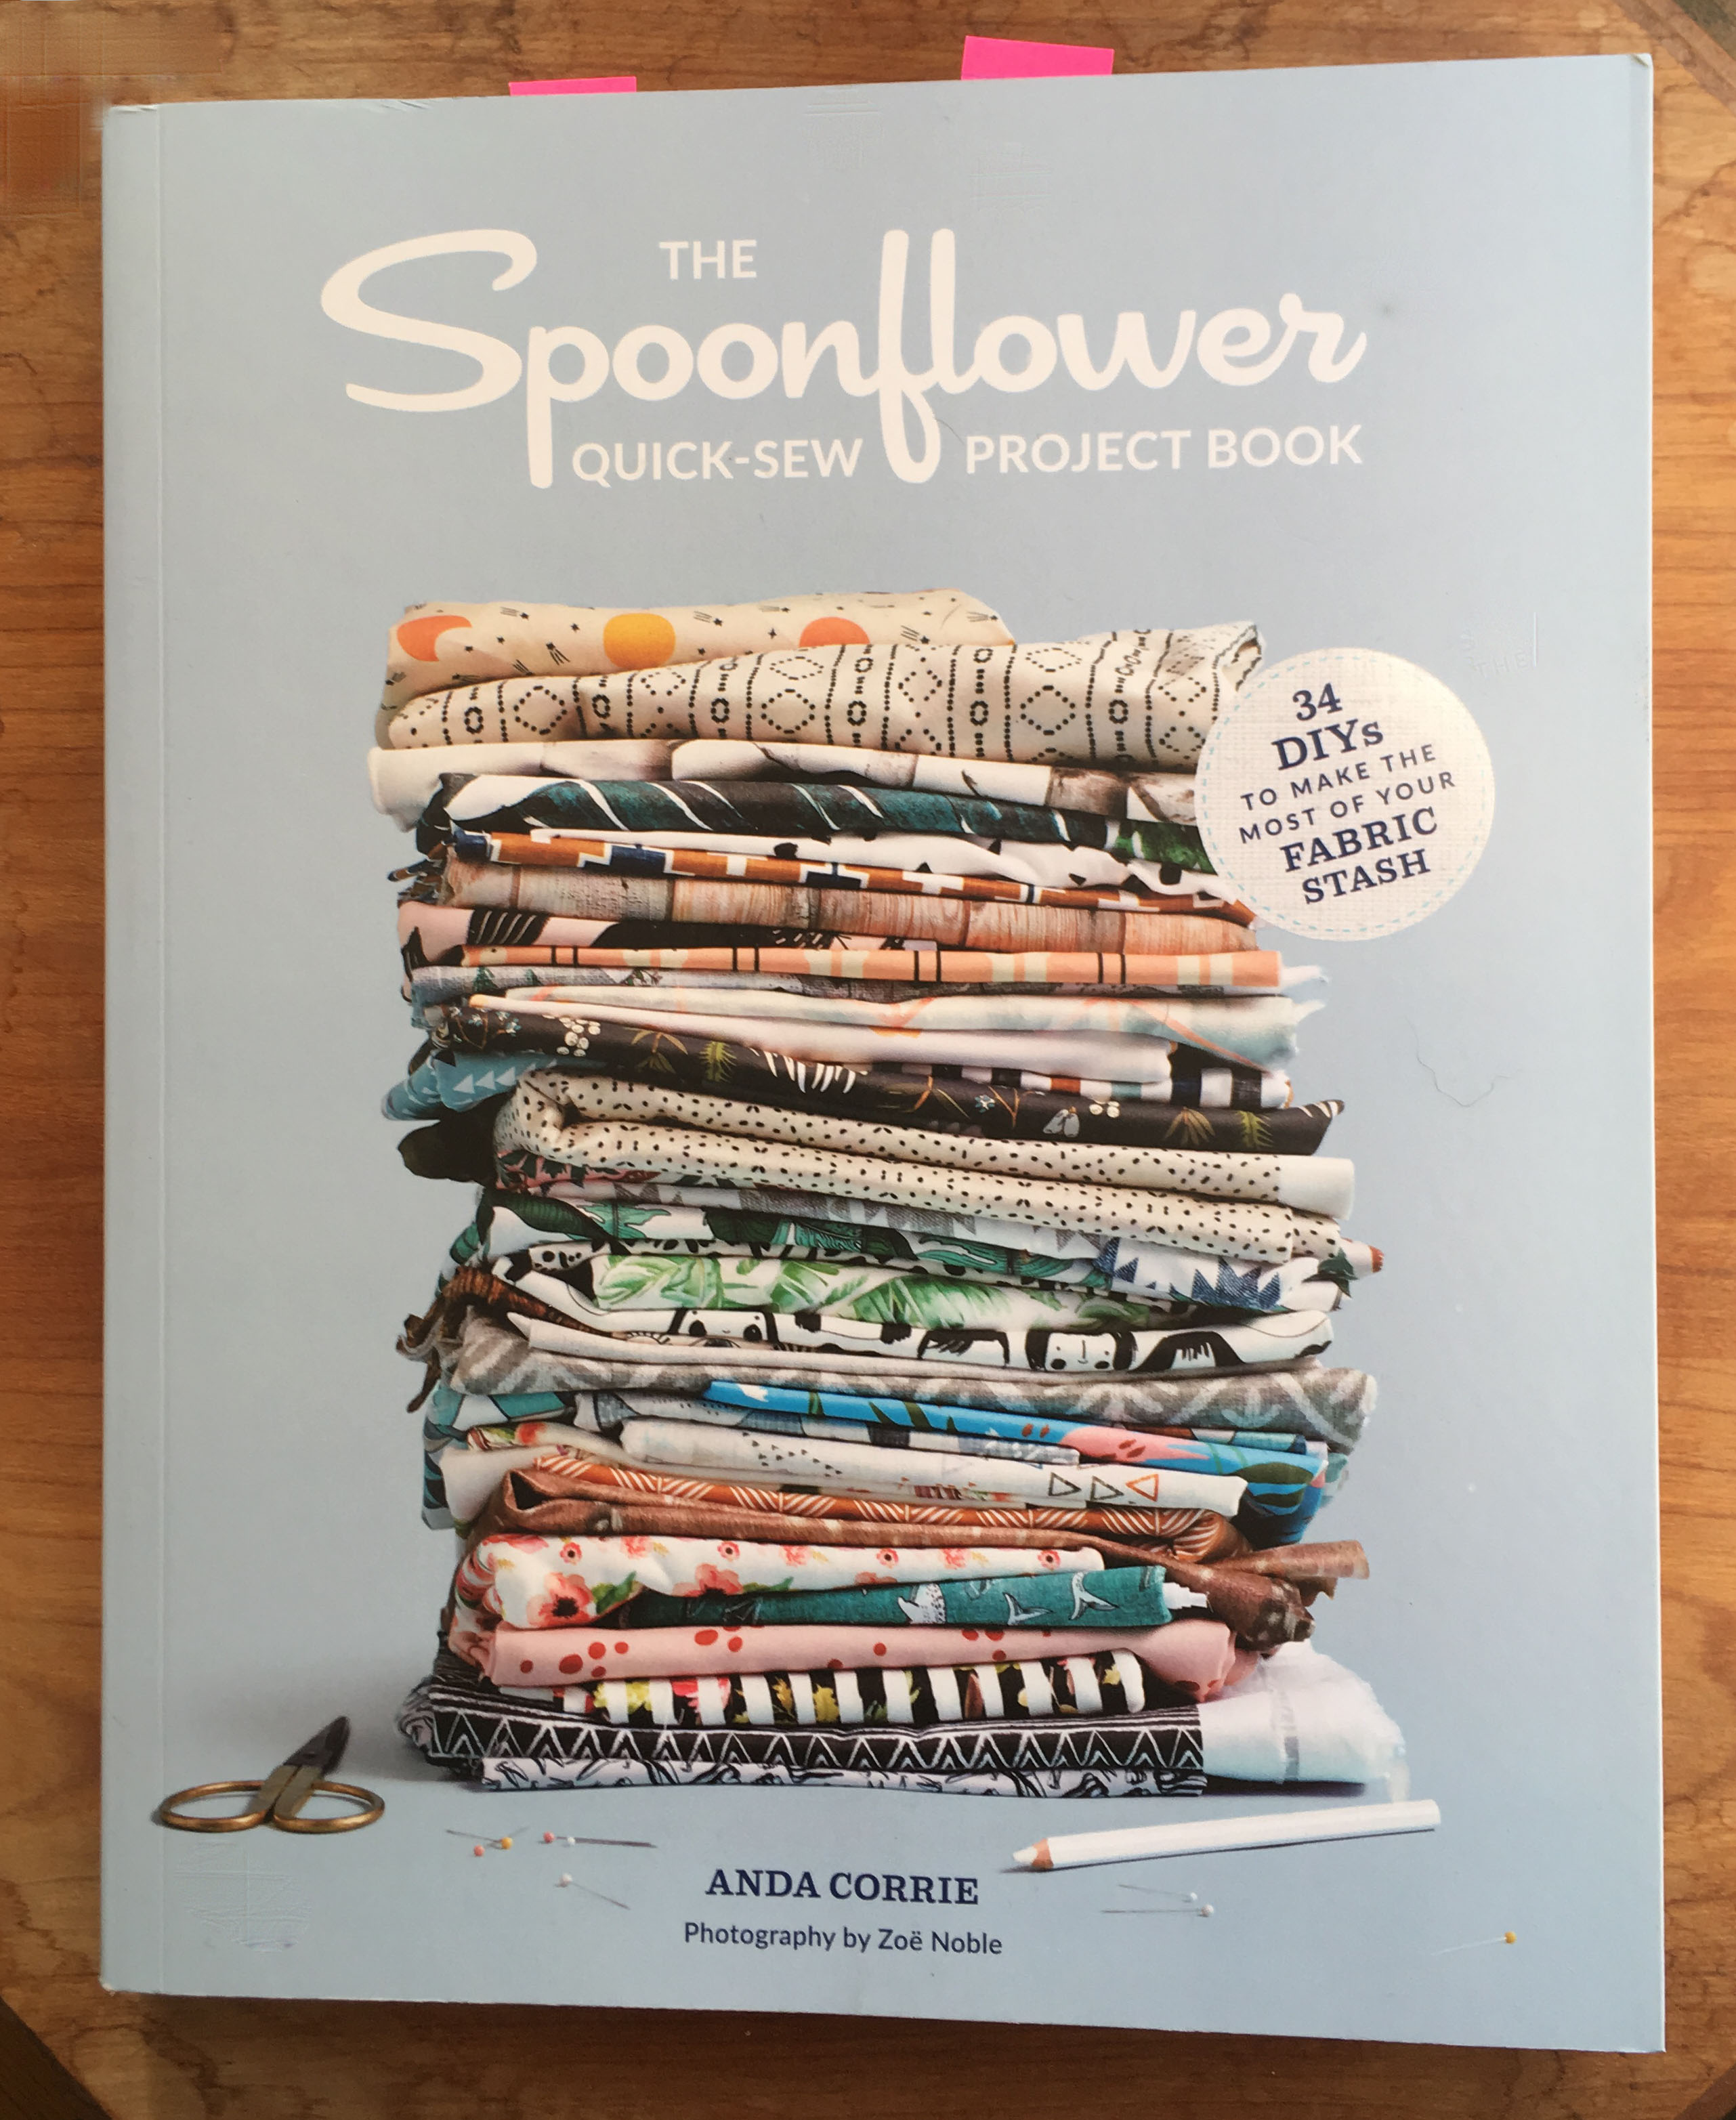
Just last week, Spoonflower released their second book, The Spoonflower Quick Sew Project Book. You might know that I worked on the first book, The Spoonflower Handbook and we get a little shout out in the intro for this new book.

The author for the Quick Sew book is my friend Anda Corrie. I have known Anda for a long time, although we only met in person in 2016. Anda worked at Etsy for many years and I asked her to be a juror for a grant program that I administrated when I still worked in the arts admin world. She also was a contributor to the first Spoonflower book. She has a project (pg 85) and she did the illustrations for the book. I love the aesthetic of her fabric designs: colorful, whimsical, and simple, but in a way that has so much character.

I wanted to tell you about this new book and a little about what I think is great about it. (This isn’t a sponsored post or anything like that. Everything I say here is my own thoughts and impressions.)

The book in a nutshell

It’s a sewing book. Where the Spoonflower Handbook focused on teaching you ways to create your own design, the main focus of this book is sewing. It has a great variety of projects that use different amounts of fabric from swatch to several yards. Although there are several projects that show you how to design something that is personalized, that isn’t the main goal. In some ways, I feel like this one is the prequel to the other. The Quick Sew book teaches you how to sew some great basic things with designs you get in the Marketplace, the Handbook takes it one step further to showing you how to then design your own fabrics. They are great companions.

Sewing skills needed for these projects vary. Some are great beginner projects for those who are just learning to sew. Some are a little trickier or demand a little patience. I tried one of the trickier projects, which I will show you later in the post.

Projects I love

I picked out three different projects which I wanted to highlight. My favorite section might honestly be the Notions & Trims section of the book.

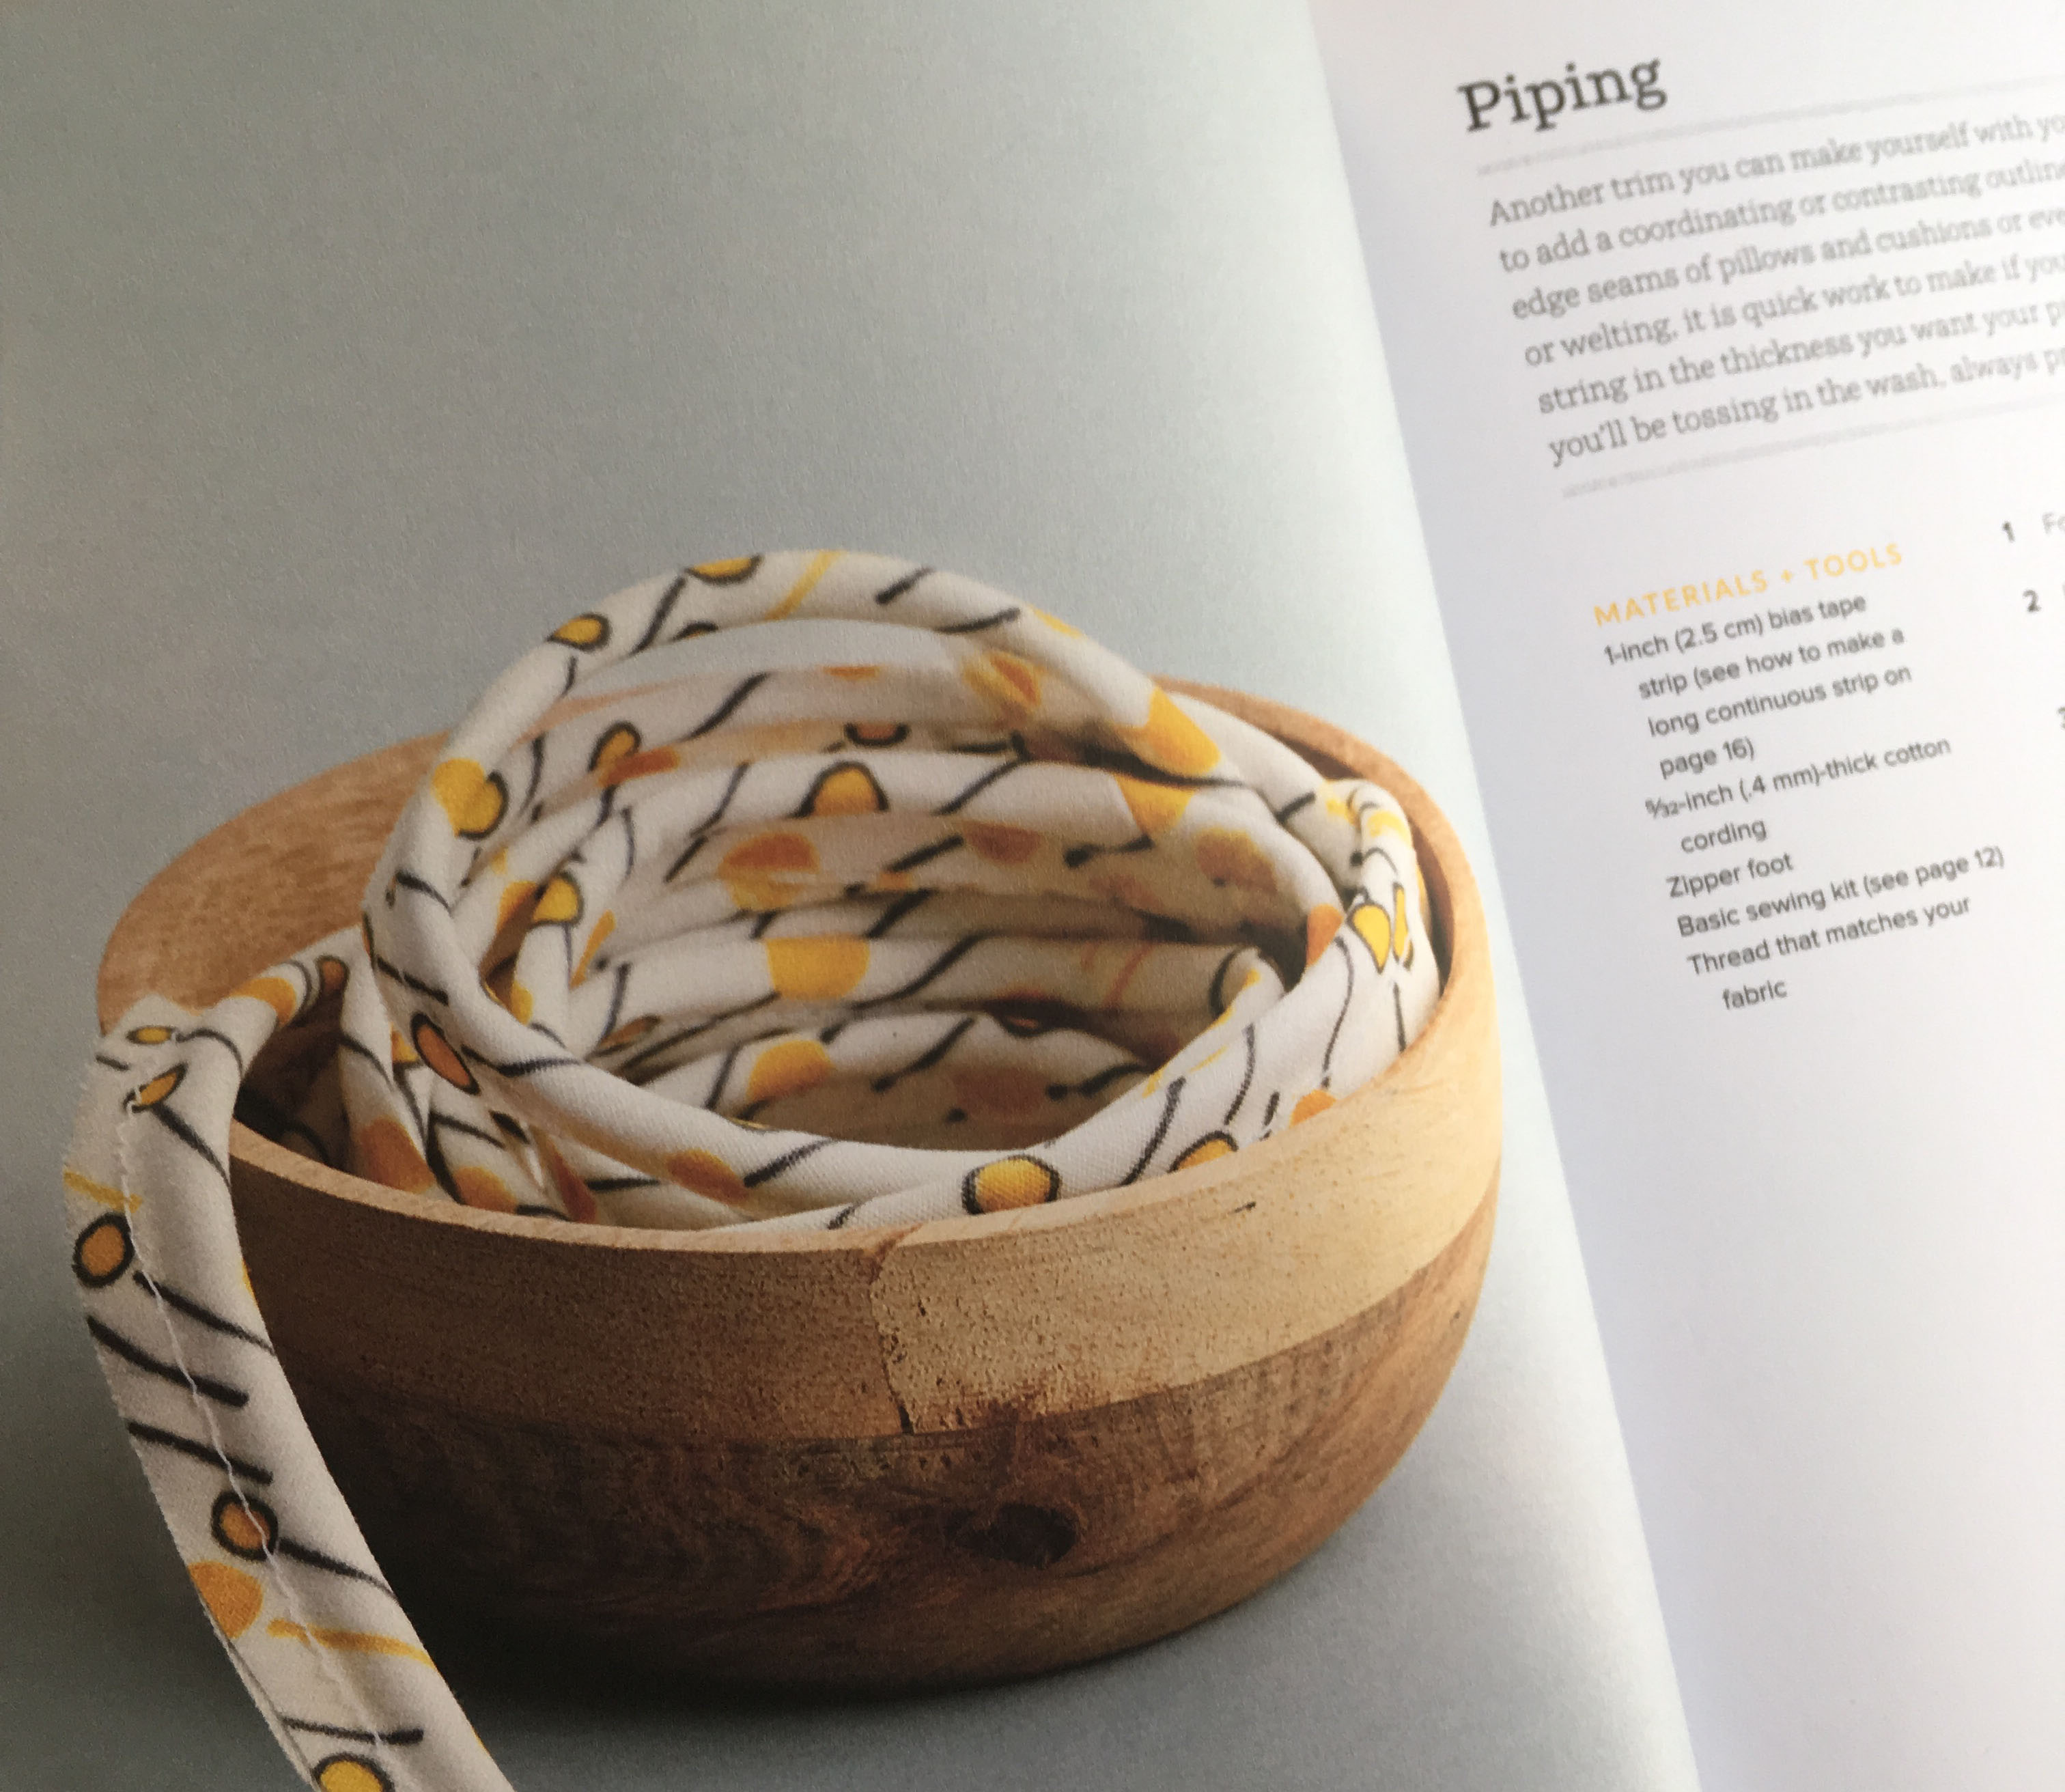
I have looked at a lot of beginner sewing books and I have never actually seen a section that breaks down and shows you how to make bias binding, piping, and covered buttons. I use these things all the time and I always make my own because I have a certain way I want them to look or a color I need to match and the premade things that are available are pretty limited. The piping is my favorite from this section. I figured it out by a lot of trial and error, which was not always successful. Did you even know you could make your own piping?

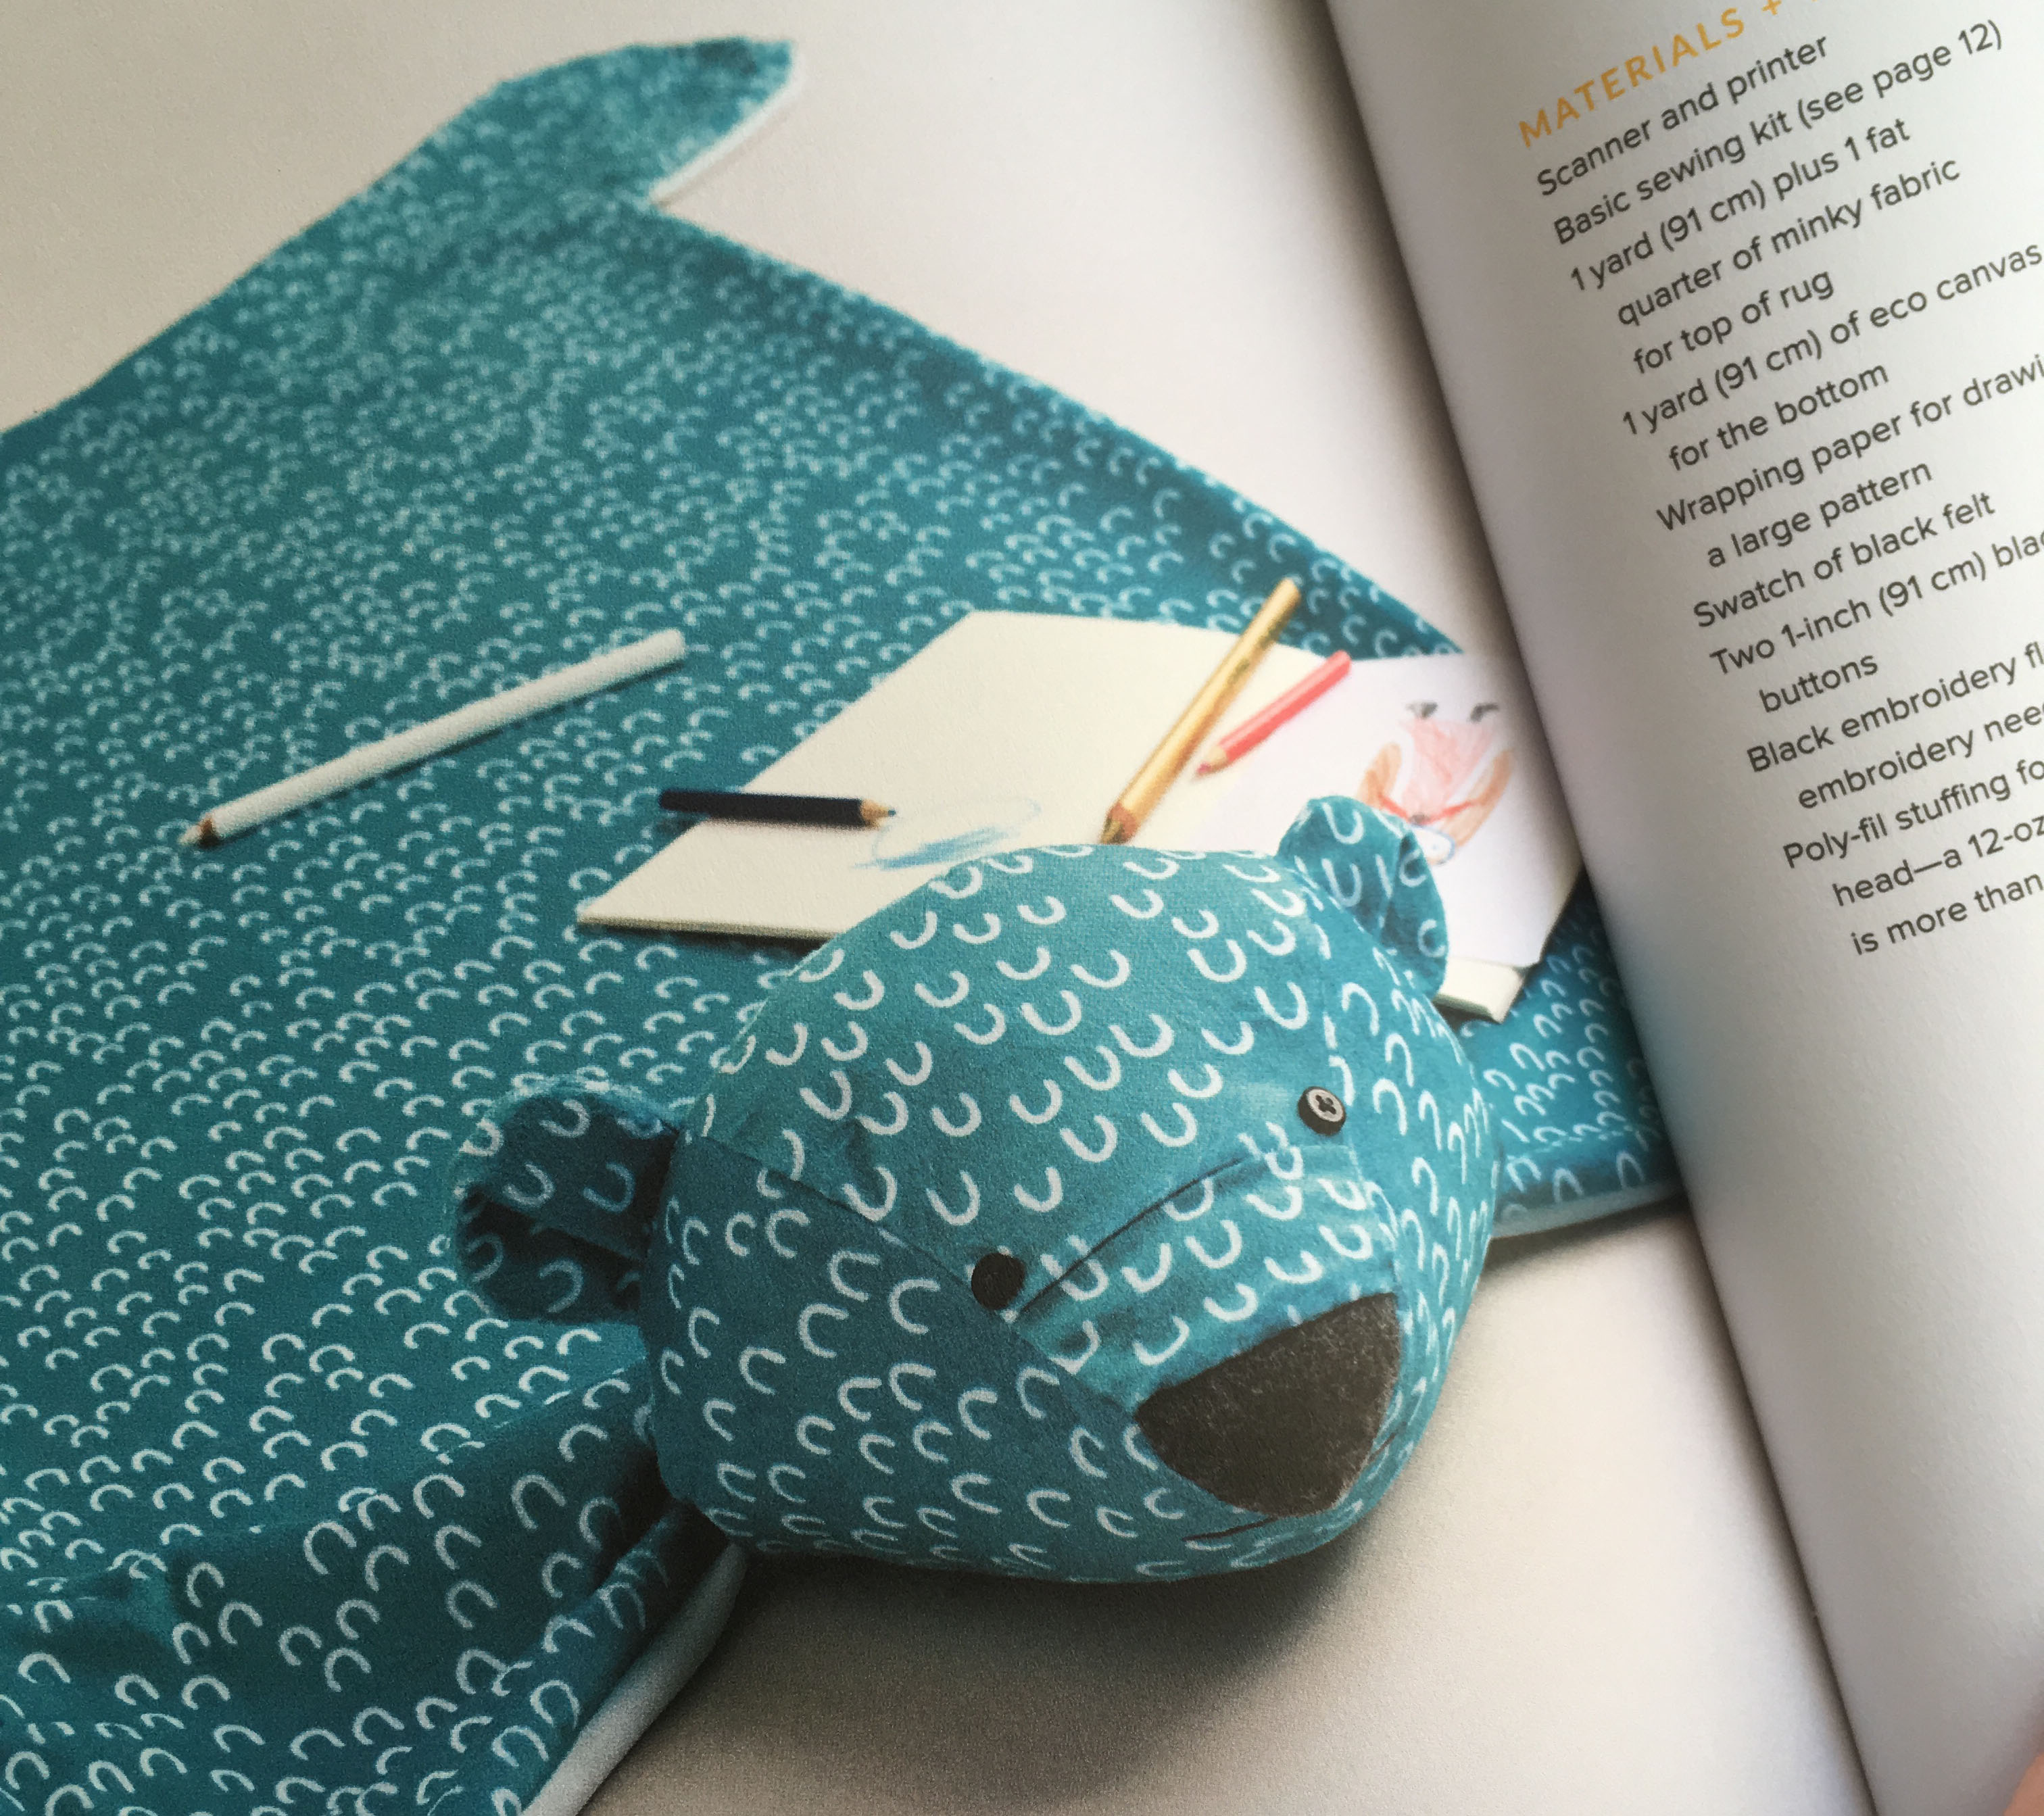
Next, I love this bear rug from the Multi Yard Projects section. He made me smile when I first saw the photo and I can imagine this would make for super cute baby photo props. He’s made from minky, so super soft and cuddly and I think the fabric design choice for this one was perfect. It’s “officially” a rug, but I can see it being so much more. I know my youngest niece and nephew would have dragged this around to watch tv with and pretend the bear was like a flying magic carpet so they could fly across the living room (because you know the floor is always lava.)

Here’s what I made

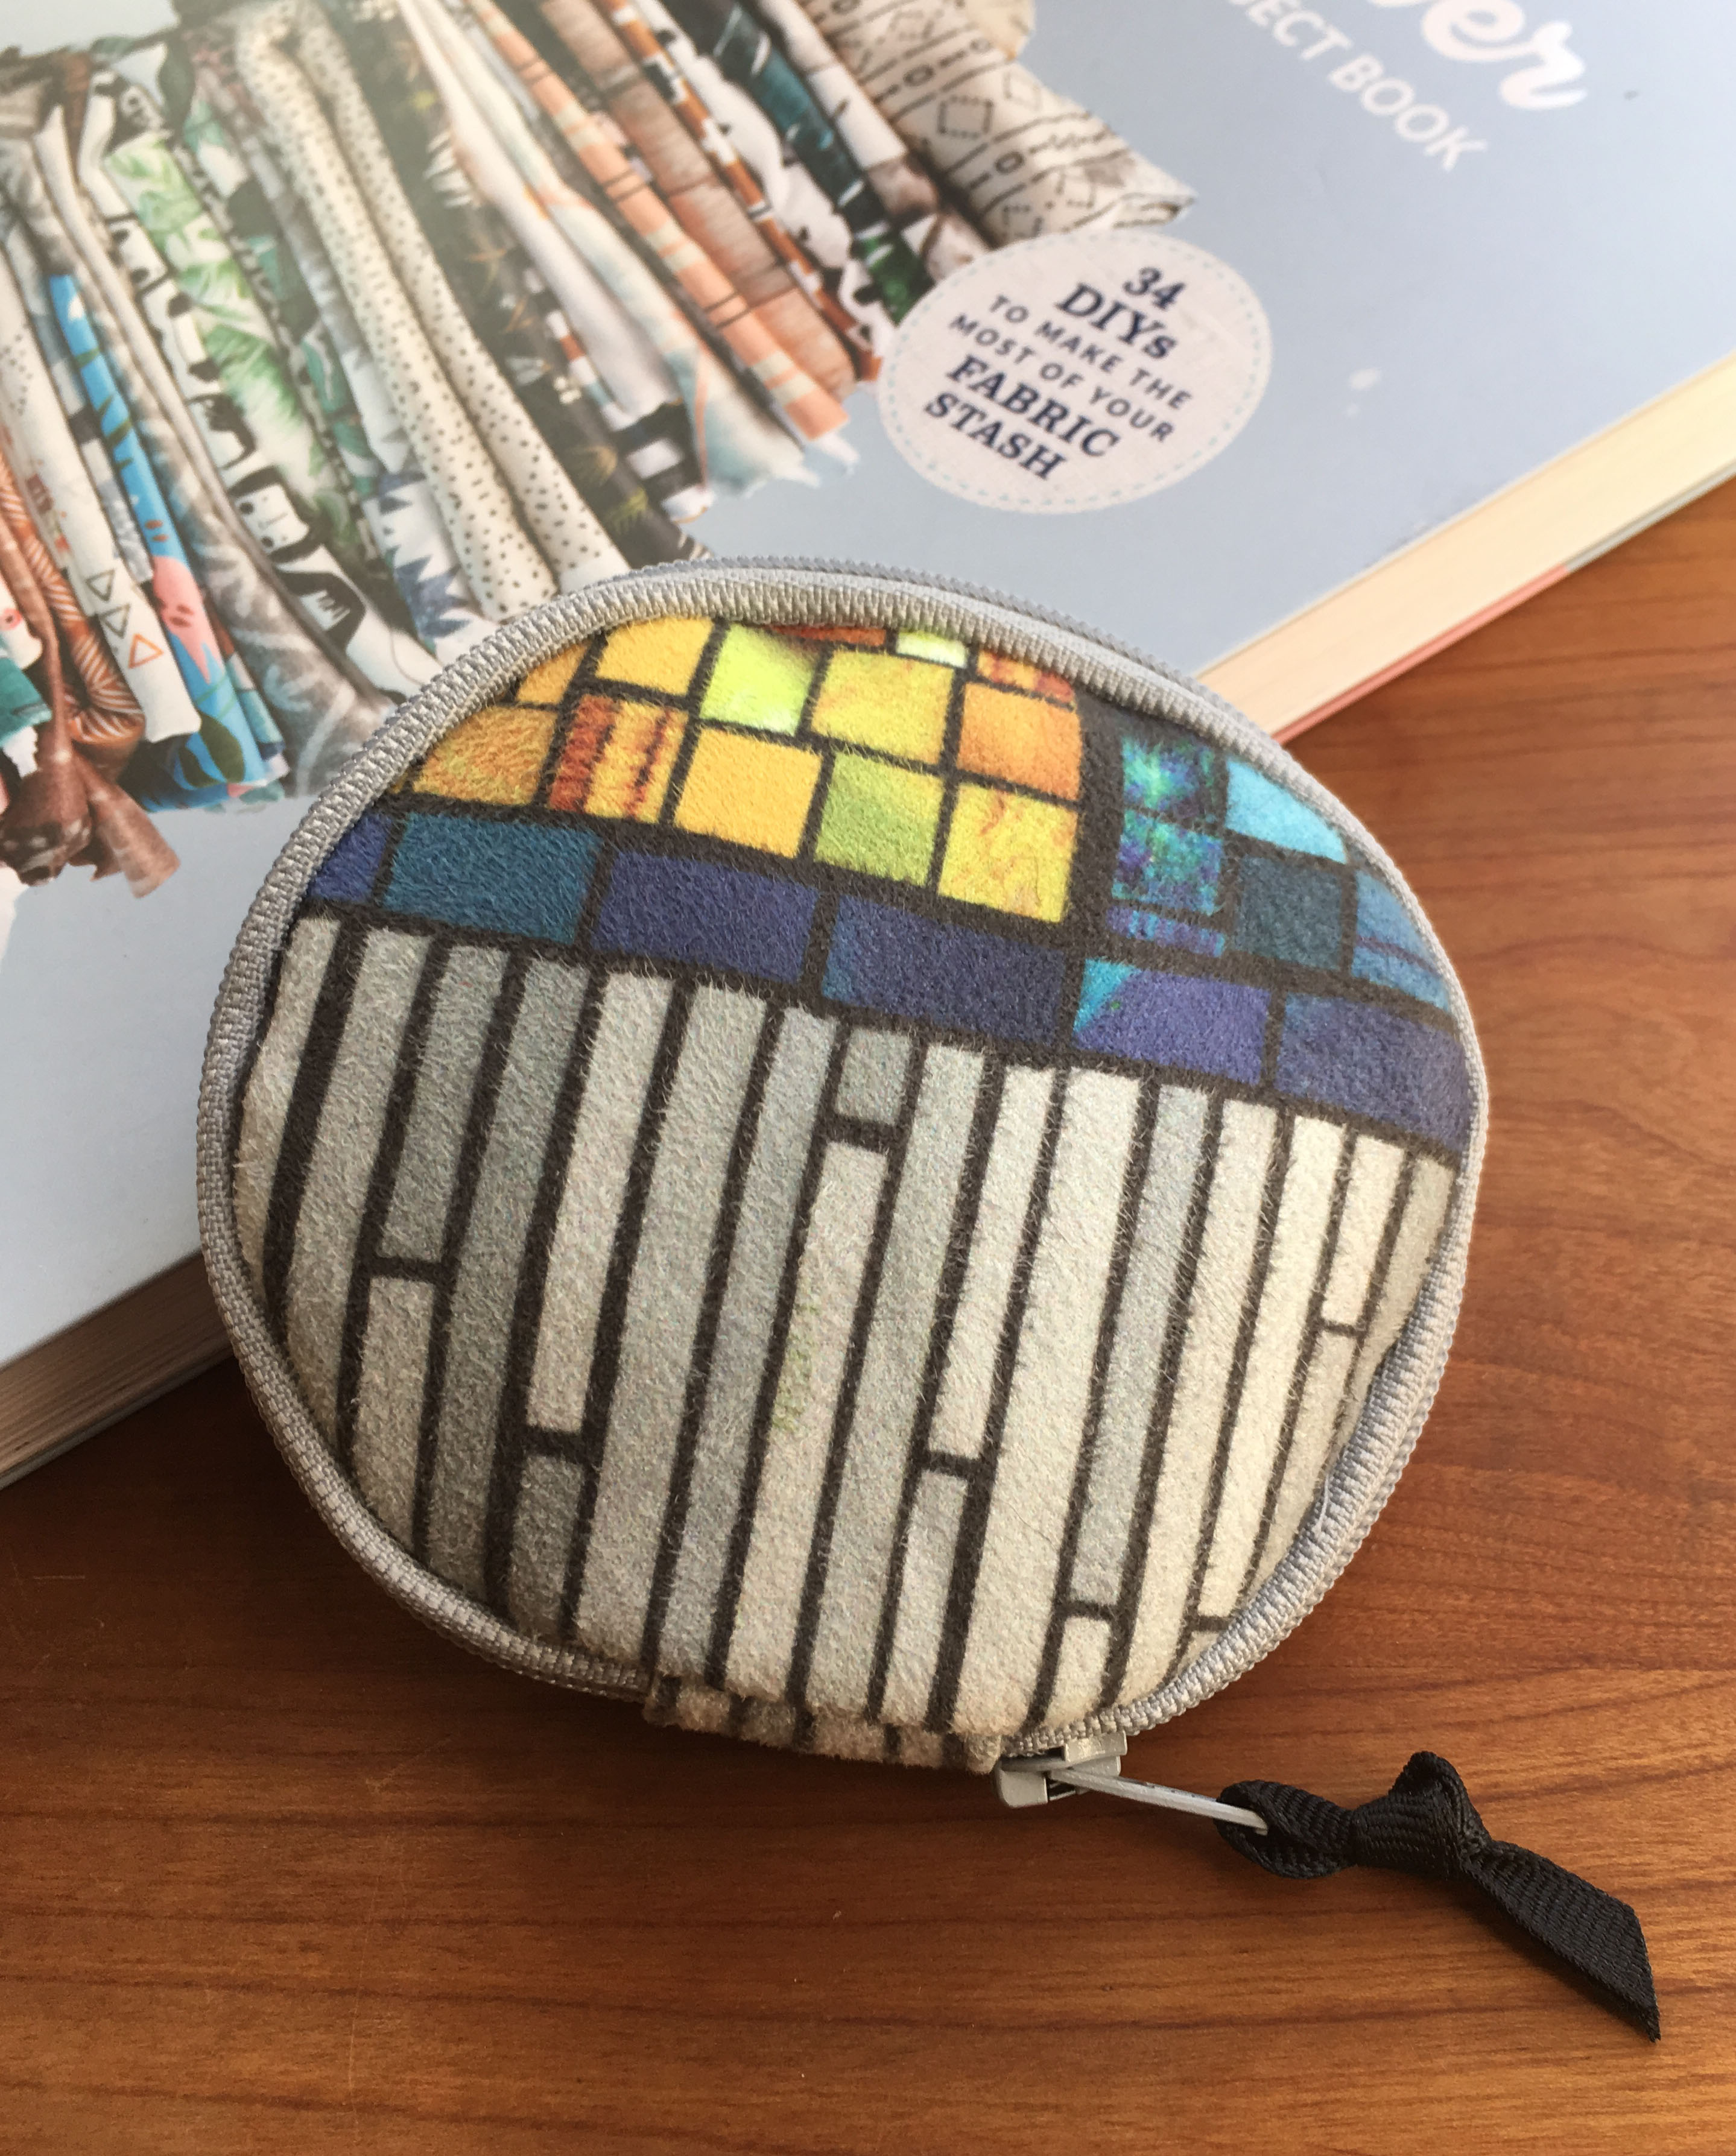
I decided that I needed to make something if I was going to do a proper review, so I decided to make the Tiny Circle Purse, which is one of the projects in the Swatch projects section. I had some scraps of faux suede left over from one of my own projects, so I used those scraps instead of a swatch to make my little bag.

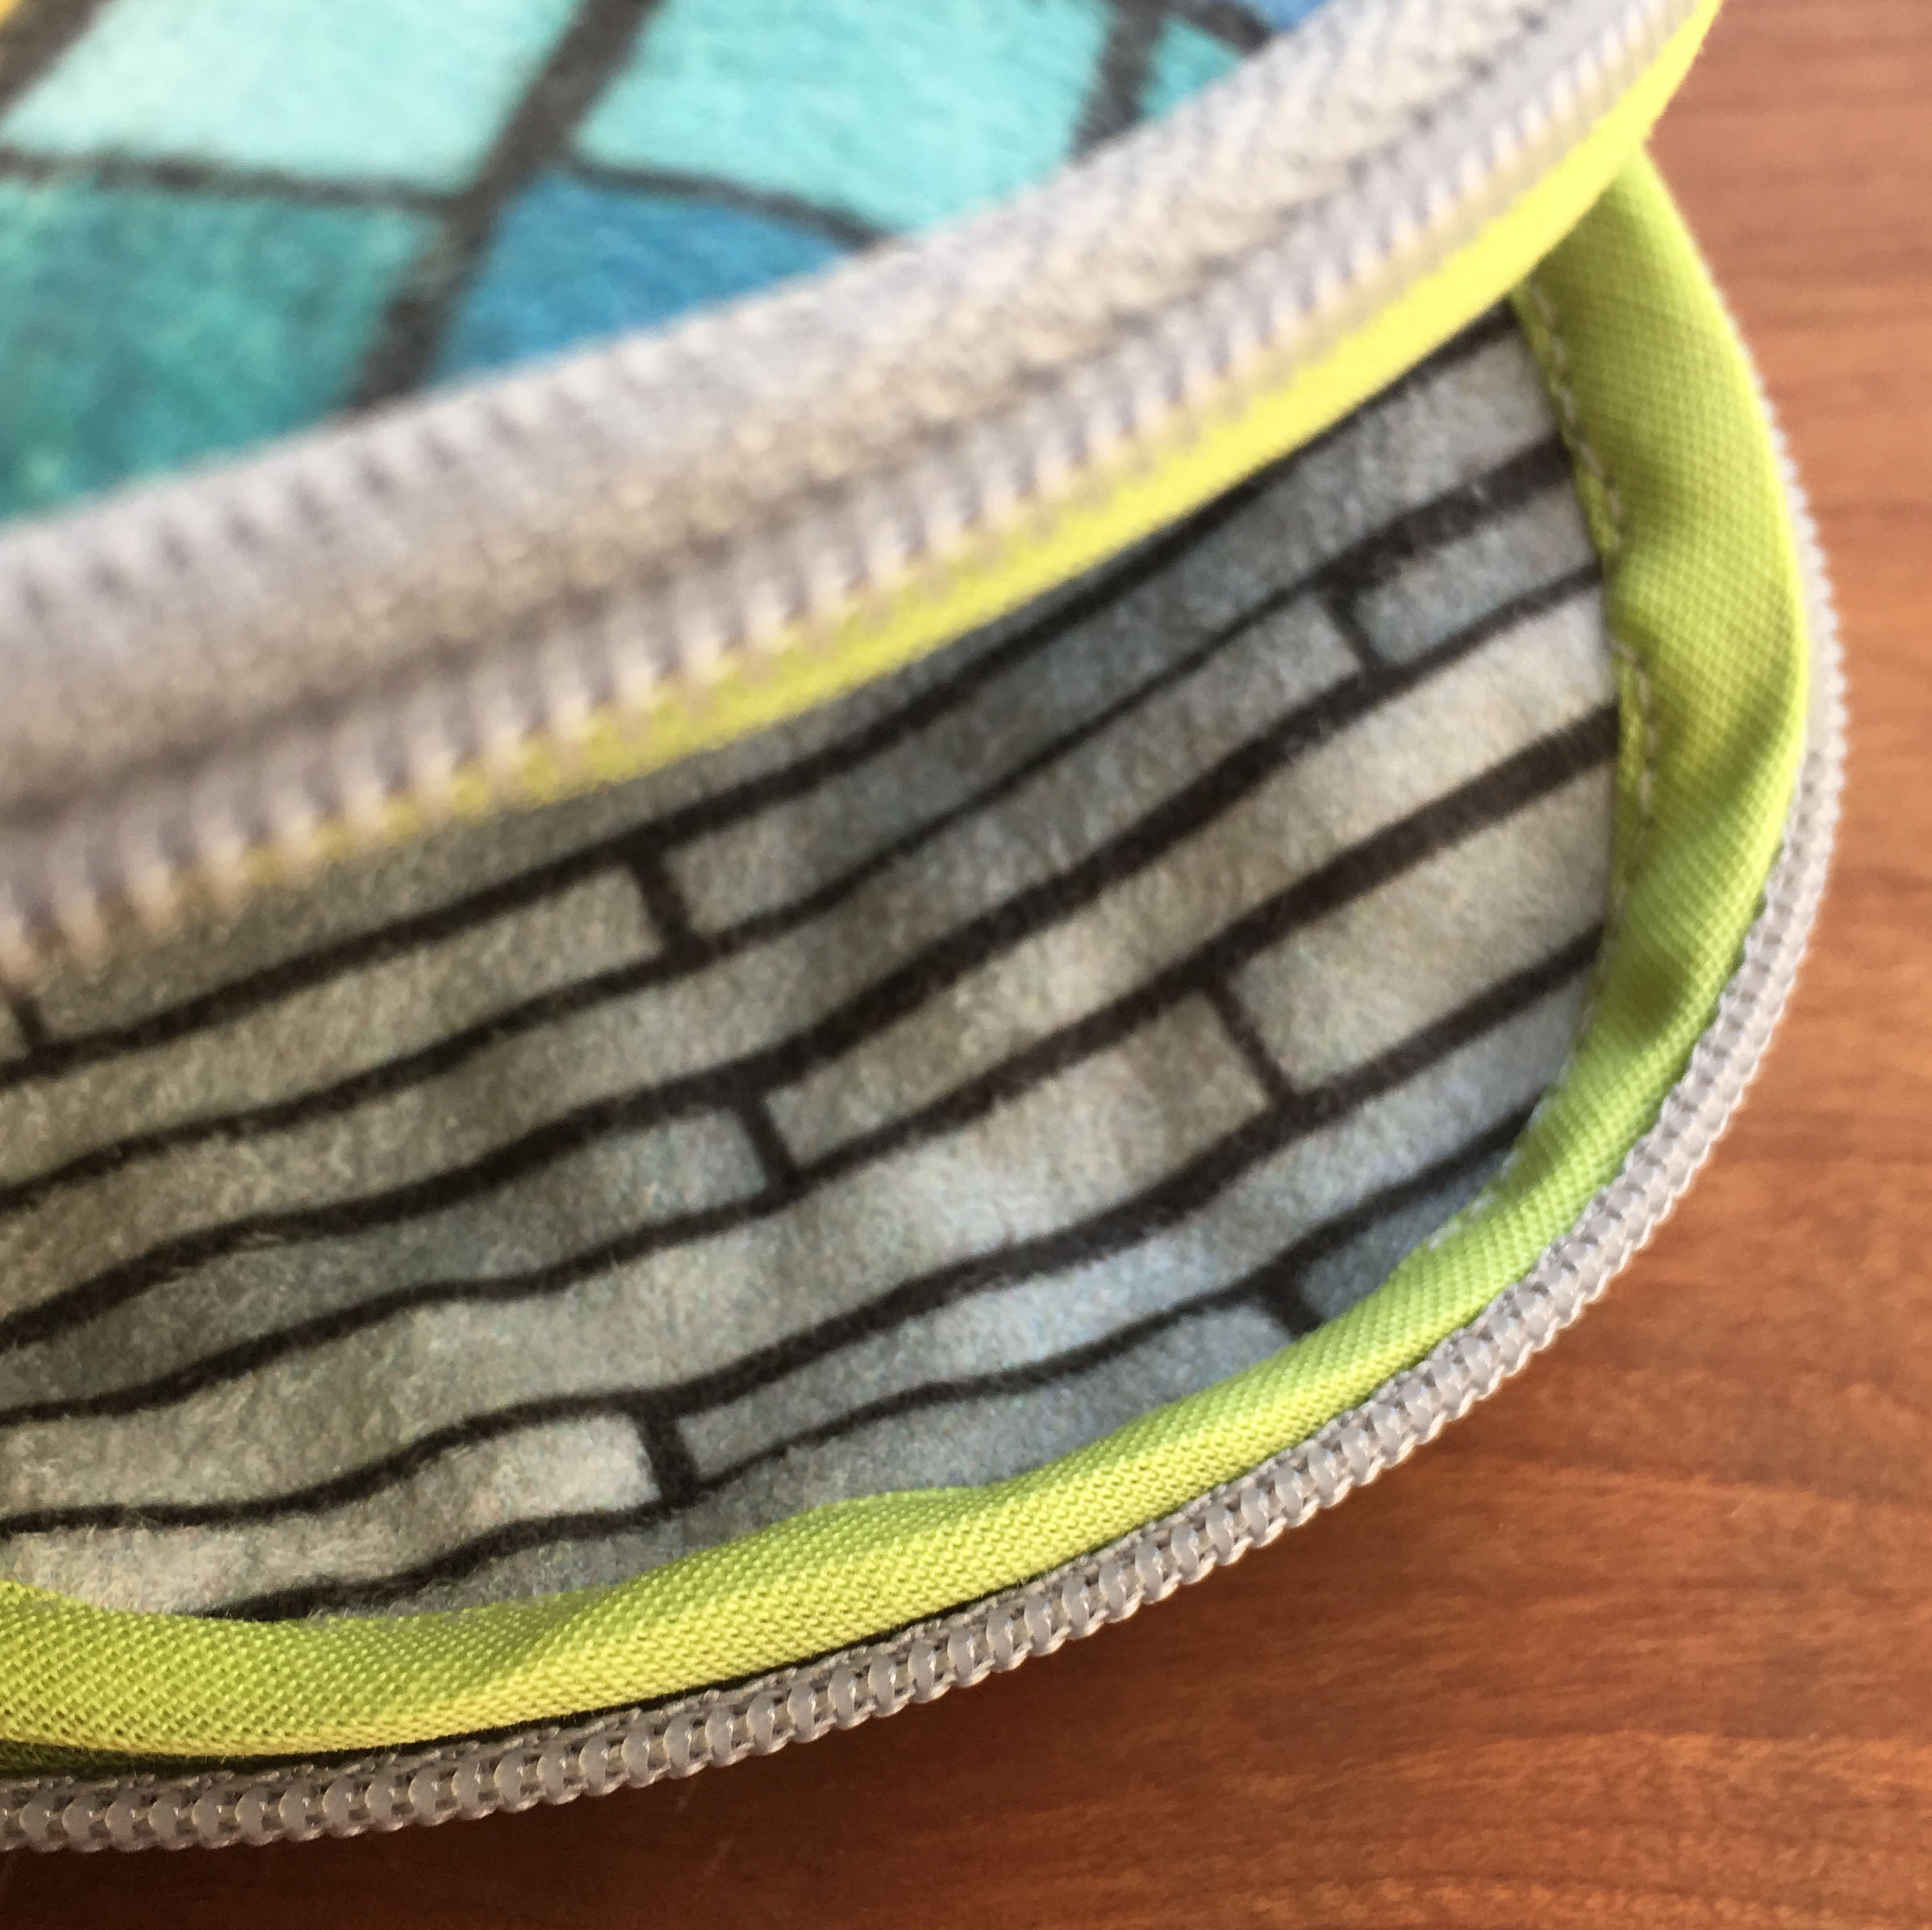
I have to admit that I cheated a little bit. I didn’t have a 10″ zipper that the pattern called for, so I shortened a 12″ one. I also didn’t have extra wide bias binding, which is used to finish and connect the ends of the zipper, so I just used a couple of scraps of fabric and turned under the edges to make it work like bias tape. To draw 4″ circles, I traced around the lid to a container which just happened to be the right size.

The raw edges of the fabric and the zipper on the inside are contained inside bias binding, which is tricky to sew in a little tiny circle, but looks pretty cool. I had some premade in neon green, so that’s what I used for this step. Because bending that zipper around in a tiny circle is challenging to sew without wobbles, if I were doing it again, I would just hand baste the zipper in first and then sew the seam, zipper and bias binding all in one step. It’s a cute little pouch and I think I am going to use it to keep bandaids and such contained in my purse. A fun project; a great use for a swatch or two.

What didn’t I love?

I don’t think it’s an honest review if I only write about the things that I love about the book and didn’t tell you anything else. So here are things that I noticed that bothered me. The fabrics featured in the book are beautiful and there are some great designers featured, but I would have loved to see more of the wonderful weirdness that makes up Spoonflower. I had exactly the same feeling about the designs featured in book I worked on. For me, part of the reason I love Spoonflower is that there is EVERYTHING there that you could ever want to find on a fabric. Corgis with sushi, oboes, vintage calculators, or steampunk robot whales. As Kermit says at the end of the Muppets Take Manhattan:

That’s it! That’s what’s been missing from the show! That’s what we need! More frogs and dogs and bears and chickens and… and whatever!

I get so very tired of everything looking like a perfectly photographed, exquisitely vanilla Pinterest or Instagram feed. Snore. But that’s a pretty personal thing and it’s just not my style. That being said, there are some really great simple modern and geometrics featured throughout the book. If that’s your vibe, you will see some things there you love and you won’t have a hard time finding similar fabrics to make your own versions of the projects.

You can get both books at Spoonflower or on Amazon. If you try something from the book or even just spot it in the wild, post a photo on Instagram and tag @andacorrie so she can see it (and me too, I always love to see your projects!) After working so hard on a project like a book, just a little note saying that you’ve seen it is like giving the author a chocolate cupcake. It seems like just a little but it means a lot.

8 June, 2017

Pop Up Class: Intro to Embroidery

2017-06-19T12:15:13-05:00Classes & Teaching, Embroidery, UpcomingClasses|Comments Off on Pop Up Class: Intro to Embroidery

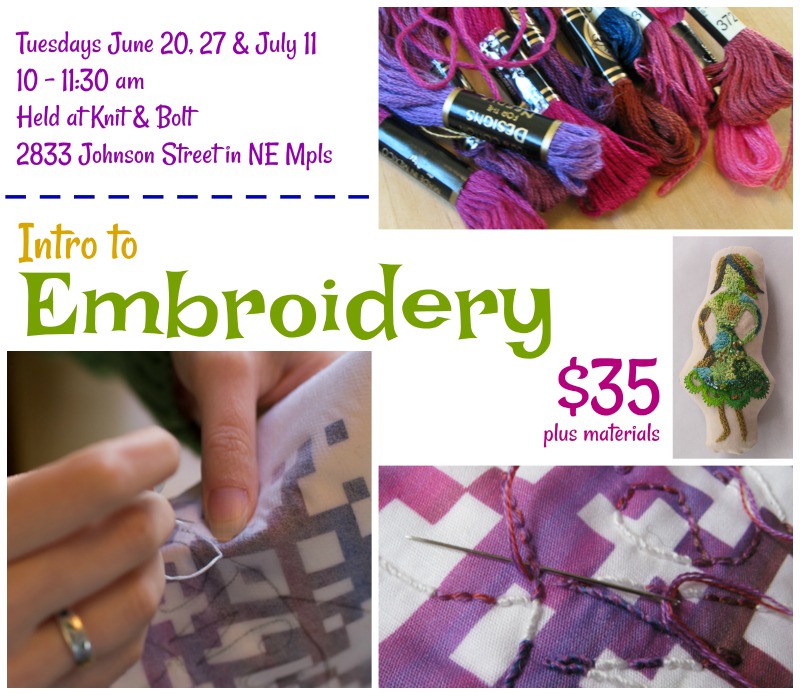
Don’t wait to sign up! I have added a class for this summer and you are invited. I am partnering up with Knit & Bolt (formerly Crafty Planet) in NE Minneapolis to do a pop-up class. In three sessions, you will learn all you need to know about beginning hand embroidery. We will cover the basics of tools, threads, needles, and to hoop or not hoop. Each session we will focus on a group of related stitches, like variations on a theme. We will talk about how to stitch a pre-traced pattern as well as free-form embroidery, which is my favorite. I broke the class up so you will have time to practice between sessions and come back with questions. We will work in the awesome new classroom space at Knit & Bolt and you can get all of your materials there at the shop. (I will post the supply list here very soon and email it to you after you register.)

Intro to Embroidery
Tuesdays June 20, 27 and July 11 • 10:00 – 11:30 am
at Knit & Bolt

Open to ages 10 and up. No embroidery or hand sewing experience necessary.

THIS CLASS IS FULL. If you are interested in learning about future classes, please sign up for my email newsletter.


Supply list

All of these items are available at Knit & Bolt. You can pick them up ahead of time, or we can take a little time right at the beginning of class to get everyone set with supplies.

  • 1/4 – 1/2 yd of plain colored woven cotton fabric. I recommend RJR solids or Kona cotton. Choose any color.
  • 3-5 colors of six-stranded embroidery floss (thread). Choose any colors.
  • Embroidery needles. I recommend John James, assorted sizes 5/10.
  • One 9×12” rectangle of craft felt or wool felt. Choose any color.
  • One 5-7” embroidery hoop. Wooden or plastic is fine.

Bring a pair of scissors with you. You might want a pen and paper to take notes. You are welcome to take photos/video with your camera/phone as I demonstrate stitches.

A note about colors. If you don’t know what colors to choose, here are some suggestions.

  • Contrast is great. Choose white/charcoal/black as a fabric color and three bright colors like red, turquoise and green for your threads.
  • Think of a theme like “ice cream”. That doesn’t mean you are going to make a picture of ice cream, but it gives you a hint about colors.
    • Ice Cream: Vanilla background fabric, brown, pink and pale green threads.
    • Ocean: Pale blue background fabric, tan, turquoise, yellow threads.
    • Paris: Pale grey fabric, blue, red and pink threads.

Download this supply list.

Go to Top