5 January, 2016

Design-your-own-Fabric Tutorial: Making Wings

2016-02-23T13:27:14-06:00Spoonflower & Fabric Design, Tutorials|5 Comments

wings

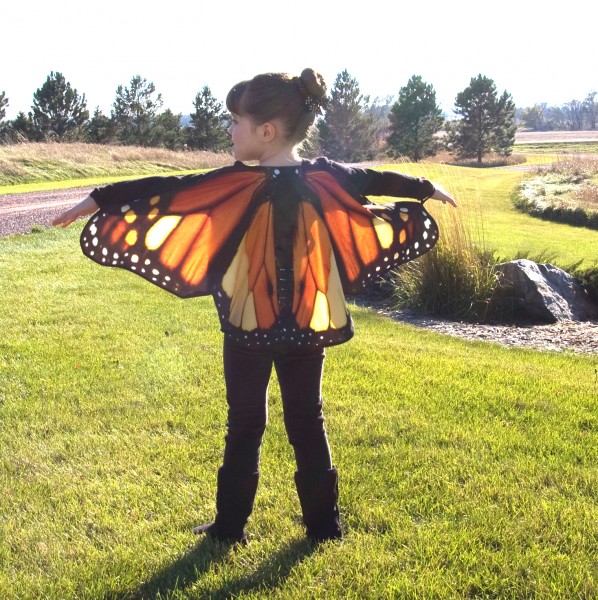
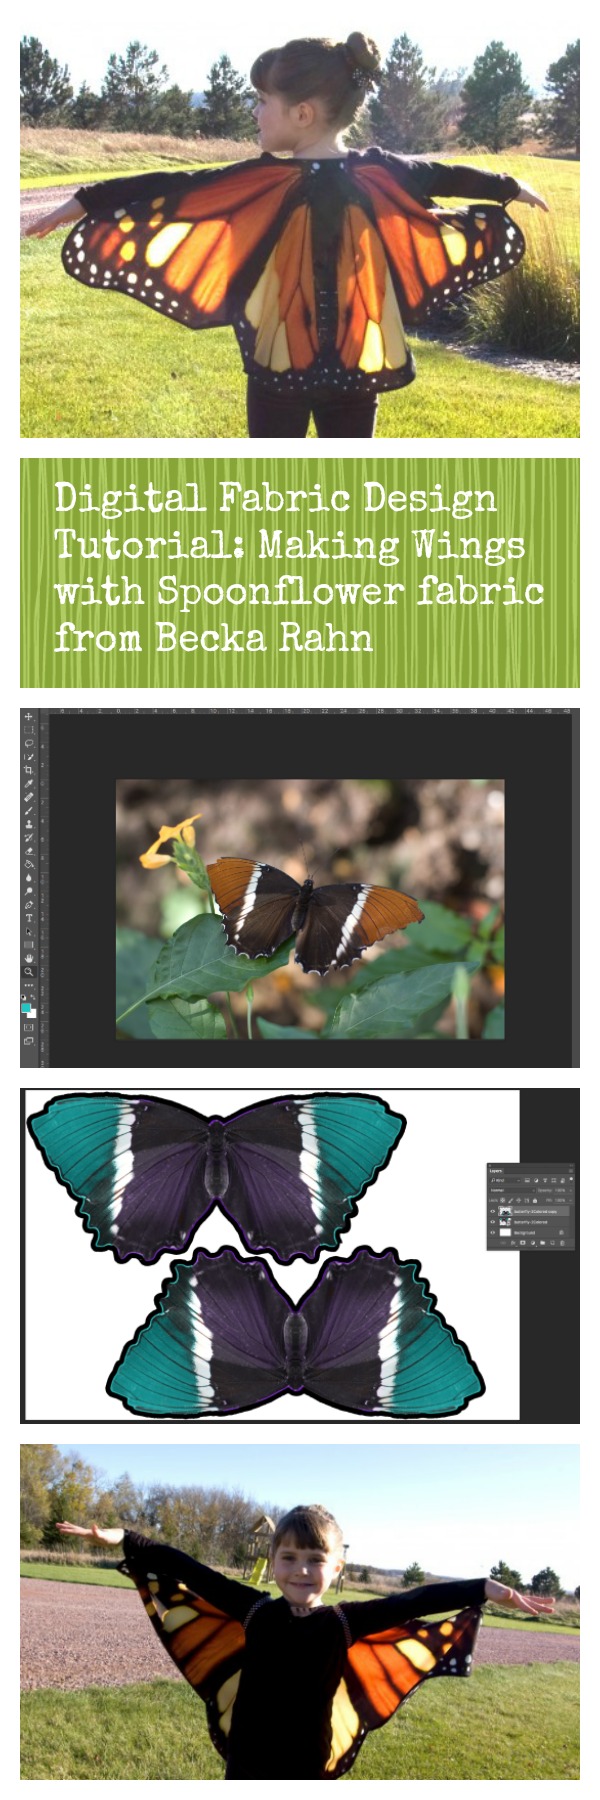
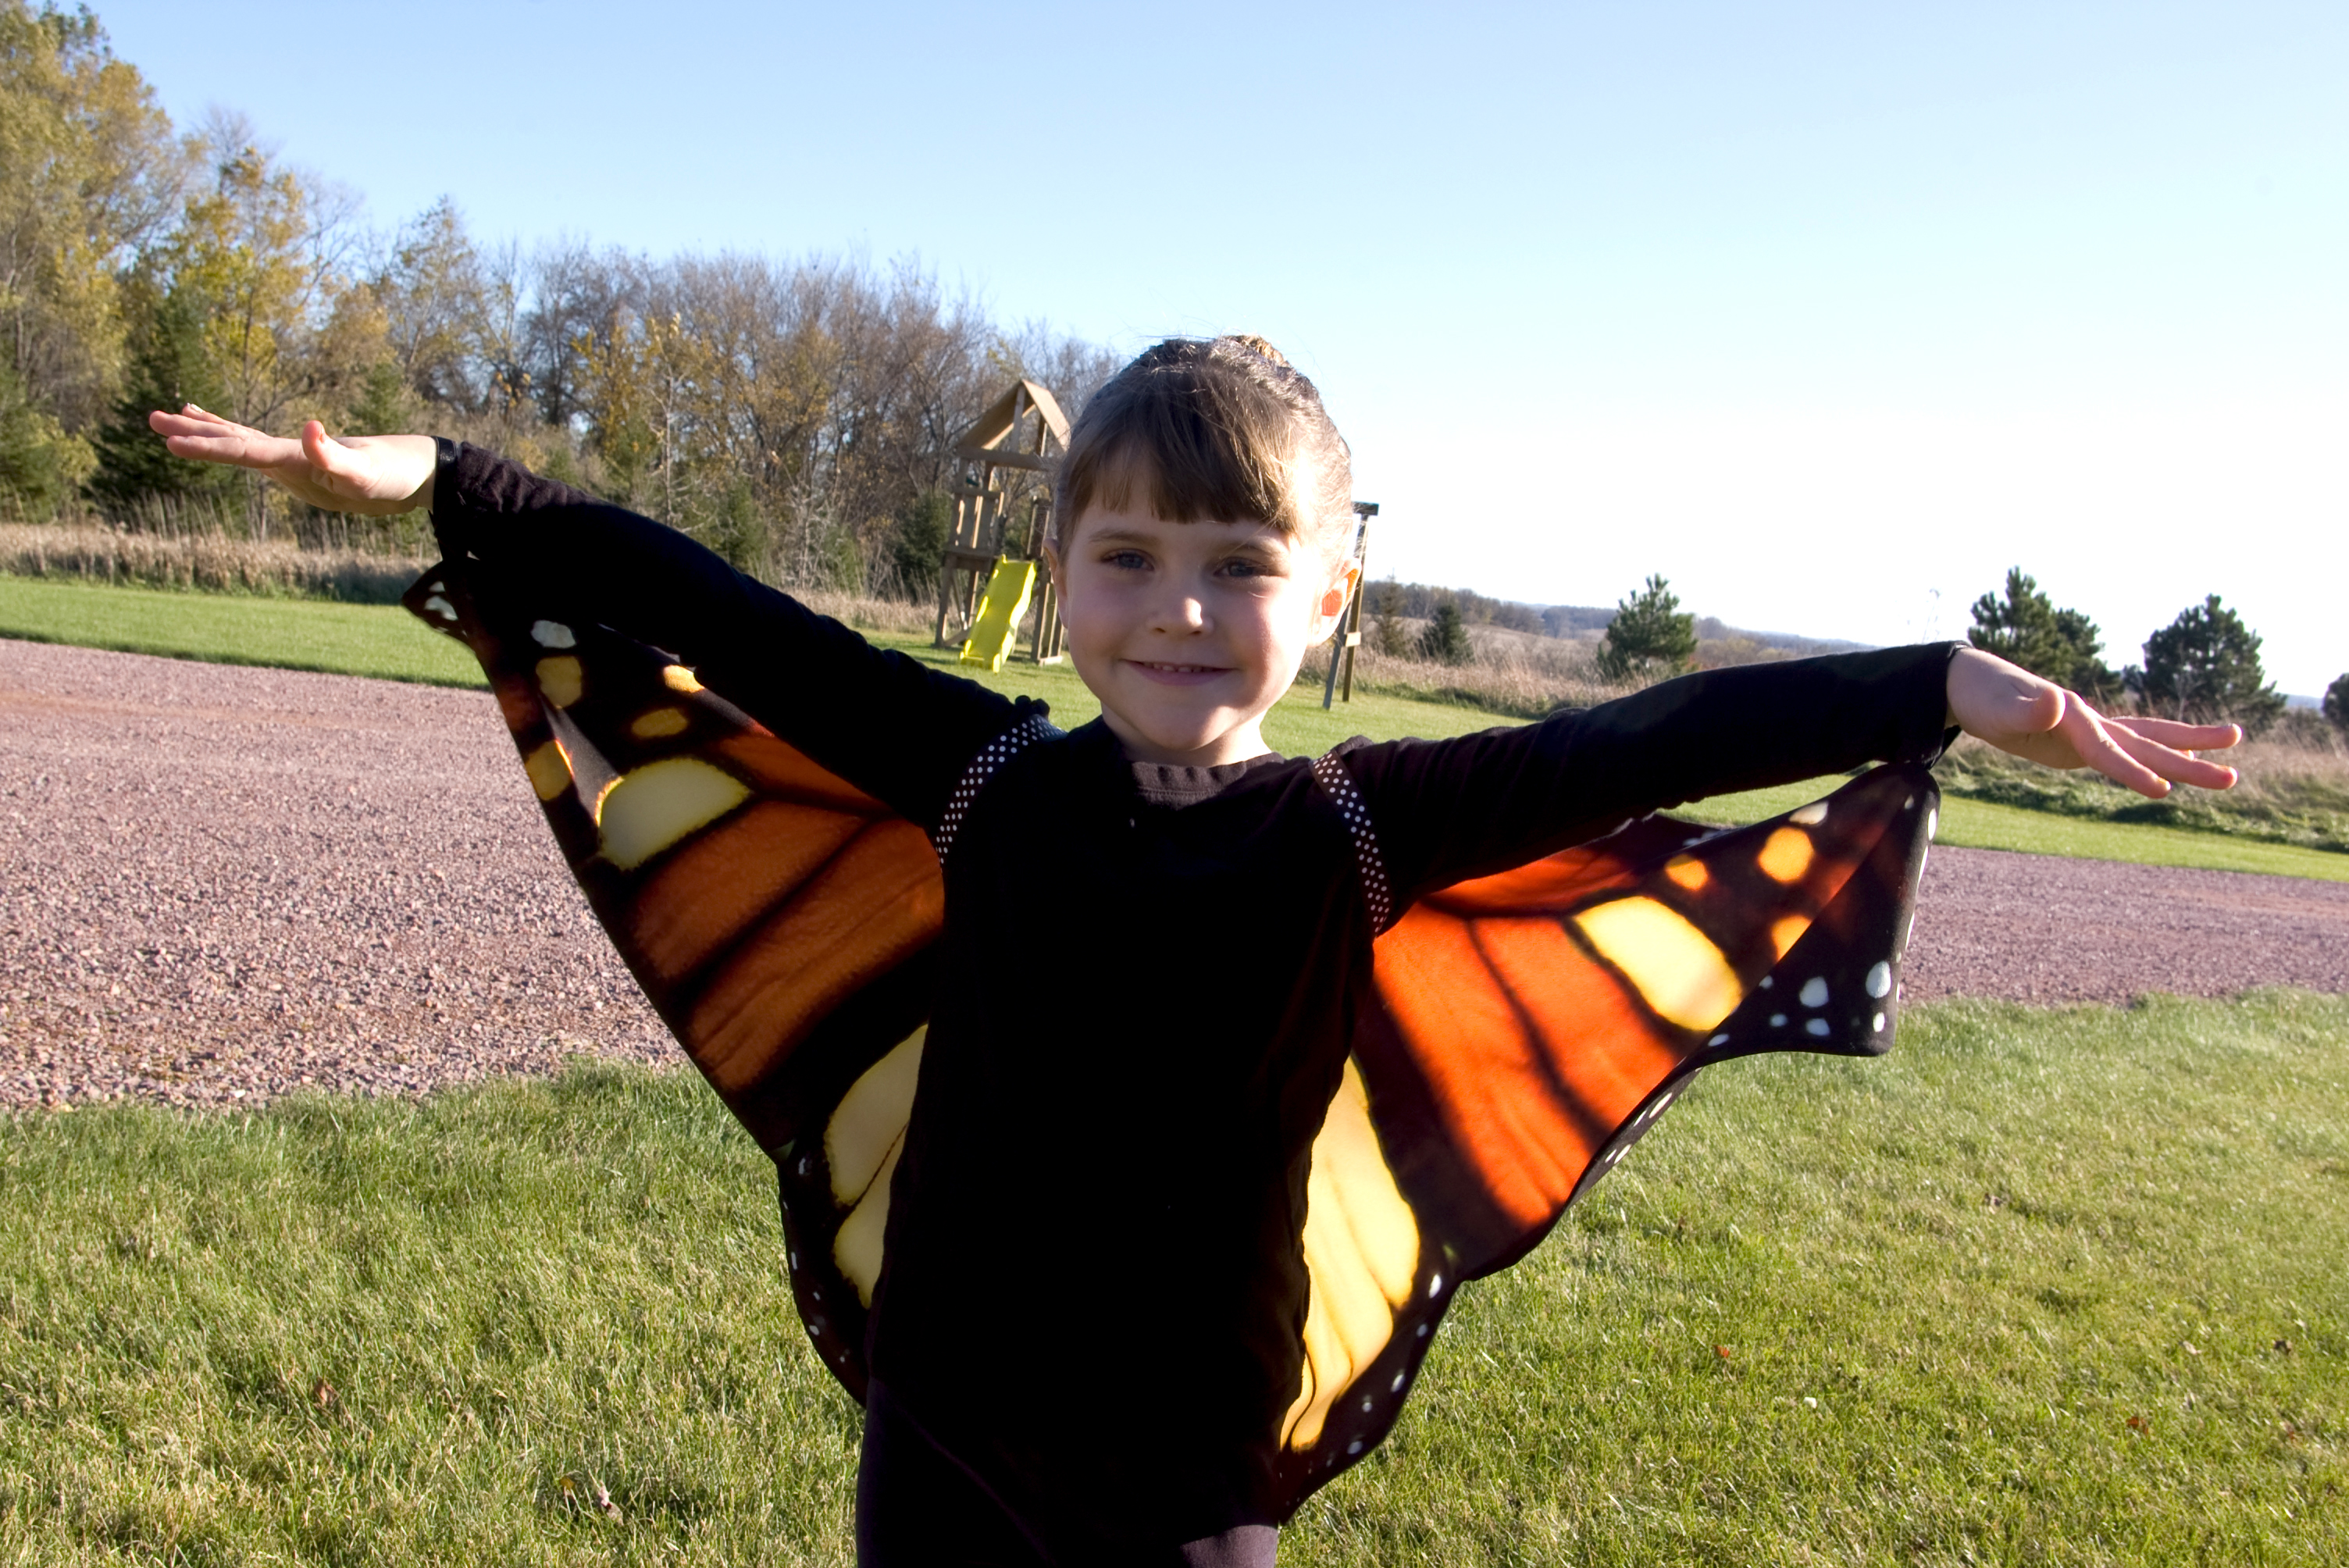
For Halloween, my niece wanted to be a butterfly fairy.  Her talented mama made the fancy princess dress, but I was asked to help with the fairy wings.  We thought it would be the most fun if the wings were not stiff wire edged things, but more like a flowy cape, so you can pretend to fly, which is absolutely necessary when you are 5 years old.  So I designed some wings and had them printed at on fabric at Spoonflower.

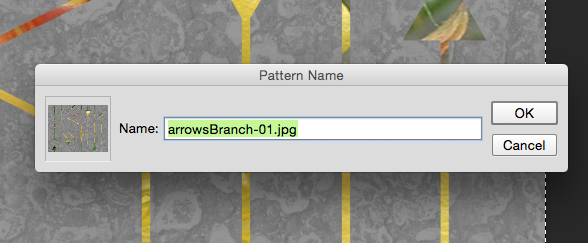
Here’s how you can make your own.

I started with a photograph of a butterfly.  For the wings above, I used a monarch because that matched the colors of her costume, but I did some screenshots for you using another butterfly that we photographed at the zoo, so you can see some other variations.  It helps to have a butterfly shape that goes pretty straight across at the top (not a strong V shape), but you can adjust that a little in a later step.

Screen Shot 2016-01-05 at 10.33.27 AM

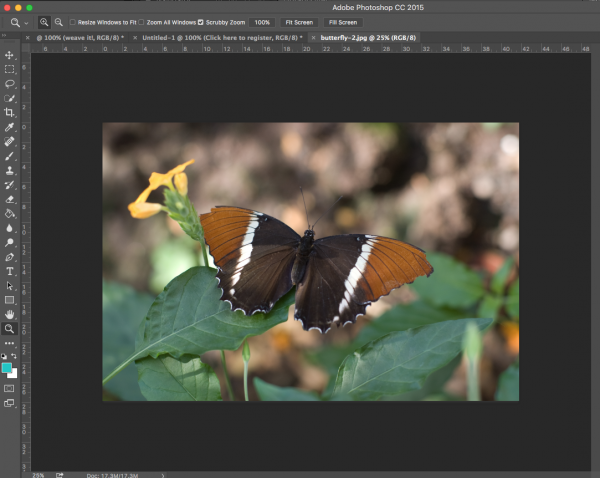
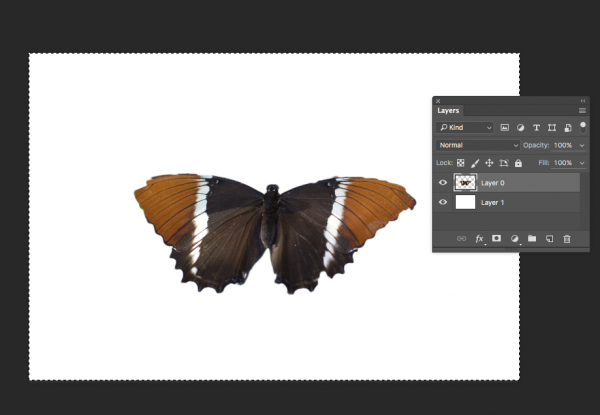
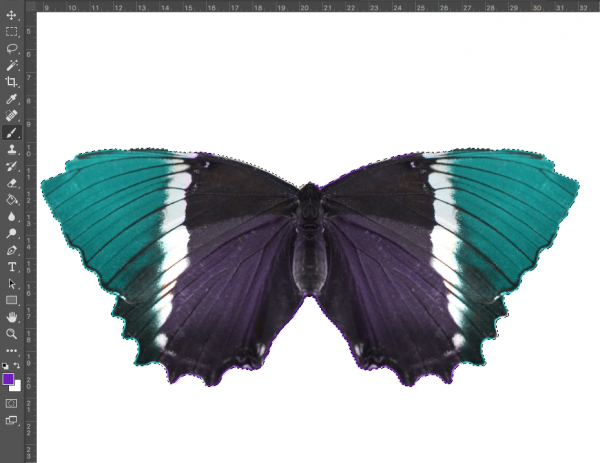
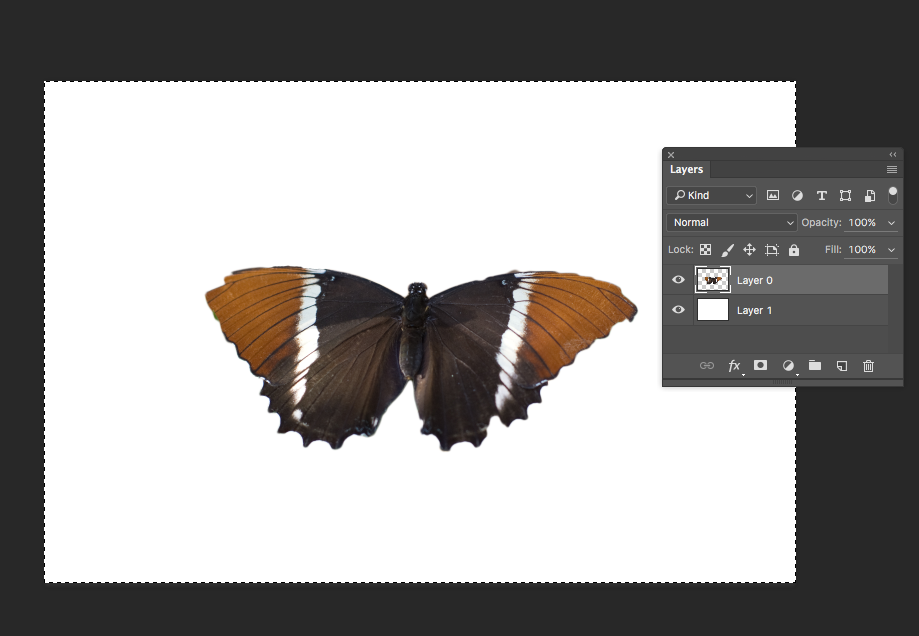
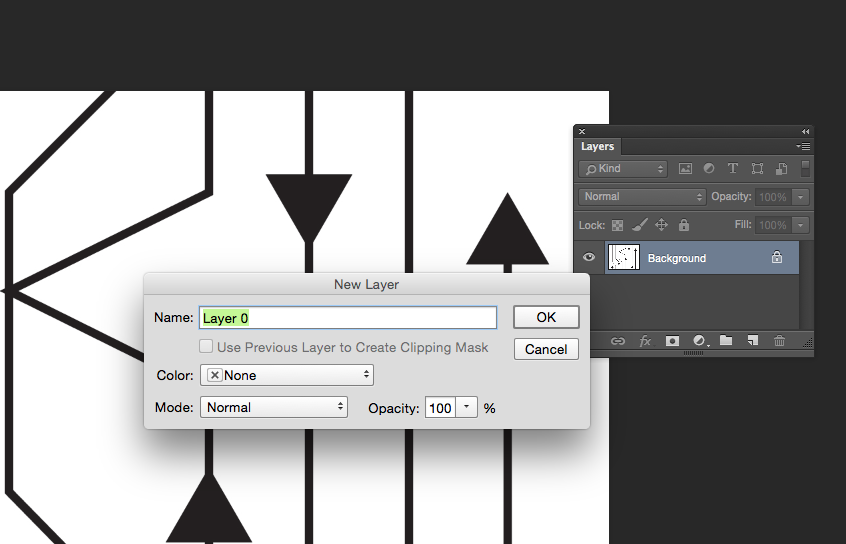
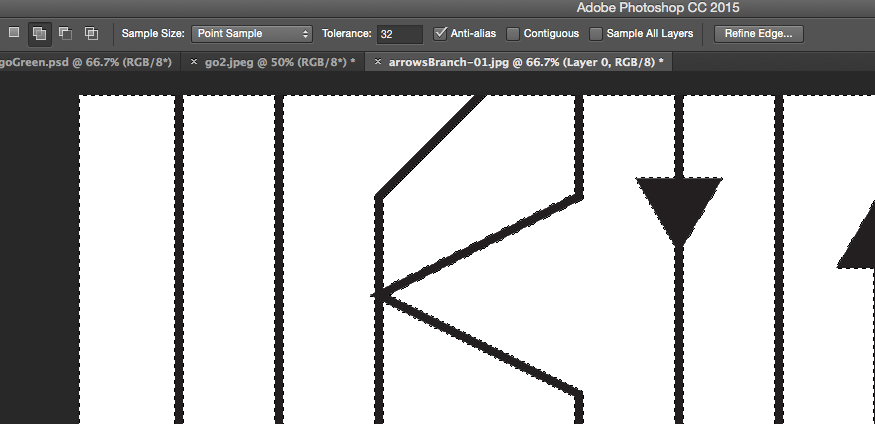
First, I opened the photo in Photoshop and made a new layer, so the butterfly photo is on one layer and there is a blank background layer. I selected the butterfly using the Quick Select and Lasso tools, inverted the selection (so now the background is selected instead of the butterfly) and deleted the background. I selected the butterfly and straightened it out a little (using the Transform tool).  You can see that my butterfly is a little lop-sided here right to left, which is perfectly fine for a butterfly, but makes it harder to make a 2 sided cape.  So I am going to fix that.

Screen Shot 2016-01-05 at 10.37.48 AM

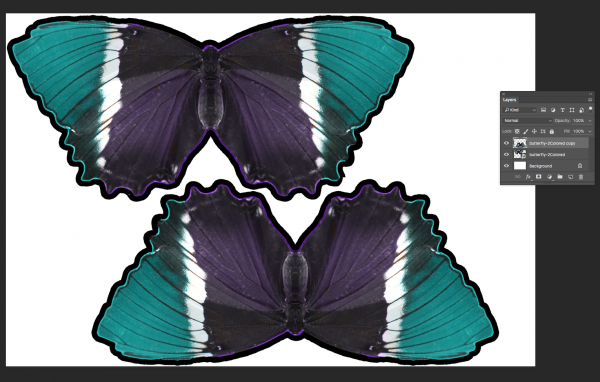
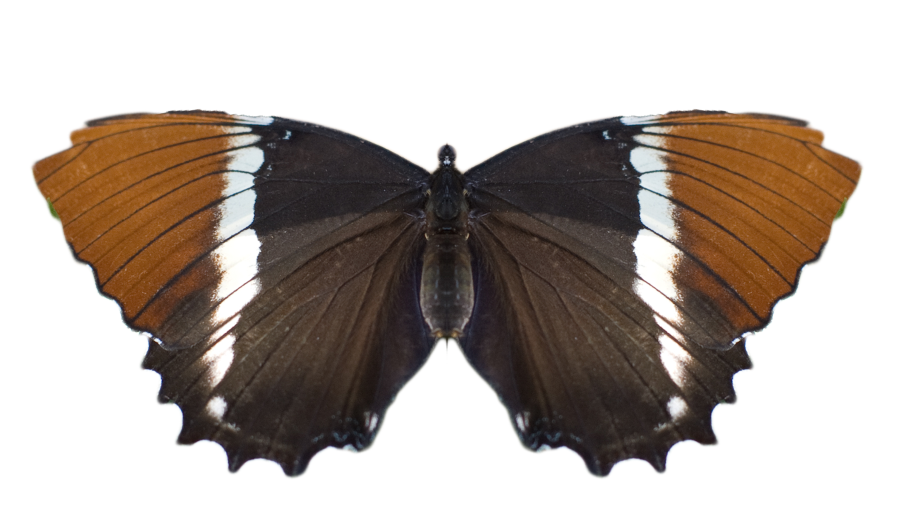
I used the Marquee Select tool to select the right half of the butterfly and delete it.  Then I copied the left half, flipped it horizontally and moved it over to the right side.

Screen Shot 2016-01-05 at 10.38.12 AM

Screen Shot 2016-01-05 at 11.33.03 AM

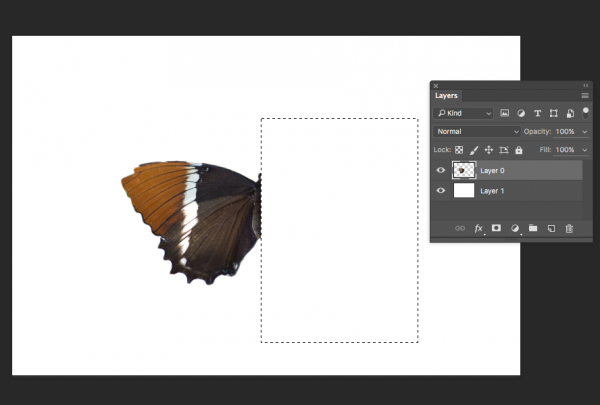
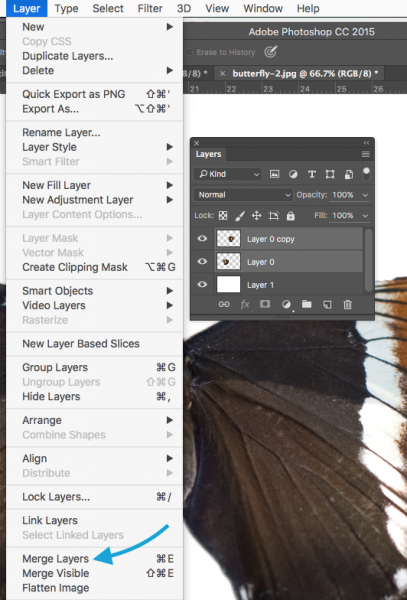
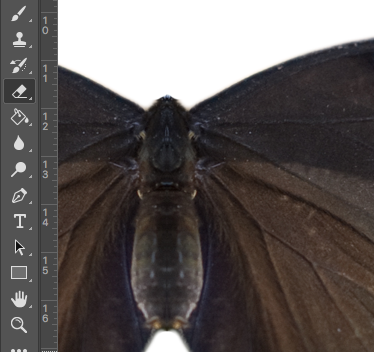
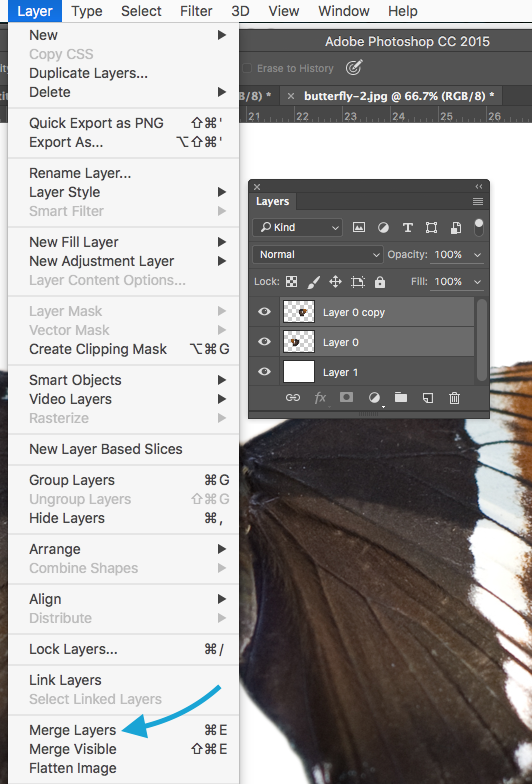
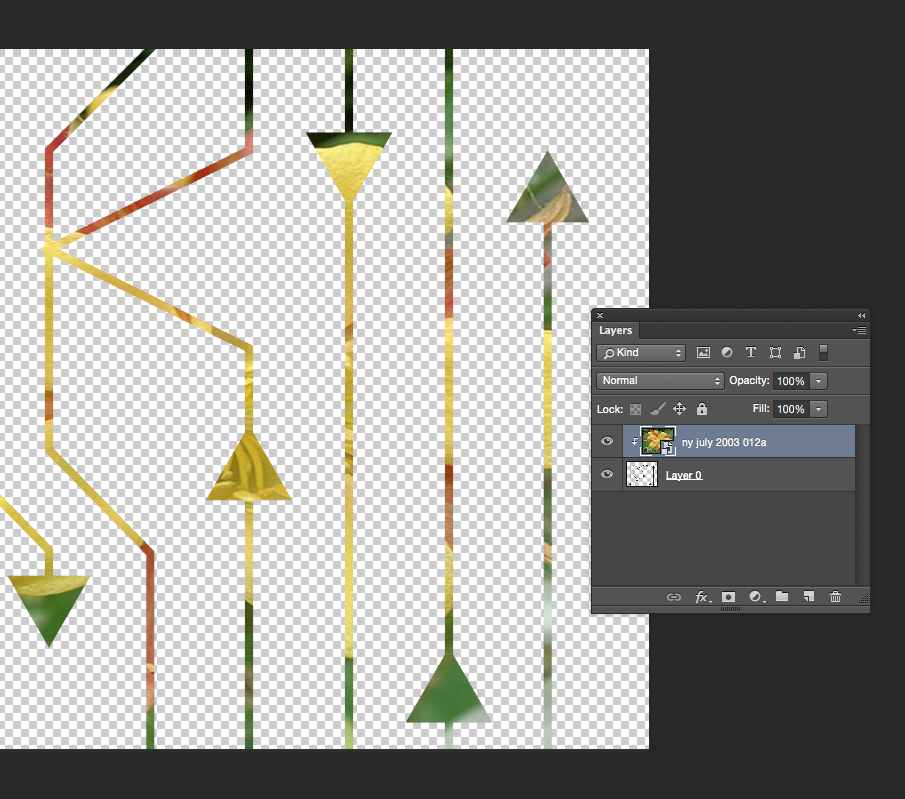
This is going to make it much easier to sew together later because I won’t have to worry about a front and back side; they are both the same and will match up when I put them right sides together to sew it.  I selected and merged the two layers (right and left side) to make it into a single butterfly layer again and used the Eraser tool to touch up a little bit at the head and tail and any jagged edges from my quick selecting job, so I had nice smooth lines around all the edges.

Screen Shot 2016-01-05 at 10.40.08 AM


Screen Shot 2016-01-05 at 10.40.52 AM

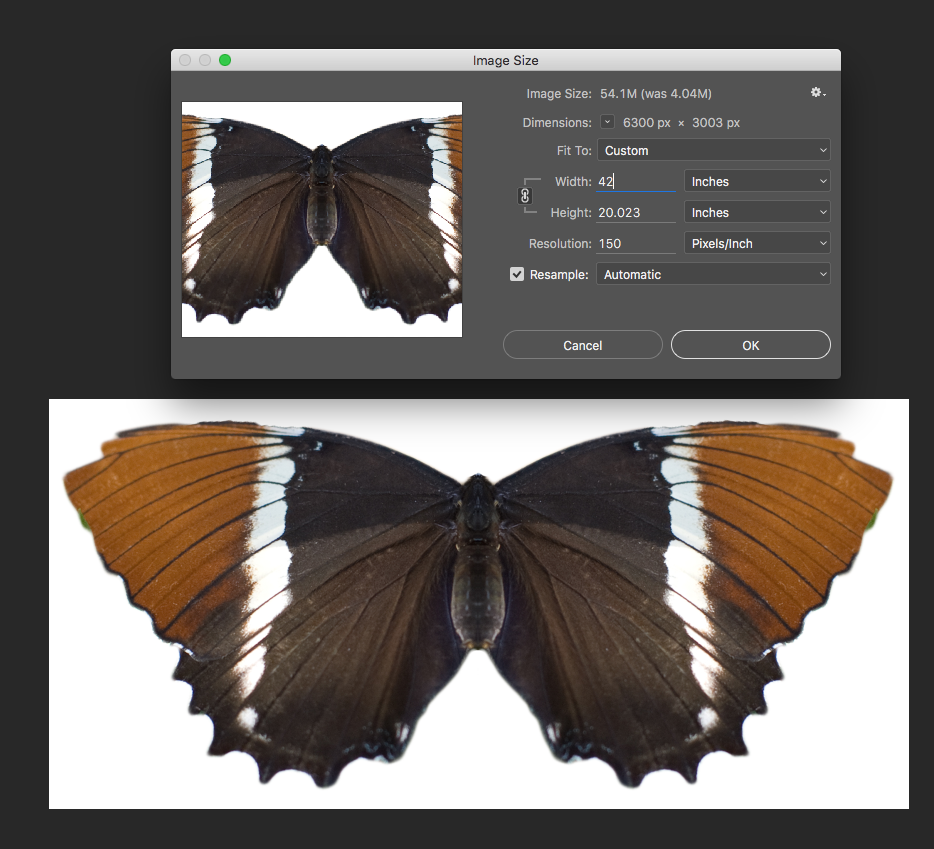
Next, I need to make this butterfly the right size to fit my little butterfly fairy.  We measured her wingspan, which was 41 inches from wrist to wrist.  Using the Crop Tool, I cropped the butterfly to get rid of the extra white space around it and resized it to be 42 inches across at 150 dpi.  Make sure you check the “lock” icon to the left of width/height so that it maintains the same ratio and doesn’t squash your photo.  (I made it 42 because I left a little space for a seam allowance.  You will see how that works in just a bit.)

Screen Shot 2016-01-05 at 10.57.43 AM

An aside for a just a minute about resolution.  I didn’t worry too much about what the resolution of this photo was to begin with because I don’t actually need this print to be super crisp and sharp.  For this project I was totally ok with it being a little pixellated or fuzzy because it’s going to read as a butterfly no matter what.  This won’t be the case for every project; you have to use your judgement.

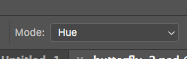
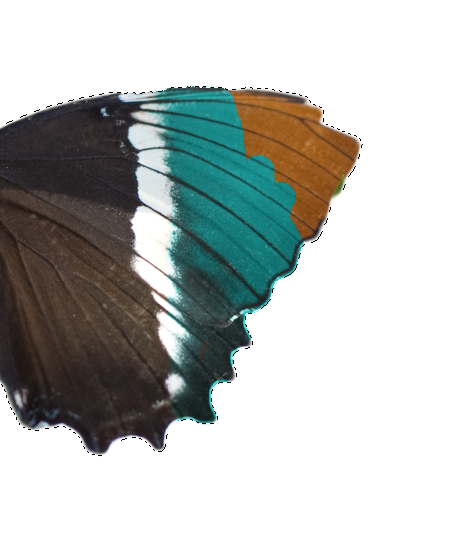
Now to add some color.  For our monarch butterfly, I recolored a bit to add some yellow to the orange and black so that it matched her dress.  You can add any color you like to make a butterfly in your favorite color or you can skip this step if you love your butterfly the way it is.  Select the butterfly, choose the Paintbrush Tool and set it to “Hue” in the toolbar Mode menu.  Then choose a color in the palette and paint over your butterfly.

Screen Shot 2016-01-05 at 11.50.38 AM

Screen Shot 2016-01-05 at 10.43.08 AM

Screen Shot 2016-01-05 at 10.45.11 AM

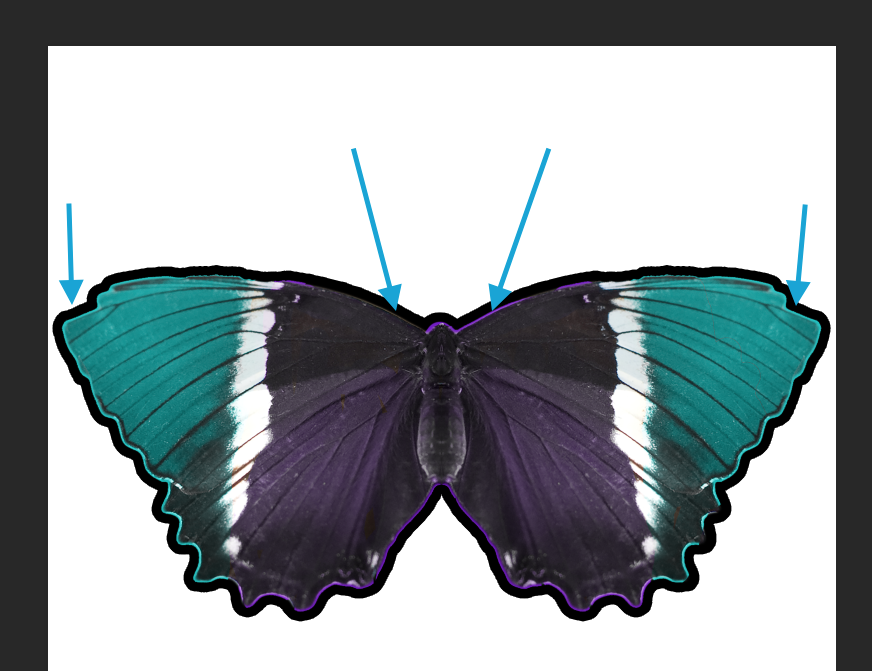
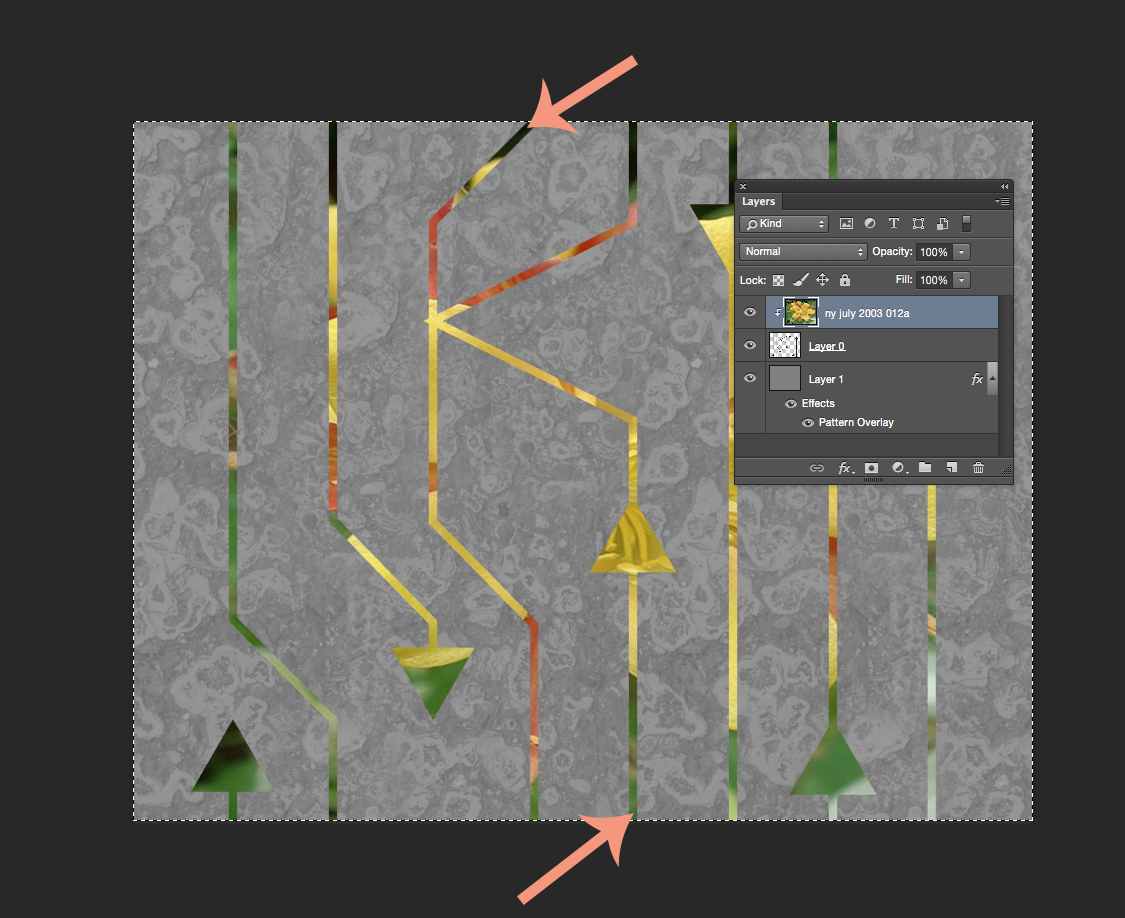
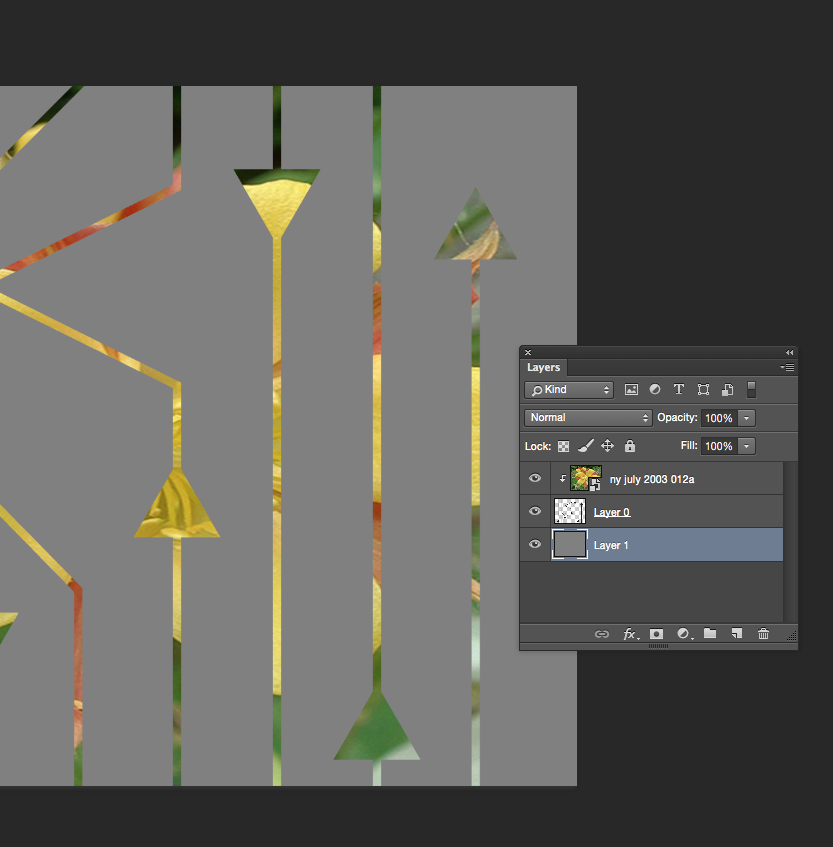
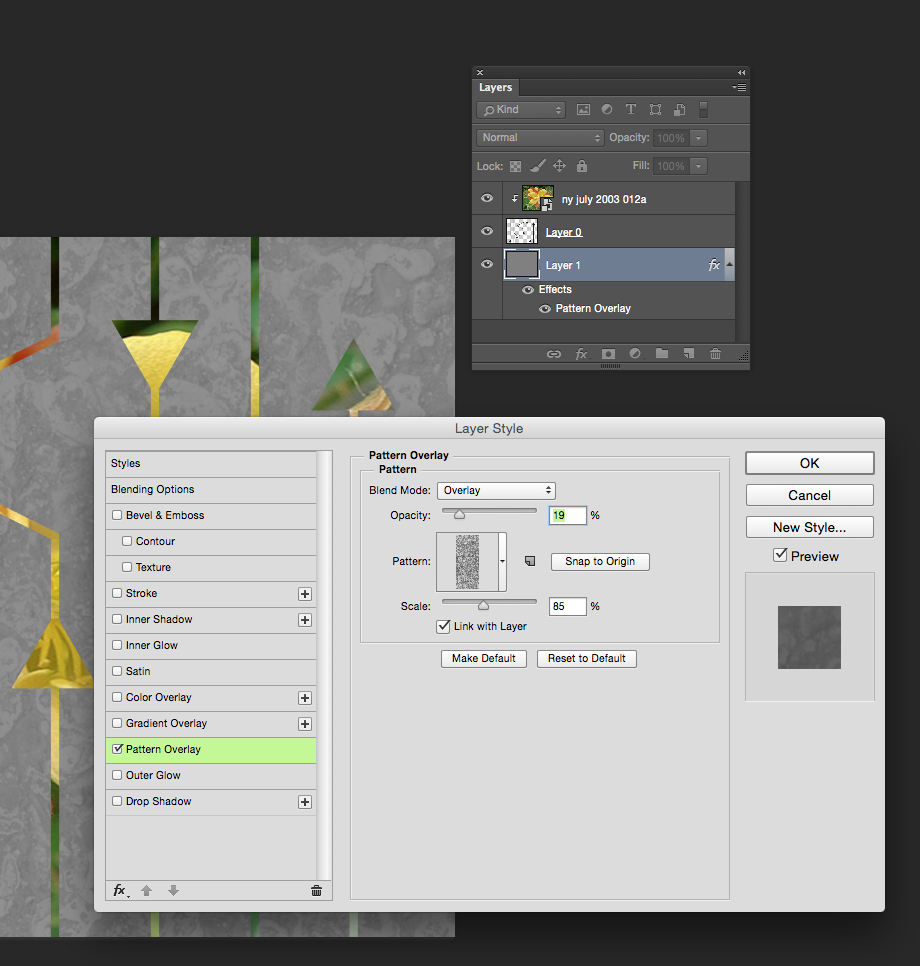
Lastly, I don’t want to have to sew precisely around every scallop on the edge of that wing to make sure that I don’t have any white showing on my finished wings.  So I am going to add a seam allowance in black to allow give me a little wiggle room.  Double click the butterfly layer in the Layers Palette and a new Layer Style Palette will pop up (you can also choose Layer Style from the top Layer menu).

Screen Shot 2016-01-05 at 11.02.10 AM

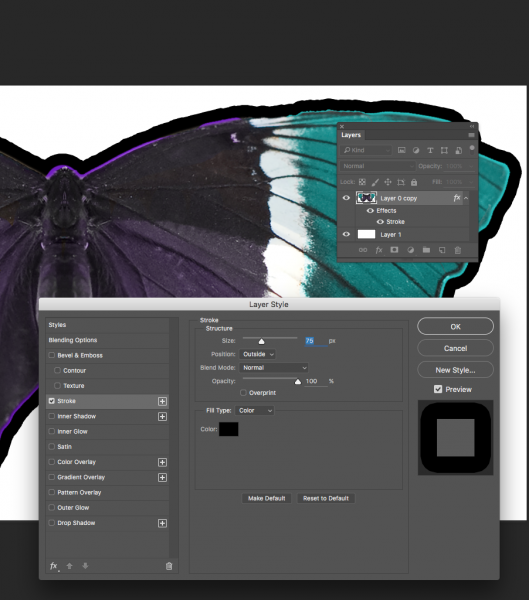
I chose Stroke under Styles and set it to put a 75 pixel stroke on the outside of my butterfly and set the color to black.  75 px at 150 dpi = 1/2 inch.  So now I have a 1/2 inch black border around the edge.  Save this.

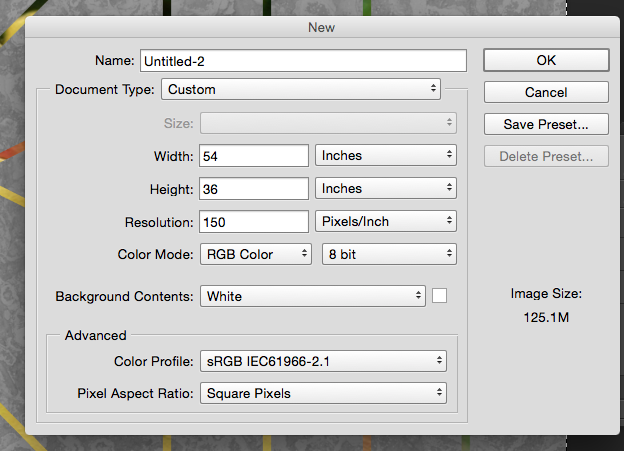
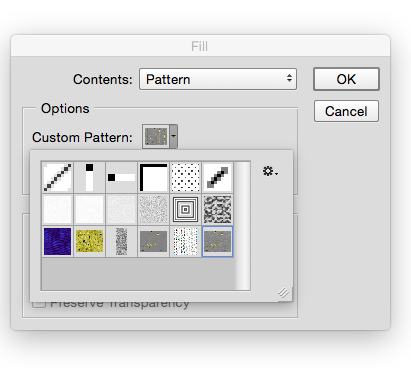
My butterfly wings are just barely small enough that I can put two of them (front and back) on a single yard of fabric.  I chose the Poly Crepe de Chine from Spoonflower for these wings because it is exactly the right weight and floaty-ness for wings.  So I made a new canvas 52×36 inches at 150 dpi and placed two butterfly wings on it.  If your wings are bigger, you may need 2 yards and then you can just upload as is and center the design.

Screen Shot 2016-01-05 at 12.10.42 PM

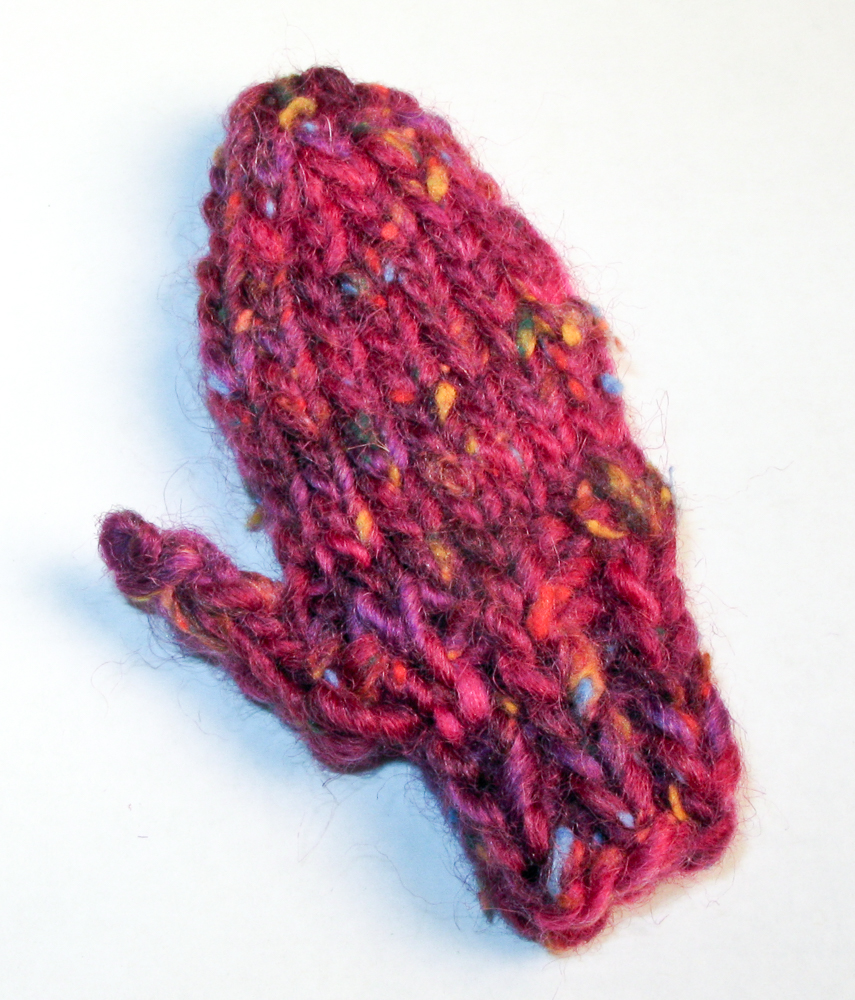
Export as a .jpg, upload to Spoonflower and wait with great anticipation while they are printed.  To finish up the wings, I cut them out and pinned them right sides together.  I cut two 20 inch pieces of black and white polkadotted ribbon and tucked them in at the top edge, about 4 inches either side of the center.  I cut two 8 inch pieces of narrow black elastic and tucked them in at the top edges of the wing tips.  Then I stitched around the whole thing with a 3/8 inch seam allowance (catching all of the ribbon/elastic as I stitched), leaving a little space to turn right side out.  Clip the seam allowance as needed, turn and press with a synthetics setting.  Slip stitch the opening.

Screen Shot 2016-01-05 at 12.13.11 PM

To wear the butterfly wings, you can either use the ribbon ties at the neck just like a cape, or we wrapped them over the front of her shoulders and tied them behind her back (my sister’s brilliant idea), so you only saw two little stripes of ribbon.  (The fairy liked not having it around her neck.)  The elastic loops slipped over her wrists.  She had a fancy fairy dress to match these, but I love them with all black too. Not in to butterflies?  Why not look for a photo of a moth, a bat, a hawk or there are even lizards with “wings” that might be perfect for pretending to be a dragon or griffin!  We also made a tiny pair of matching wings for her doll to have a matching costume.  Same method, smaller scale. 
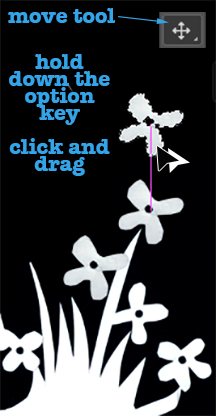
wings2

PinterestButterfly

2 December, 2015

Photo Cheater Quilt: A tutorial in 6 parts

2015-12-02T09:01:43-06:00Spoonflower & Fabric Design, Tutorials|Comments Off on Photo Cheater Quilt: A tutorial in 6 parts

I put together a really fun digital fabric quilt project using a collection of rainbow-hued photographs.  The finished quilt gets lots of “oohs and aaaahs” when I bring it to class as a sample.  Spoonflower has just posted the whole tutorial to their blog and here is a round-up of the links.

How to Create a Photo Cheater Quilt

Cheater Quilt Lesson One: Developing your Theme & Curating Photos

Cheater Quilt Lesson Two: Assembling your Color Collages

Cheater Quilt Lesson Three: Creating your Canvas

Cheater Quilt Lesson Four: Placing the Blocks

Cheater Quilt Lesson Five: Materials & Finishing your Quilt

Share!

Please show us your finished quilts by sharing a photo using hashtag #SpoonChallenge on your favorite social media outlet! We would love to see them.  My friend Amy from PennyCandyHandmade took the idea and ran with it.  See her awesome Hawaii-themed quilt here.

23 November, 2015

Mini Mitten Ornaments: A free knitting pattern

2015-12-01T21:07:14-06:00Tutorials|2 Comments

mittens2I originally posted these several years ago, but it suddenly occurred to me that I had better get moving if I wanted to get some holiday crafting finished and that all of you might be in the same boat.  These are a really fun way to use up scrap yarn and they go fast.  In fact if you have taken one of my Handpainted Skeins or Intro to Dyes classes, these are perfect for the mini skeins you dyed.  They are also super cute knit as pairs of mittens and attached together with a string. So if you need a little gift for someone or a little holiday decor of your own, here you go.  And happy knitting!


I wanted to knit some tiny mitten ornaments and although I found all kinds of cute patterns using sock weight and other tiny yarn, I didn’t come up with anything for worsted weight, which I have oodles of scraps of.  These mittens knit up in about 15 minutes and are simple enough that you can add stripes and some simple patterns if you are so inclined.  The finished mitten is about 3 inches long.

Materials: Worsted weight yarn scraps, four size 3 DPN, yarn darning needle

CO 12 stitches. (I like them divided evenly on 3 needles.)

K1 P1 ribbing for 6 rows.

K1 P1 KFB P.  Repeat 2 more times.  You now have 15 stitches.

Knit 8 rows.

K2tog, K 3.  Repeat 2 more times.  (12 stitches)

Knit 1 round.

K2tog, K2.  Repeat 2 more times.  (9 stitches)

Knit 1 round.

K2tog, K1.  Repeat 2 more times.  (6 stitches)

Cut your yarn.  Thread the end through a yarn needle.  Pass the yarn end through the last 6 stitches.  Pull tight and then pull the end to the inside of the mitten.  (I don’t weave in ends on this, I just stuff the yarn tails to the inside of the mitten.)

To make the thumb, you will do a short section of i-cord.

CO 3 stitches.  Knit 4 rows of i-cord.

K2tog, Knit 1.  Cast off, leaving about a 6 inch tail.

Thread the end of the yarn through your needle.  Slip the yarn end down through the center of the i cord and use the end to stitch the thumb in to place. A couple of stitches will do it.  I put the bottom (cast on) edge of the i-cord even with the top of the ribbing.

Bury all the ends of yarn inside the mitten.

mittens

9 September, 2015

Tutorial: Seamless Arrows Pattern, Part Four

2016-03-16T10:04:02-05:00Spoonflower & Fabric Design, Tutorials|Comments Off on Tutorial: Seamless Arrows Pattern, Part Four

(This is part four of a tutorial for making a seamless arrow pattern.  Find Part One and Part Two and Part Three here.)

Proofing and touching up the pattern is the finishing step to create the seamless arrow design and I am going to do that with the Photoshop pattern tool.  The first thing I do is select the whole design (Edit -> Select All) and create a pattern tile by choosing Edit -> Define Pattern and click OK.

Screen Shot 2015-09-09 at 10.46.34 AMIt will look like nothing has happened.  That’s ok!  The tile that you selected has been saved in the patterns palette, which is kind of hidden.

To proof the design, I create a new blank file that is the size of a yard of fabric. That’s an arbitrary size – I just think it’s nice to look at a large number of repeats.

Screen Shot 2015-09-09 at 10.46.58 AM

Then I choose Edit -> Fill from the menu.  From the pop-up Fill menu, choose Pattern from the contents drop down menu.  Just below that in Options there is another drop down and in it, you should find that pattern you just saved.  (See what I mean about a little hidden.)

Screen Shot 2015-09-09 at 10.47.25 AM


Now you can see what it looks like when the tile is repeating across a whole yard of fabric.  And right away a couple of things jump out at me.

arrow

Oops.  I didn’t think about the edges and I have a blank space where there aren’t any arrows.  I can fix that by cropping out some of the blank space.  The other thing that jumps out is a seam where the color changes. The color change is kind of abrupt and it makes a dark line.  I can fix that pretty easily by going back a step to my original file.  I select the photo layer of that flower because that is where the color is coming from.  The easiest way for me to make that contrasting line to go away is to just use a paintbrush to just touch it up. I choose a green color from the bottom of the image and paint some at the top where that really deep green was, hiding that seam line and blending the two together.

arrows2

After I do those two little edits…

Screen Shot 2015-09-09 at 11.23.29 AM


I have a pretty good finished design.  I save that tile and that is the repeat that I can upload to Spoonflower and print my fabric.  This is the version that I used for my grant project exhibition, which I will post photos of very soon.

Screen Shot 2015-08-07 at 11.26.11 AM

More in this series: Part OnePart TwoPart ThreePart Four

arrowsPin


1 September, 2015

Tutorial: Seamless Arrow Repeat Part 3

2016-03-16T10:03:14-05:00Spoonflower & Fabric Design, Tutorials|Comments Off on Tutorial: Seamless Arrow Repeat Part 3

(This is part three of a tutorial for making a seamless arrow pattern.  Find Part One and Part Two here.)

For Part Three, I am going to move over and work with the design in Photoshop now.  Why?  I could easily add color in Illustrator, but the effect I want is to cut those arrowheads out of another photo, which will give it a very organic color wash instead of a solid color.

Open the file in Photoshop.

So first I open that file we just saved in Photoshop. I first double click the Layer marked Background to unlock it (making it Layer 0).  Then I use the Magic Wand tool and delete to remove the white background and just leave the pattern of black lines.  (Make sure the option marked contiguous at the top center is clicked off and you will select all of the white in the image and not just the parts touching where you click.)

Screen Shot 2015-08-27 at 10.11.41 AM

Screen Shot 2015-08-27 at 10.15.30 AM

That will leave a checkerboard pattern in the background.  That is Photoshop’s way of telling you that is now transparent.

Add the photo layer.

Next I will add something to create that colored layer.  For my grant project design, I used one of the layers from the photo created by my design partner, so that her print and mine would coordinate.  But really anything will work, as long as it has the colors you want.  So for this example, I used a photograph of a columbine.  Choose File -> Place Embedded and pick your image.  Size/resolution is not really important.  Once you have placed it, click and drag it to resize and fill the space.  Make sure the photo layer is on top and your arrows on the bottom.

You can add filters or adjust colors or edit this layer if you want to.  For example, I might blur it to make it look more watercolored and less photo sharp.  In my grant project design, I added a few pops of magenta with a paint brush to bring out that color in the coordinating fabric.

Screen Shot 2015-08-27 at 10.14.23 AM


Create a clipping mask.

Select the Layer with your image and right-click it to bring up a pop up menu or choose Layer -> Create Clipping Mask from the top menu.  This will cut from the photo in the shape of the layer underneath.

Screen Shot 2015-08-28 at 11.54.48 AM


Add a background.

I will add a new layer to give the design a background color. You can click the new layer button in the palette (looks like a page with a bent corner) or choose Layer -> New from the menu.  I can choose Edit -> Fill from the menu to fill this layer with color and then drag it in the Layers palette to be on the bottom of the stack.

Screen Shot 2015-08-28 at 12.00.47 PM


The last thing I did was to add a little texture to that flat grey layer.  When I double click the layer in the Layer Palette, I will get a menu of Layer Style options.  I chose an asphalt texture that I had saved previously and set it to be only 19% opaque.

Screen Shot 2015-08-27 at 10.20.08 AM


In Part Four, I will show you how to proof your design and touch up any little flaws in the repeat and then it is finished and ready to go.

More in this series: Part OnePart TwoPart ThreePart Four

arrowsPin

31 August, 2015

Tutorial: Seamless Arrows Print – Part Two

2016-03-16T10:02:27-05:00Spoonflower & Fabric Design, Tutorials|Comments Off on Tutorial: Seamless Arrows Print – Part Two

(This is Part Two of a tutorial for creating a seamless arrows print.  See Part 1 here.)

Screen Shot 2015-08-27 at 10.06.48 AM

Part two of the tutorial is all about making the design seamless.  What does that mean?  I want these arrows to look like they are traveling all over the fabric without having a a start and stop.  Even though I only made a small section of the design, I want it to look like I designed something bigger and disguise the edges of the repeating element.

Check and adjust your lines.

With this design, one way to make it look seamless is to make sure that any line that extends off the edge of the drawing, joins up with the design again.  In orange I circled two lines, which go off the edge at the top of the repeat, and then show up again at the bottom.  When I make this tile repeat and put two identical tiles next to each other, those lines will match up and look like they are one continuous line.  I should also say, you don’t have to always work in a repeat, in fact I don’t make repeats very often, but for this particular project I just needed some yardage and not a specific shape.  So a repeat was the easy way to go.  Make sense?

Try the Pattern Tool.

Illustrator also has a Pattern Tool which you can use to get a preview of what that repeating element will look like.  Select all of the elements in your design and then go to Object -> Pattern -> Make.

Screen Shot 2015-08-27 at 10.09.17 AM


repeattoolThe pattern tool has lots of options for the kind of repeat style and the spacing, which you can play with.  I am using the tool in this screenshot to just show me what it looks like if I were to see 3×3 tiles.  And I can see when I have everything repeated that there are a couple of edits that I would make.

What do I look for?  Think about how your eye travels around the design.  My eye keeps going to and stopping at two arrowheads that are lined up side by side.  I think I need to move one of those around and break that up.  I also look for negative space – is there somewhere that is blank or has a gap that looks out of place?  Then look for things that are unique – there is only one line that stops (it’s between those 2 parallel arrowheads).  That might be a quirk that I want to leave in, or it might be distracting.

So my next step is to make all of those adjustments and then save this tile.

Screen Shot 2015-08-27 at 10.08.21 AM

I am going to save it as a .jpg and check the box that says “Use Artboards” which will crop it to fit the tile (in case I have anything that hangs over the edge.)

In Part Three, we move to Photoshop to add color and texture to the design.

More in this series: Part OnePart TwoPart ThreePart Four

arrowsPin

Go to Top