18 March, 2025

Teacher Tips: What to do when a class gets cancelled

2025-03-18T12:41:01-05:00An Artist's Life, Classes & Teaching|0 Comments

I’ve been teaching for more than 20 years as an independent contractor. That means that most of the time, I am partnered up with an organization like my county library system, an art center, shop or museum and teaching a class with them. Sometimes those classes get cancelled. There are lots of different reasons for that (like pandemics and weather) but most often it’s because there are not enough people signed up to make the math work out. So I thought I’d write a little about what I do when a class gets cancelled, especially for those of you who might be new to teaching or thinking about teaching your first class.

Don’t take it personally.

My first tip is to not take it personally. There are so many reasons that people don’t sign up for classes and almost all of them have nothing to do with you. I was supposed to teach a class tonight, which is why this topic is on my mind. We realized much later after we set the date for this one, that it falls right in the middle of spring break for the school district that art center is in. Oops. I don’t live in that district so I didn’t even think about that, but it means a lot of people are busy. I’m also a new teacher for this venue. Which means the community there doesn’t know me yet.

Before I worked as an artist full time, I was the education administrator at an art center. I scheduled all of the adults classes. It happened SO often there that we had a kind of unwritten expectation that a class would always cancel the very first time you offered it. There’s a commonly quoted stat that says someone has to see something like an ad 7 times before they will act on it. I think this is the case with these classes. People only registered the second time they saw it, thinking “Oh it looked fun, that must be popular since it’s there again, I should sign up”.

It’s really discouraging, don’t get me wrong. There’s a lot of work that goes into proposing and planning a class that can seem like a waste so I have some other things I do to try and capture some of that back in a positive way.

Talk to your partner.

Communicate with your partner org. Often they are the ones taking registrations and talking to people about the class much more than I am. What questions did people ask about the class? Was there “buzz”?

I once answered a “call for class proposals” from a shop who said their customers were super enthusiastic about a class on needle felting. But that class was cancelled without a single registration. Based on the feedback the shop got, I think it was priced too high because of the tools and materials needed to get you started in a total beginners class. In retrospect, it would have maybe been better to do a demo or a tiny make-and-take project that could act like an appetizer for class. That was valuable information.

Recently I pitched a class to one organization and they didn’t love the project and so we did something else. But I saved it and pitched the same project again to a different partner, who added it to the schedule. The students loved it so much, one suggested I do a whole series of classes based around the theme of that project. I trust my partner orgs to know their community (who they work with every day) better than I do and I think both orgs made the right call.

What can you reuse?

Classes take a lot of preparation. There is a project to design, samples to make, materials to select. When a class is cancelled, I look at what I’ve got prepared and think about how else I could use it because I’ve already done all of that work. So the first thing I think about is: could I teach this in a different format?

  • Could it be an online class?
  • A pattern to sell on Etsy?
  • A tutorial for my blog?
  • A make-along or educational posts on social media?
  • Could I combine it with another project to make a more advanced class? Or simplify it more for beginners?

I almost never teach something once and drop it. I like to think of my classes having more of a life cycle that I can adapt and grow and change to use different ways.

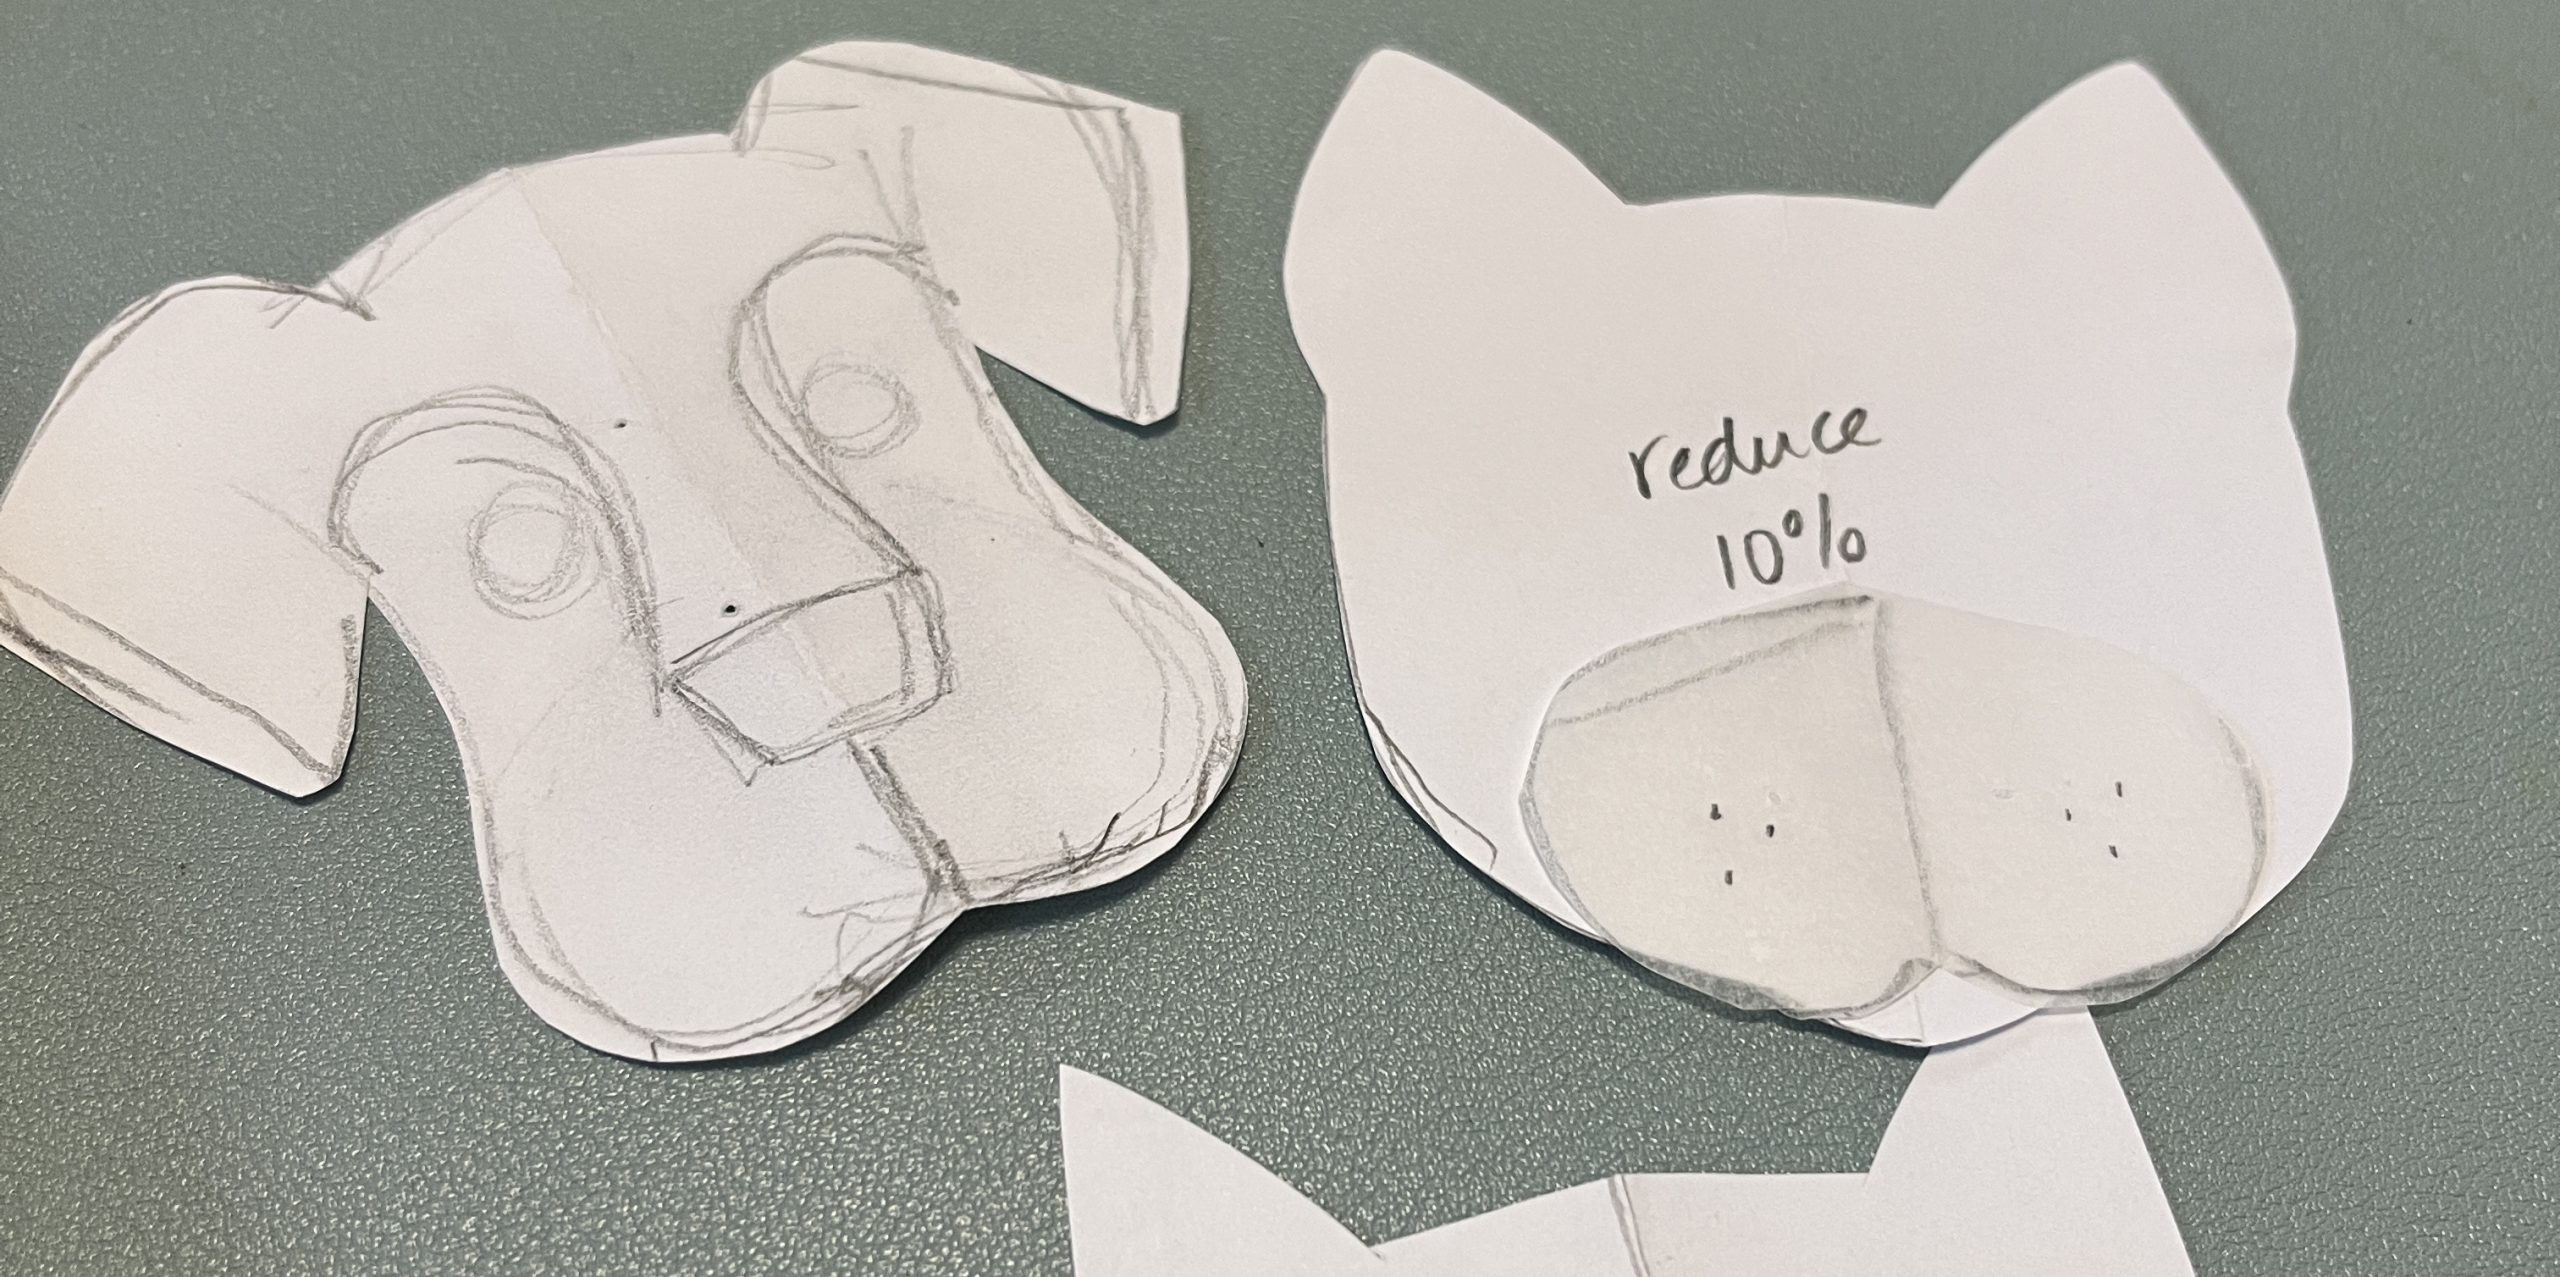
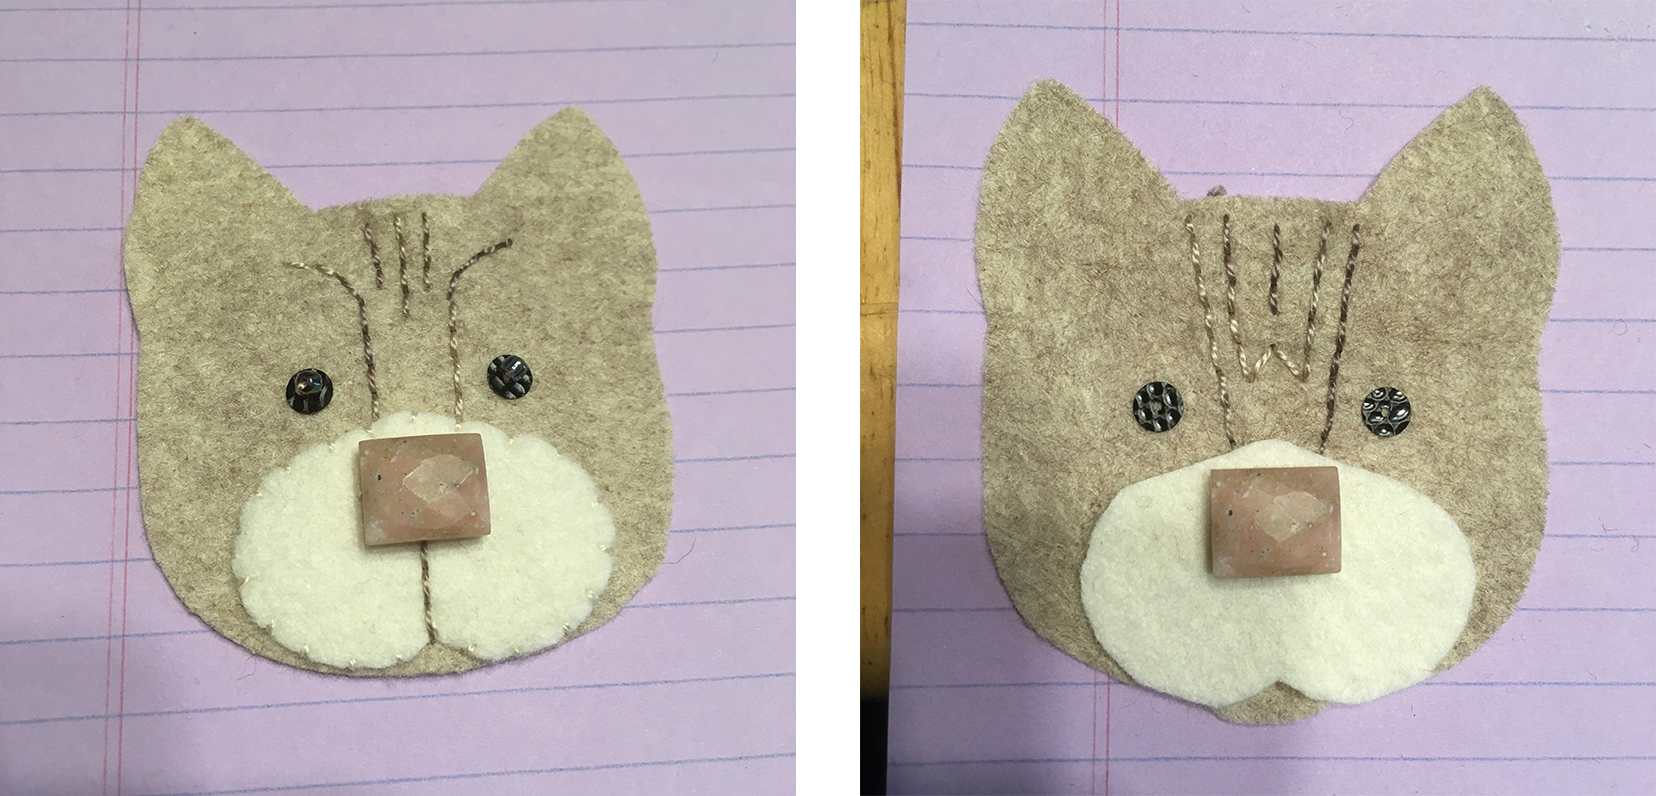
Look at everything with a fresh eye.

“Don’t judge a book by its cover” is a really common phrase but we absolutely all do it. The title, description and photo that go with your class are a tiny bit of information that are trying to communicate so much information. I was working on proposals for a conference yesterday that had a 450 character limit to describe a 2 day class. Getting all of the info for 2 days of class into 3-4 sentences is HARD.

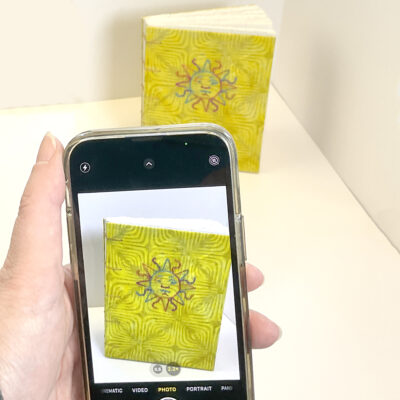
Before I put it out there again, I look at everything that I used to represent the class and try to change it up. Sometimes I make new samples to photograph or just take new photos of the samples I have. I look at the description and think about how I might change the focus or “vibe” of the class. Can I rewrite it to sound more casual? more structured? more technique focused? What fits with the other classes that are being taught at that venue? How can I change the title to make it more clear/fun/appealing?

I try to get someone else to read the description and ask me questions about it. What doesn’t make sense? Or have someone describe back to me what they think is going to happen in class when they read the description.

I remember working on a submitted class proposal when I was an arts admin. It was a great class: good description, good price, good project. But the class samples in the photos were so unappealing. It was a class sewing undies, which I think our audience would have signed up for, but the photos were terrible. There were three samples but all made from the same materials so they looked mostly the same and the colors were odd and unflattering. The photos were dark and looked like they’d been photographed on the floor (which made me think of dirty laundry). Those photos were not communicating all the good parts of the class.

Fill the time.

One of the hardest things about the pandemic shutdown was that I got a “sorry your class/event has been cancelled” email about once a week for months. I felt like I had been slowly crushed. The thing I learned from that was to not let my brain get into a cycle of “I was supposed to be teaching a class right now, but it got cancelled and I am a failure.” And the way to do that was to fill that time I had set aside to teach the class with something good. Over the pandemic, I illustrated a children’s book in all of my newly free time.

Since I was supposed to be teaching tonight, I am instead going to try out a new recipe for grilled paneer with a mint and cilantro sauce. I’ve never made it before so that will be a fun project because I love to cook. A few weeks ago another class was cancelled and I used that day instead to play with a new design and it turned into a new pattern for my Etsy shop; something that wasn’t on my planned goals for the year. It feels like an awesome bonus instead of something discouraging.

16 August, 2023

I’m a new Skillshare Teacher!

2023-08-16T12:08:54-05:00Classes & Teaching, UpcomingClasses|Comments Off on I’m a new Skillshare Teacher!

I’m super excited to announce that I have my first class available on Skillshare.

This is something I’ve been working on and thinking about for a long time. I’m absolutely going to continue teaching in all the places you love online and in the community, but I have been looking for a way to get my classes in front of more people. Social media algorithms are impossible for independent makers like me to get things seen by new people and I thought that Skillshare would be a great place to find potential students who were already looking for classes. Accessibility is an important value to me, so I didn’t like the idea of students only being able to participate via a paid subscription, which is why I’m really happy to add this as one more way to be able to offer lots of different classes in different ways. Students have asked me for years if I am on Skillshare and I can finally say YES!

Since I started working on my first class, I have watched a bunch of other Skillshare classes and I am enjoying them a lot! The way Skillshare works is that you get an annual subscription and you can participate in as many classes in as many different topics as you want to. I’ve watched classes on video editing, watercolor, sewing sock gnomes, and bookbinding. There’s a brand new teacher that’s doing one about seed saving that looks interesting and I am just waiting for that one to launch. Teachers have to audition to teach on the platform, so you know that they are pretty passionate about what they are teaching. It was totally intimidating making that intro video and hoping it would be good enough!

I also believe in transparency. Part of the way my class gets seen on Skillshare is through interaction, which means I have to tell people about it. So this is a referral link that says I sent you there, which helps Skillshare see that I am doing my part to promote my classes too. That also gets you a free 1 month trial (think of how many classes you could take in a month!) I would love it if you would interact with my class there in any way: bookmark it, register, follow me as a teacher, sign up for the trial. Everything helps show the algorithm that people are interested!

Why did I start with Embroidered Ice Cream Cones? Skillshare put out a list of their most requested classes and hand embroidery classes were on the list. These ice cream cones are a fun project that’s not just a boring beginning sampler of straight lines of stitches. I think embroidery lends itself to online classes so well. You can really see how to make the stitches close up and you can repeat the video as many times as you need to see how something works. I’m already thinking about the next class. I think it might be a pond with waterlilies and lilypads. What would you like to learn?

26 June, 2023

My Favorite Hand-Embroidery Threads: Eleganza Perle Cotton & Kreinik Very Fine Braid

2023-06-26T18:42:27-05:00Classes & Teaching, Embroidery|2 Comments

I’ve been teaching a weekly online embroidery class for more than a year now and although my regular students know my favorite threads, I thought it would be great to talk a little more about them outside of class. I do a LOT of hand embroidery on both paper and fabric so I use threads nearly every day. I just finished a large project using all 6-stranded DMC floss, which is probably the kind of thread that most people are familiar with, but it turns out that it’s not my favorite one. So, let me tell you about the ones that are my favorites.

Eleganza Perle Cotton

The threads shown on the left side above are all #8 Eleganza Perle Cotton made by Wonderfil. They have had artist Sue Spargo design a line of colors for them and these are my absolute favorite threads to stitch with. Perle cotton is a little different than 6-stranded embroidery floss. Instead of 6 strands, perle cotton has only 2 and they are meant to stay twisted together; you don’t separate them like you can with floss. The threads are incredibly smooth and shiny and I don’t think they knot up as easily when you stitch them. The variegated colors are particularly nice because the color changes are pretty close together, so when you stitch the color changes often and you don’t get long stretches of the same color. There are also some unusual color combos in the variegated threads, like this one called “Conga Line” which I like when I am stitching.

Pictured are Welsh Poppy EZ16 (orange), Paradise Blue EZ10 (blue), Conga Line EZM47 (variegated), Mounted Trousers EZ57 (deep green).

Kreinik #4 Very Fine Braid

I have tried so many different metallic threads over the years and they are always stiff, rough and fray easily. They are difficult to stitch with and some stitches just look ugly because of the stiffness of the threads. The Kreinik braids are completely different. They are still a little more challenging than perle cotton, but the #4 Very Fine Braid is much smoother and easier to stitch with. They are sturdy and they don’t leave your piece feeling rough and scratchy. The threads are very sparkly and come in so many colors. It’s not just silver, gold, red and green! I usually get mine on Etsy because Kreinik doesn’t sell directly from their website, but it’s pretty easy to find.

Pictured above are Gold 002, Vintage Burgundy 153V and Aquamarine 684. “Golden” Mrs. Santa shown below is from a pattern by mmmcrafts, stitched by me.

7 March, 2023

Three teacher confessions: Why I love questions

2023-03-11T11:27:18-06:00An Artist's Life, Classes & Teaching|1 Comment

Imagine putting on a blindfold. Then adding some earplugs. And then stepping into a room to teach a two hour class.

I LOVE teaching virtual/Zoom classes. If there is one spot of sunshine that came out of the past few years for me, it’s the acceptance/accessibility of online teaching. I jumped in to learning the technology enthusiastically. And I now teach something via Zoom every week from my studio table. It’s awesome.

I remember one of the late-2020 classes I taught had a group of 18 or so students and every single person had their camera and microphone turned off. I’m not complaining even for a minute that everyone chose to do that. There are many reasons to NOT have your camera and microphone on and they are all good ones. I support that 100%. But what I didn’t expect was how hard it was to teach when there is no feedback at all from students. I felt a little like I had to relearn how to do it.

It takes a lot of energy.

Until I was faced with an entire screen full of black rectangles, I didn’t realize how much I relied on simple feedback like students nodding or looking up from their project to know when it was time to move to the next step. It’s a like a conversation. I share something and then students share something back with me. But when there’s no feedback, it’s like shoveling snow. You just keep scooping up the next bit and stepping forward until you get to the end and then you stand there panting.

“Students who vigorously nod: you are life itself.” This quote popped up today in my Instagram stories and I couldn’t agree more. Those nods and smiles and thumbs up are like little shots of espresso. More so than I ever imagined.

The more I thought about it, the more I wanted to write this post with a few “Teacher Confessions” or things that I suspect students don’t know but that make my job a thousand times easier and more fun.

1. Questions are never dumb.

I was thinking about a class I taught a few weeks ago. It was a small one and started out with everyone watching quietly from their black boxes for the first 45 minutes. But then someone unmuted and asked a question. And it was like that broke the ice. Soon there was another question and then a comment. And then a “me too” in the chat. And suddenly we were having a conversation.

I wanted to give that first question-asker a shiny gold star sticker! With an in-person class, I can watch and see if anyone looks puzzled or is struggling with a step and I can show a demonstration a different way or explain it differently or do it again. I watch for that. But virtually, I can’t see what anyone is doing so I don’t know when to repeat or move forward. Until you ask a question.

2. Sharing is even better than questions.

I am not one of those teachers who believes anything is “my way or the highway”. I’m there to show you the way I do a thing to get a specific result, but I know that there are always many ways of accomplishing that end result, sometimes more and less successfully. In another class we were working on something with a specific step that we did over and over. So we all had some time to practice this new skill. After a few repeats, someone asked a question and instead of just me answering, another student added “I moved my hand this way and tried this” and someone else said “It was easier for me when I tried it this way”. That, my friends, is like winning the lottery. Not only did I learn a new way of thinking about it, but everyone else now had three ideas for ways to do this thing instead of just one.

3. Questions + sharing = community experience.

There’s an invisible thing that I think happens when everyone is participating in the conversation too. When someone asks a question, you might think “Oh I wondered that too.” or “That makes so much sense now to me too.” If you try something another student suggested, you suddenly have something in common with that other person too. It’s a shared experience or something you did together. You had the same question, tried the same thing, had the same success or flop. Suddenly it becomes something “we” did, instead of something “I” did. It’s a little like that feeling of watching a movie in the theater and everyone lip synchs the line “My name is Inigo Montoya. You killed my father. Prepare to die.” It makes you a part of something special. You walk away with a smile.

As teachers we all say “Please ask questions” but the confession part is that I really do mean it. It helps me as much as it helps you (and probably everyone else too.)

19 April, 2022

New Online Classes!

2022-04-19T15:32:39-05:00Classes & Teaching, Everything Else, Spoonflower & Fabric Design, UpcomingClasses|Comments Off on New Online Classes!

It’s class launch day! I have four new online classes open for registration today, from fabric design to hands-on art with recycled materials. I offer both on-demand classes where you can register and take the class on your schedule any time and live online classes where you can join me on Zoom for a virtual class. Here’s what’s new!

New on-demand classes at Teachable

Postcard Art From Everyday Materials. In 2020, I developed a series about making art from every day materials you might find around your house like scrap paper, glue stick, recycled envelopes, post-it notes. For each technique, I show you three or four designs to make into mailable postcards or other small art pieces. I originally partnered with Dakota County Libraries to host these on Facebook, but now I have them here on my website with added links, ideas and resources.

Crafting a Class. Learn how to plan, prepare, promote, and teach an awesome hands-on class. From setting goals and writing your description to fine tuning your supply list and managing students at different skill levels, this online class goes in-depth to help you craft the best class you can. I’ve redone all of the videos and added new lessons about teaching online, setting up a Zoom classroom and more.

Live online classes held on Zoom

A Spoonful of Spoonflower. Thursday May 12, 7:00 pm CDT Get a tour of what it’s like to design fabrics and print them using Spoonflower, a web-based service for printing your own fabric designs. During class, I’ll walk through creating a simple two-color design from creating a sketch to uploading and ordering. I usually only offer this for guilds and private groups and I thought I should do one that’s open to anyone!

Designing Kumihimo Braids Thursday June 16, 7:00 pm CDT Learn the basics of kumihimo, a multi-stranded braid which originated in Japan. In this class you will learn both an 8 and 16 stranded braid pattern and how to make your own marudai braiding loom. We will talk about how to design your own braid variations with different colors and yarn weights or textures.

Be sure to also check out the other classes I have available by clicking the links to Live Classes & Events or On Demand Online Classes in the menu above.

21 October, 2021

Designing Kits (and classes) behind the scenes

2021-10-21T12:46:10-05:00Classes & Teaching, Embroidery, Etsy, Sewing & Design|1 Comment

I LOVE making kits. I like designing small projects and sourcing beautiful materials. I even love the meditative afternoon of packaging things all up. It goes along with my love of teaching. For me, a kit is like a “class in a box” that you can jump into at any time. Instead of talking and demonstrating, I have the creative challenge of figuring out how to capture the important steps in photos and how to write the instructions to make them as simple and straightforward as possible. It’s a different kind of teaching, but for me it’s just as much fun.

This week has been all about cats. The cats design started as a request from students in a class that I taught with a bead embroidered dog. That dog is something I designed for a virtual class with the local county library, but then I loved it so much, I also turned it into a kit. Students in that class said “You should do cats!” and so I thought it would be fun to talk about how I designed those cats.

I always start with a sketch on paper and in this case since I already had the dog design, I wanted to make the two go together and share a similar style. So I started with my dog pattern pieces and sketched cat shapes over top of them.

My first version was too big, but I liked the shape. My next step is to re-draw the pattern pieces in Illustrator, so I made myself a note to reduce the size. That’s super easy to do once it’s in a digital format. I scanned the paper pieces and traced over them to create the pattern outlines. Then I printed out versions at a couple of different sizes so I could check it next to the dog and make sure I liked the way they worked together.

Next I started working on their faces and the embroidery. The first version, I tried to make curved eyebrows like the dog design has, but it made the cats look really angry. So I made another sample and decided to try and do tabby cat stripes instead. I liked this one a lot better. At this point in the design process, I make a lot of samples. Often if I can see they just aren’t right, I cut them apart and reuse pieces like the nose beads for the next version. I often use scrap felt so sometimes the colors are a little wacky. The beads I used here as a stand in for the nose were a little too big and square. My dog design used black sequins and black beads for the nose, but the cats looked wrong with the dark contrast. (My black and white version looked more like a skunk than a cat!)

So I swapped gold sequins for the black and found the perfect pinkish stone beads for noses. Next is choosing felt colors for the finished cats. I know that people love to make things that look like their own pet. I absolutely do. That’s why the dog kits have yellow, chocolate or black lab versions. So for the cats, I wanted three different colors too. These are loosely based on my sister’s three cats: a grey tabby, an orange tabby and a tuxedo (hers is all black). I get all of my felt from an Etsy seller because I love to support other small businesses with my small business whenever possible. So I have a color card with all of the colors of felt she carries and I spent a lot of time picking just the right colors for these. The orange tabby was definitely the hardest color choice to make. It is a darker color than the orange tabby I had when I was growing up, but it turns out that there aren’t a lot of shades of nice orange felt available. I like this combo.

Next I make up the “final” samples that I will use for the kits and then I make up one more where I photograph each step as I go so I can write the instructions.

I like to give lots of options for “what do I do with it” when creating kits. I originally thought of these as pins, but not everyone likes big pins on their jacket like I do, so I also show how to finish these with a keyring or to put a hanger on them and use them like an ornament (not pictured). I’ve seen people talk themselves out of making things that they really love because they “don’t know what to do with it” so I think the more ideas I can give, the better! (A class member also suggested making magnets, which I think is an awesome idea.)

I decided it would be fun to teach this one as a class before I launched it as a kit. So a week or so ago, I did a Zoom class and a group of us made these cats together. It was so much fun! When I was sending things out to the members of the class, we chatted about their cats, and I realized that being able to personalize your cat was really important, so I decided that every kit should have a little extra felt so you could make your felt cat look like *your* cat if you wanted to by adding extra stripes or patches. We also played around with a couple of different ways of adding whiskers.

When I got done with virtual class, I went back through my kit instructions really carefully and thought about all of the things we talked about in class and made sure I included those little details in the step-by-steps. I thought it was all done and ready to launch so I set up to take photos for the Etsy listing so I could post it later in the week.

It wasn’t until I was putting together a kit for a different class that I started thinking about these cats again and realized they weren’t quite finished. I attended a webinar by Spoonflower and Lilla Rogers this morning and we had a conversation about “pretty”. She talked a lot about that subjective “pretty” factor that makes designs really appealing and how that’s something she looks for. That’s exactly what these cats were missing: that little bit of something that took them from just a cute cat to “I have to make that”. So I went back to the drawing board.

When I was a kid, our cat Bob was an indoor/outdoor adventurer and he was a little too good at catching birds. So my mom got him a collar and put jingle bells on it so he couldn’t be quite as stealthy. So I grabbed some scraps of felt and made a collar with a jingle bell for my felt cats. Bingo! I LOVE these now. Whether it’s the nostalgia of thinking about my own favorite cat or the extra little detail that makes these a little more whimsical, I think the bell is exactly what they needed.

So you guessed it! More samples! I stitched three more samples, re-wrote a section of the instructions, and took a bunch more pictures and these became the finished cat designs. Yesterday I put together the first batch of kits for my Etsy shop. These kits are great for beginners and I hate how so often beginner (or kid-friendly) kits are made with low quality “cheap” materials. I love beautiful materials to work with anytime I am teaching, so these kits are made with my favorite materials: wool/rayon felt and perle cotton thread and stone and glass beads.

So now I have dogs, cats and sheep. What’s the next animal I should do in this series? I’d love to hear what you think!

Go to Top