Often when I teach an intro fabric design class, the students and I create a collaborative fabric design during class, which I have printed and mail to them after class. This most recent class played along with me and made this design using speech bubble shaped post-it-notes and wrote their favorite “clean” swear word. I thought it would make a funny fabric, especially given the day I had before I got to class. So I scanned our design and got ready to put it into a repeat and it just seemed sort of blah. We needed a much more colorful fabric to match our colorful language. So I added some color and after I sent the swatches, I told my class I would post a tutorial about how I did it so they could check back. My screenshots for this are in Photoshop, but many other design programs have the same tools you can use.
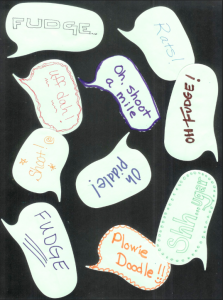
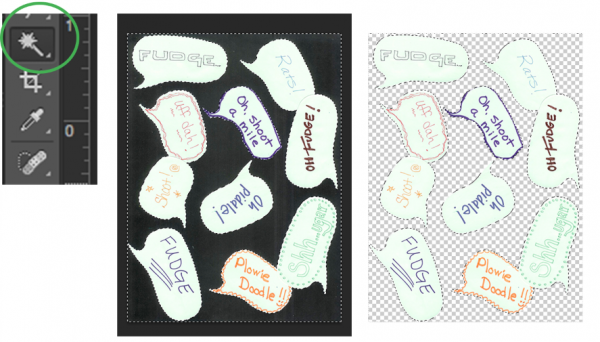
We started with a scanned image of post-it-notes on black paper. I scanned this at 150 dpi because I wanted to print it at the same size and that is the resolution I need for fabric.
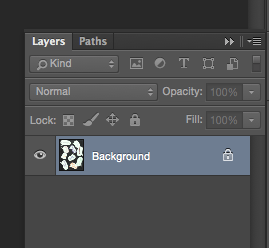
 The first thing I wanted to do was to move the speech bubbles to a layer all by themselves. This way I could insert something into the background and have them float over top. When I open the image in Photoshop, it automatically makes it a locked background layer. (See the lock icon?) When I go to the Layers palette and double click the layer that says Background, it will unlock it and convert it to a regular layer (Layer 0), which is what we need.
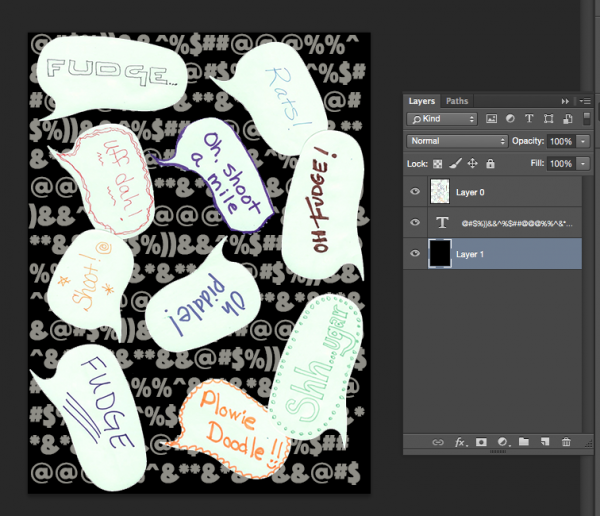
Next I will add a new background layer back in, by choosing the new layer icon (looks like a page with a bent corner) to make Layer 1. Then choose Edit -> Fill from the menu to fill it with black. You will probably also have to put your layers in the right order by clicking and dragging them in the palette to make sure the bubbles are on top and the black layer on the bottom.
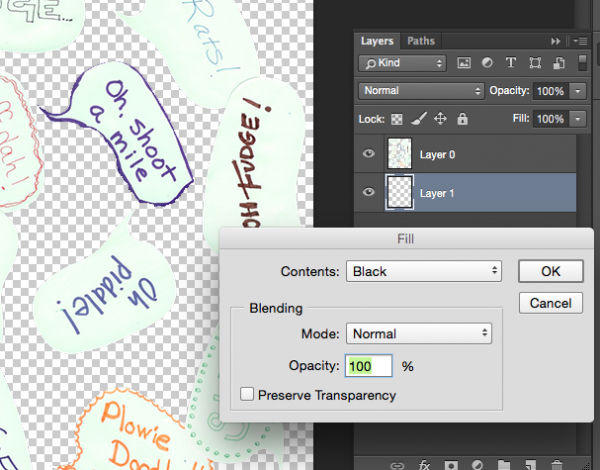 So it doesn’t actually look like we have done much at this point, but what we have done is split the design into two layers so that we can now insert something in between them. Next, I am going to add a Text layer, by clicking the text tool and dragging a text box to fill the design space. Now I can type text into this layer. I filled it with cartoon style swear words (*&%$!!@) to match our theme. It doesn’t matter what color they are, we will change that next. Drag the text layer so it is sandwiched between Layers 0 and 1.
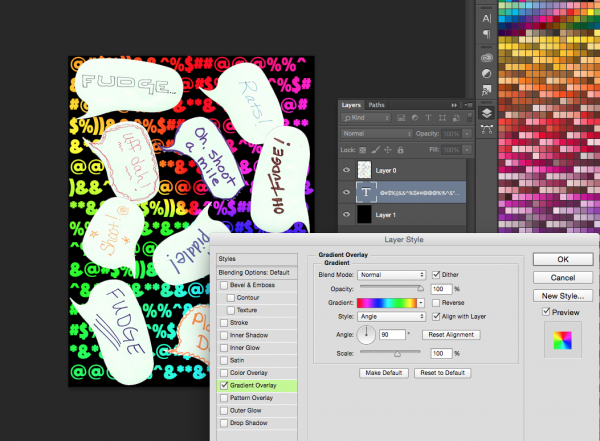
Now the color! If you double click the Text layer in the Layers Palette, a window will pop up giving you options for Layer Styles. We are going to use a Gradient Overlay to add a rainbow to this text.
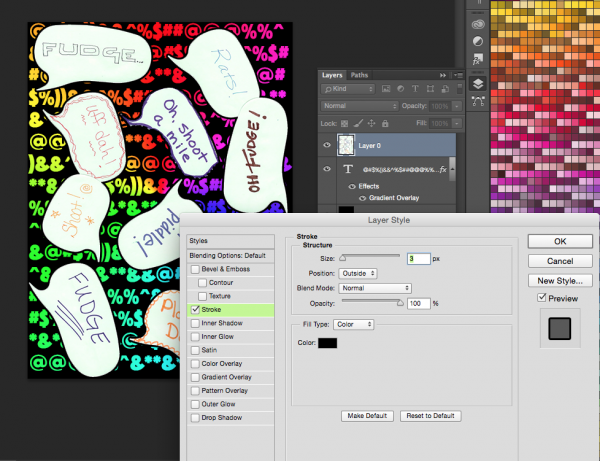
The last little tweak I made to the design was to add a black outline to our speech bubbles to help make them pop out from the background a little more. That is easy to do with the same Layer Styles tool. Double click Layer 0 with the speech bubbles and choose Stroke from the style options. I added a 3 px border of black.
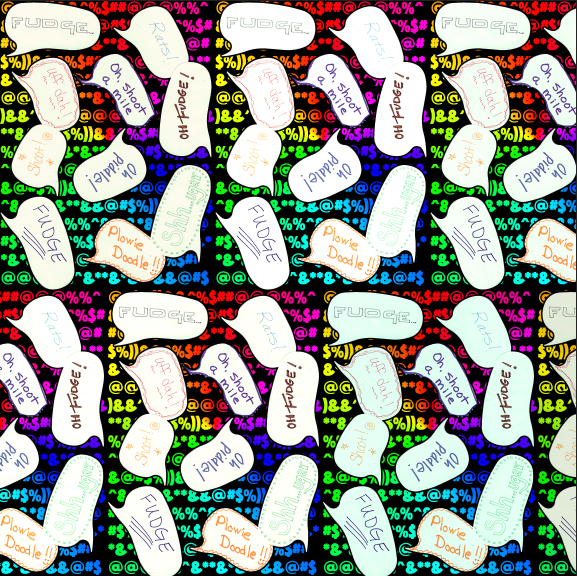
And this is the finished design.
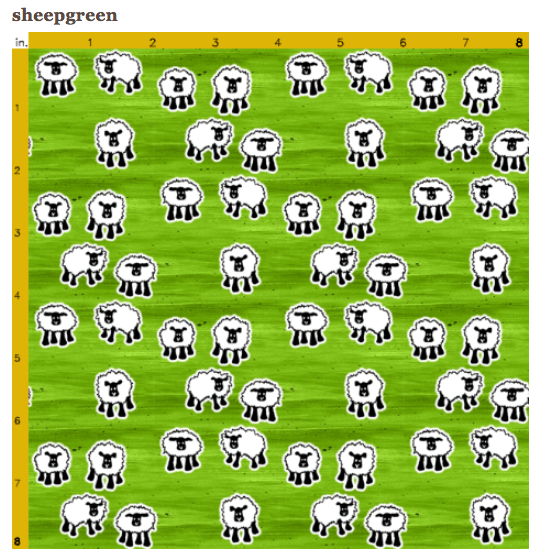
 Now I understand that this is a pretty silly fabric and you aren’t probably going to run right out and order yards of it. But by using the same steps you learned here, you can create fabrics like these:
These sheep are drawn with a fine tip sharpie and scanned. I cut them out from the background the same way and added a white Stroke to the layer so they have that white outline. The background for this design instead of text, is a piece of painted paper that I scanned and added a Color Overlay (from the Layer Styles Palette) in green.
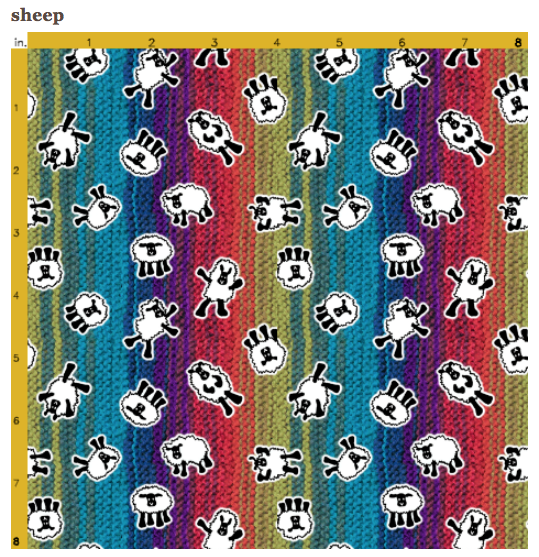
Or dancing sheep on a knitted background.

Hi, Becka –
Thanks for the piece of fabric and the tutorial on how you created the background. It was a great class. Now all I need is Photoshop! I did create a piece of fabric and ordered it from Spoonflower. I’m going to make a decorative flag. I have one of those brackets you can put in your garden to hang decorative, seasonal flags. I’m not sure how well the fabric will hold up, but a fat quarter is the right size to work from so it seemed like a good first project. Thanks for the class and the inspiration to try designing my own fabric!
Teresa – That sounds like a great project! Let me know how it turns out.