

Hi, I’m Becka.
I’m an artist who explores ideas through paper, fiber, pattern, and technology. My favorite projects usually start with curiosity and end somewhere I wasn’t expecting. I enjoy exploring new techniques, combining ideas from unexpected places, and seeing what happens when I follow a question instead of a plan.
I share that process through my artwork, writing, and teaching because I think creativity is more fun when it’s shared. I believe that seeing the whole creative process—the experiments, the successes, the failures, the art, the business, and everything in between—makes makes trying something new feel a little more possible.
Curiosity is contagious. I hope you find something here that inspires you to follow your own.
Upcoming Classes & Events
Studio Journal

Curiousity is my core & Updating my branding
I’ve been thinking about doing a brand refresh for a while now. I wrote a whole post about this logo, font, and the colors I chose in 2015! That’s 11 years since I’ve updated it. You can see the 2015 version on the left and my updated version on the right. The washed-out-orange and too-bright-green from that previous version were just starting to bother me. In fact, I avoided using them on my website and other things because they just didn’t really feel like they were right any more.
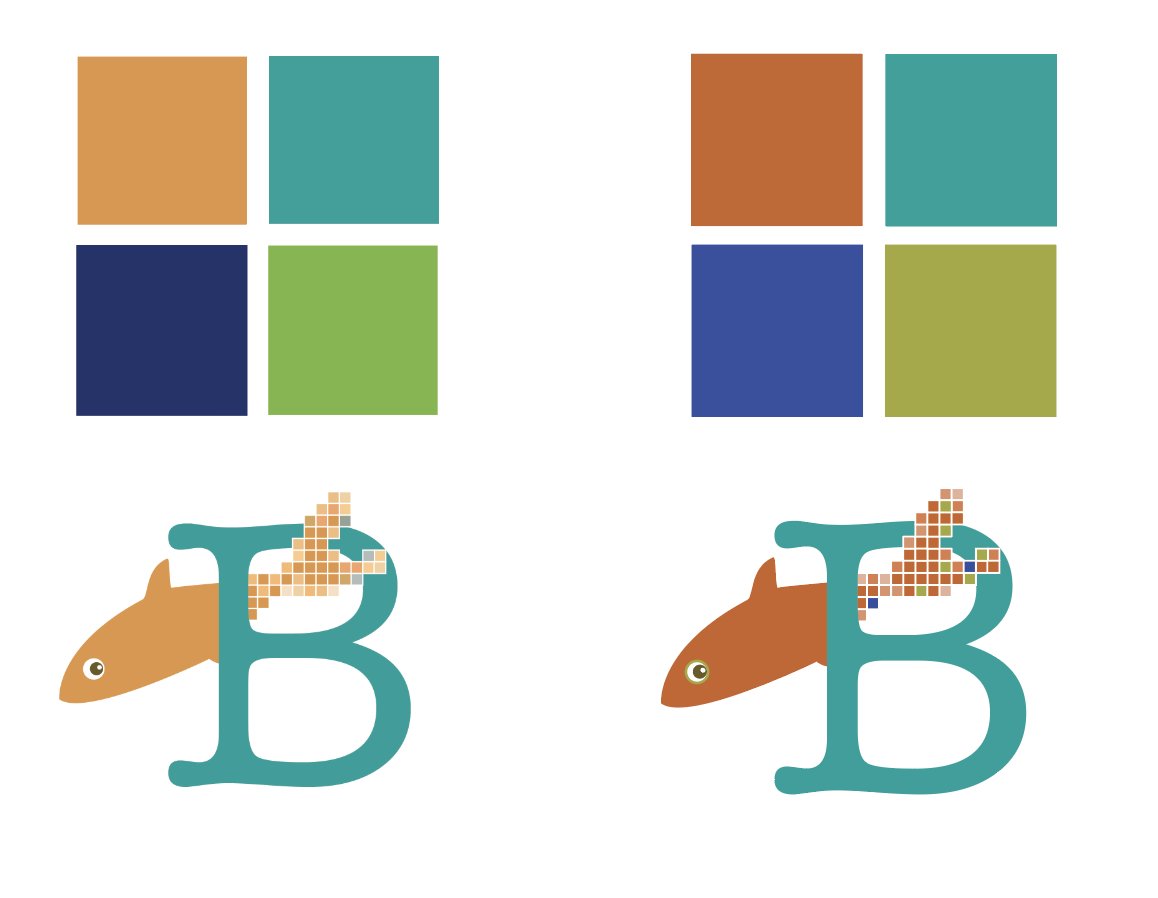
The aqua color stayed exactly the same, but I tweaked the other three colors to make them colors that feel more like “me” in 2026. It’s kind of a subtle change because those four basic colors are still my favorites and still feel like the go-to colors for everything that I do. I struggled a little with the goldfish because that looks really different to me, but I think it’s because I’ve been looking at that other color combination for 11 years. I’m hoping because everything is essentially just a tweak that I can just use up everything like business cards with the [read more…]
Behind the Scenes: Teaching (or not teaching) at a national conference
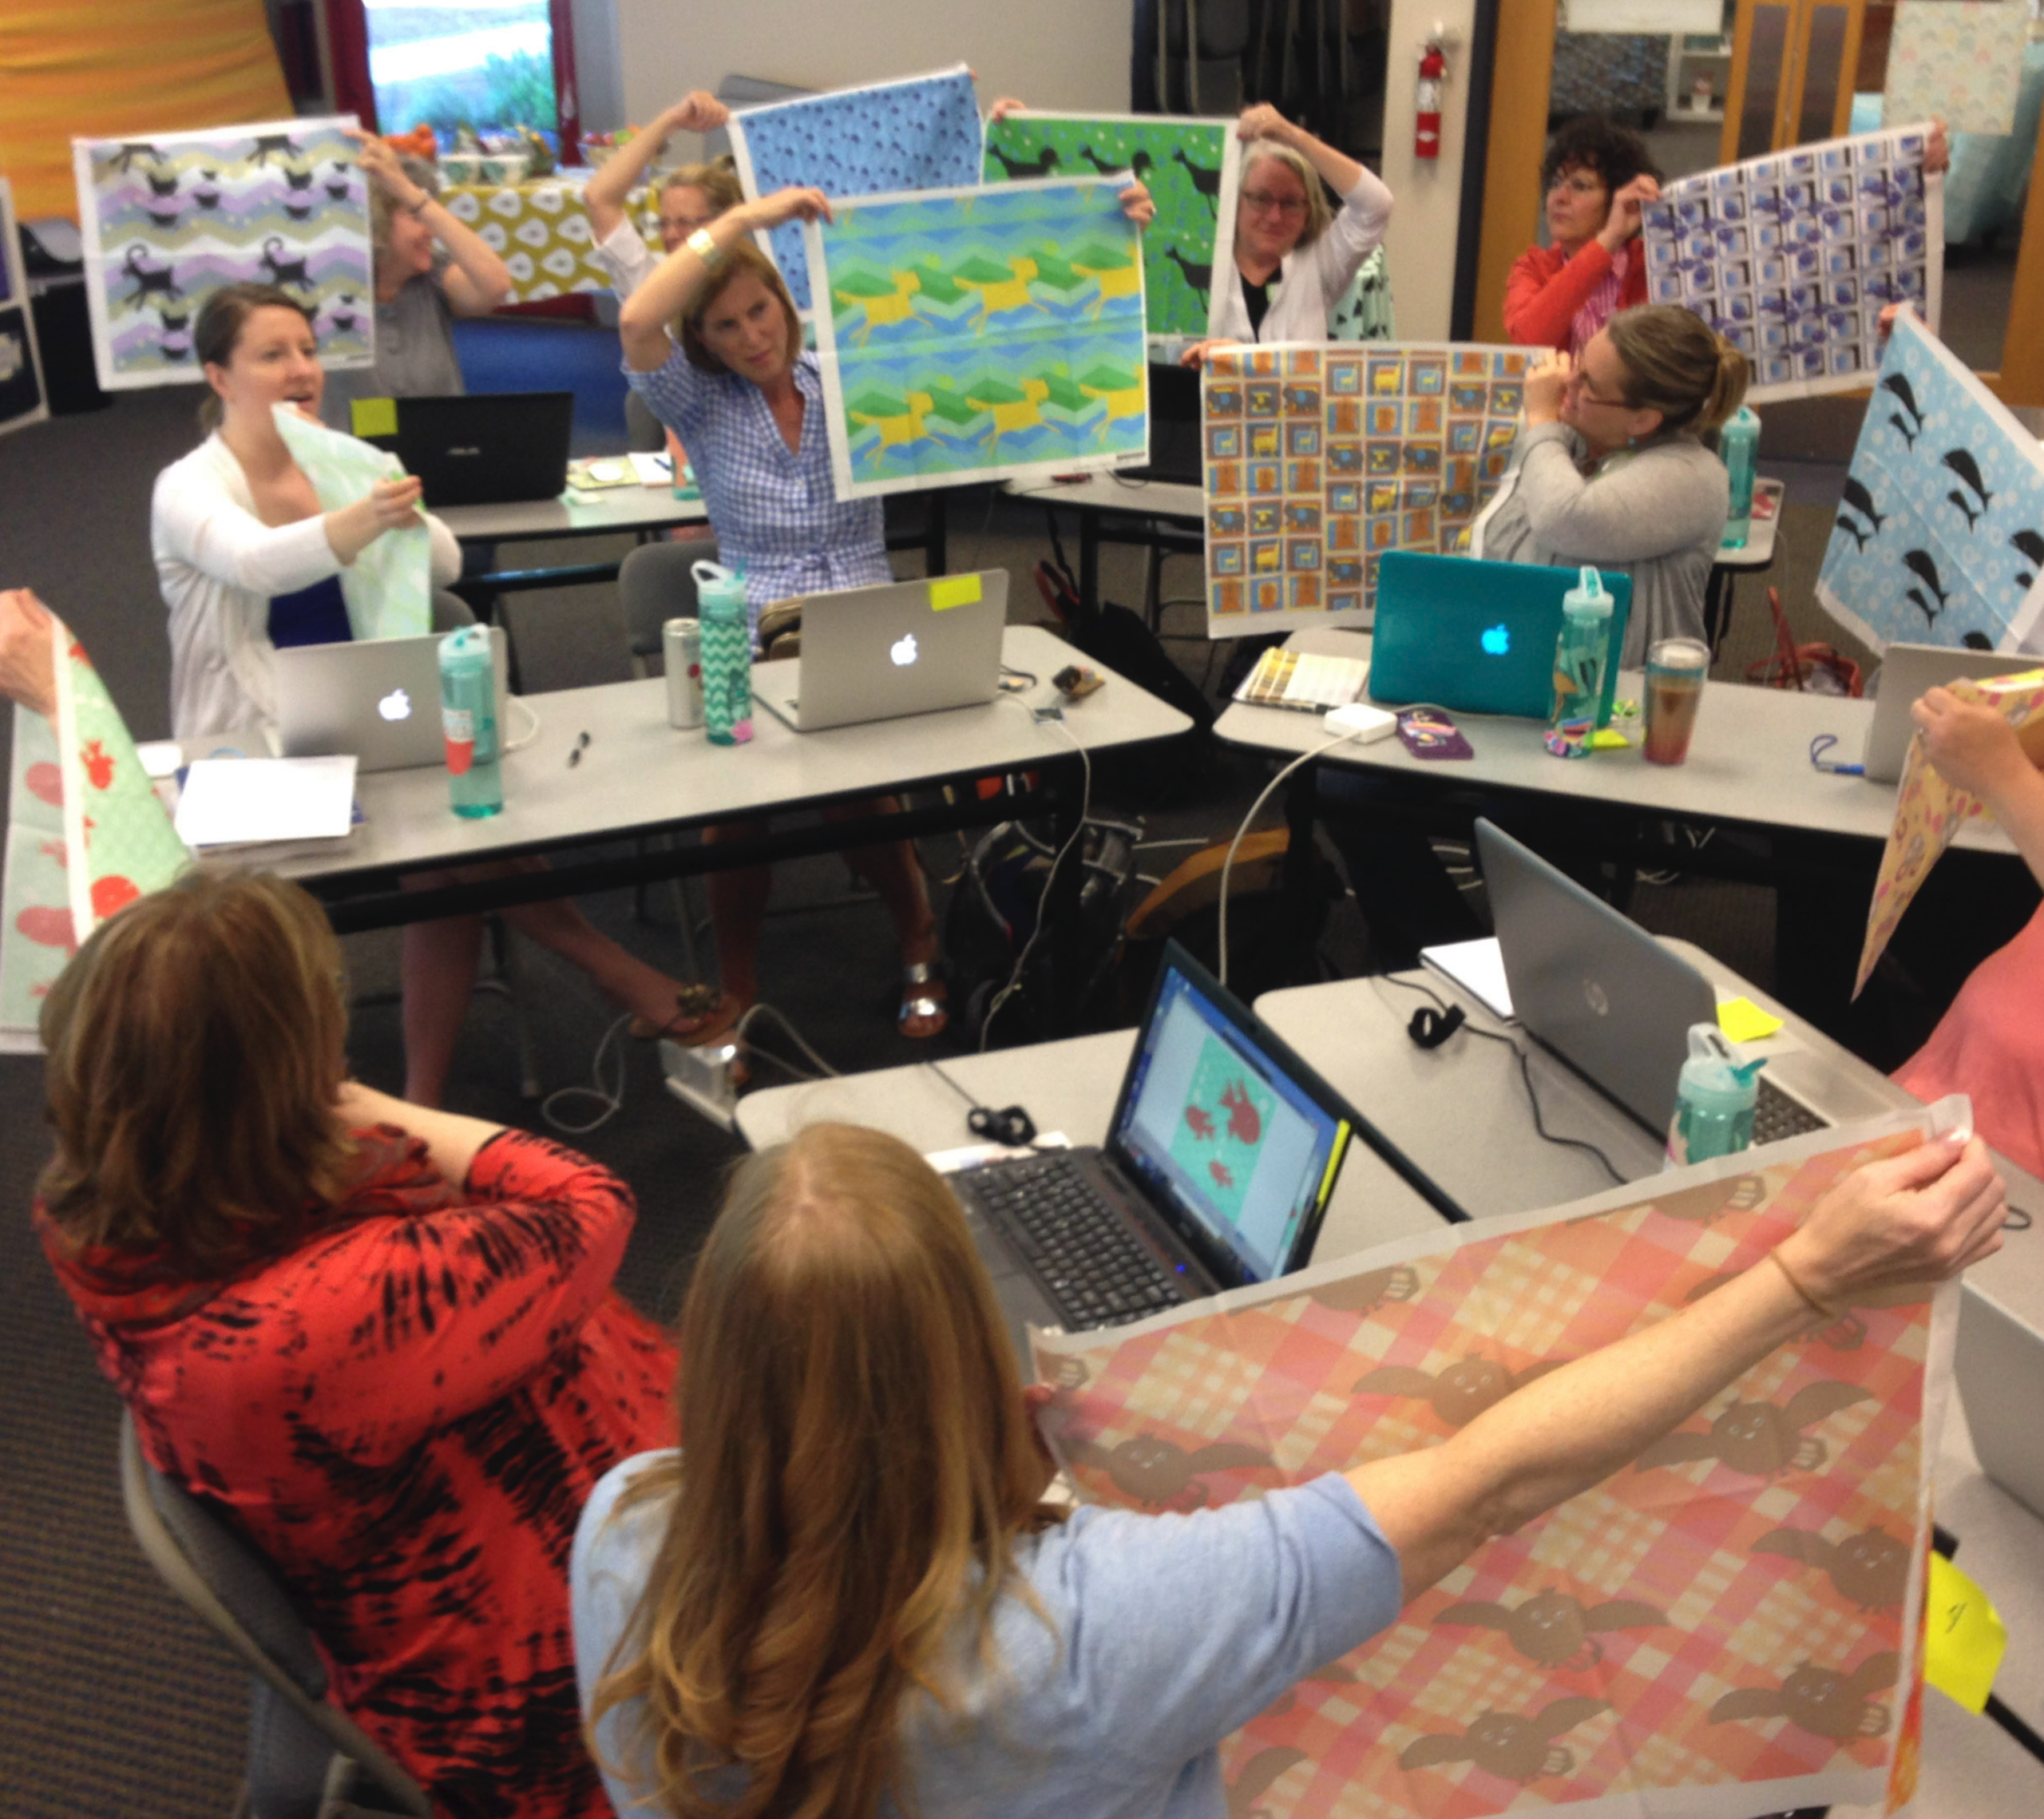
I have been invited to teach at about eight national conferences over the past 10 years. These have been for organizations representing a wide range of fiber art genres like the Surface Design Association, Handweavers Guild of America, International Old Lace Society, and the Association of Sewing and Design Professionals. Usually I have taught some kind of technology-related topic, like digital fabric design or behind the scenes of an Etsy shop and I LOVE teaching at these kinds of events.
Recently we had to cancel two of the classes I was scheduled to teach and I made a post about it just to let people know. Someone on social media commented that it was a shame that they were cancelling things so early, since it’s about 6 weeks before the event is scheduled. I thought to myself “Early?!” and then realized that I should write a blog post about the process of teaching at one of these events because this seems anything but early to me. I’ll use this most recent conference as an example. Although the details are different for every one, most of them coordinate things on a similar timeline.

Application
I first [read more…]
Pattern Review: Style Arc Barry Pants & iTokri Fabric
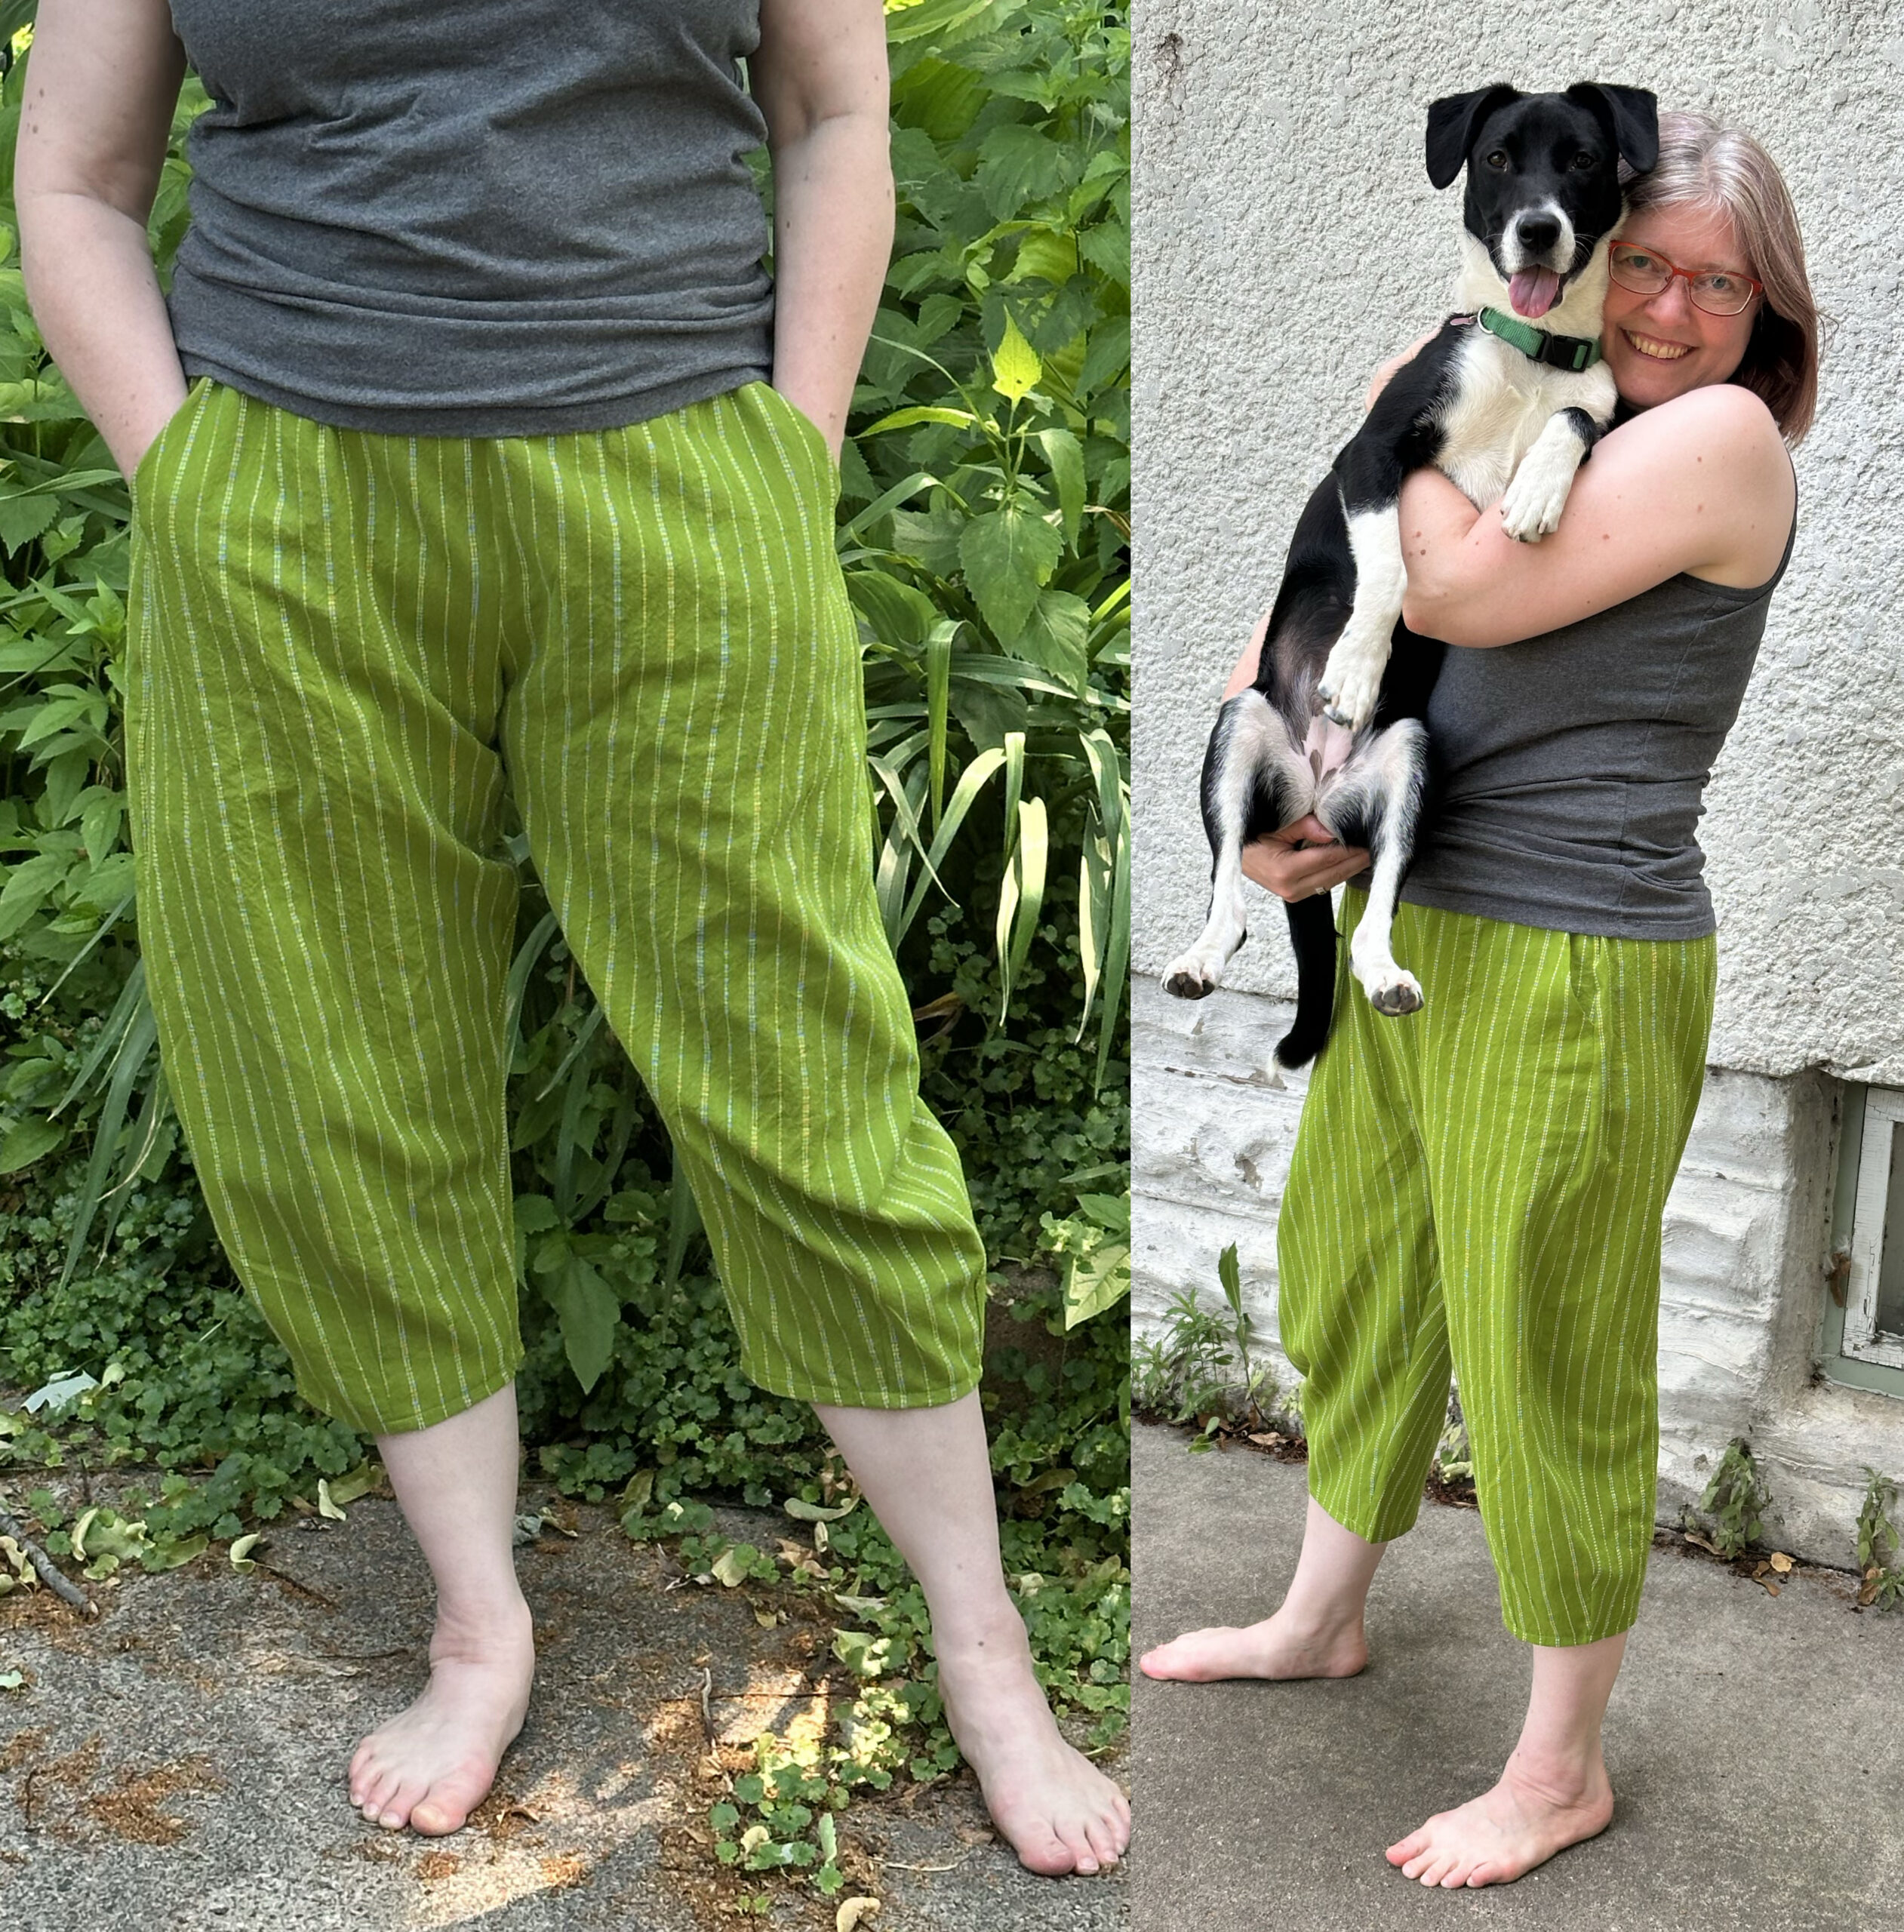
This post is going to be a double review! Today it’s 90+ degrees outside and I finished these pants and I might wear them all week. These are the Barry Woven Pants from Style Arc with a little modification and they are made from some beautiful cotton jacquard fabric from iTokri.
Barry Woven Pants
I made another pair of these in a rose colored linen but I decided those needed a few tweaks before I was really going to wear them, so this is the second attempt at this pattern. The major modification I made was to take out 5 inches from the length. They are drafted to be a slightly above the ankle length on someone 5’6″. I am only 5’4″ and when I made the first pair following the pattern exactly, they just look a little out of proportion on me. I should have shortened them, but I didn’t think to look at the height the pattern was drafted for until after I finished.
So for this one, I took 5 inches out at the lengthen/shorten line printed on the pattern. Easy! I like a capri length pant better than ankle length anyway, so these are really more my [read more…]
The Day After the Art Show
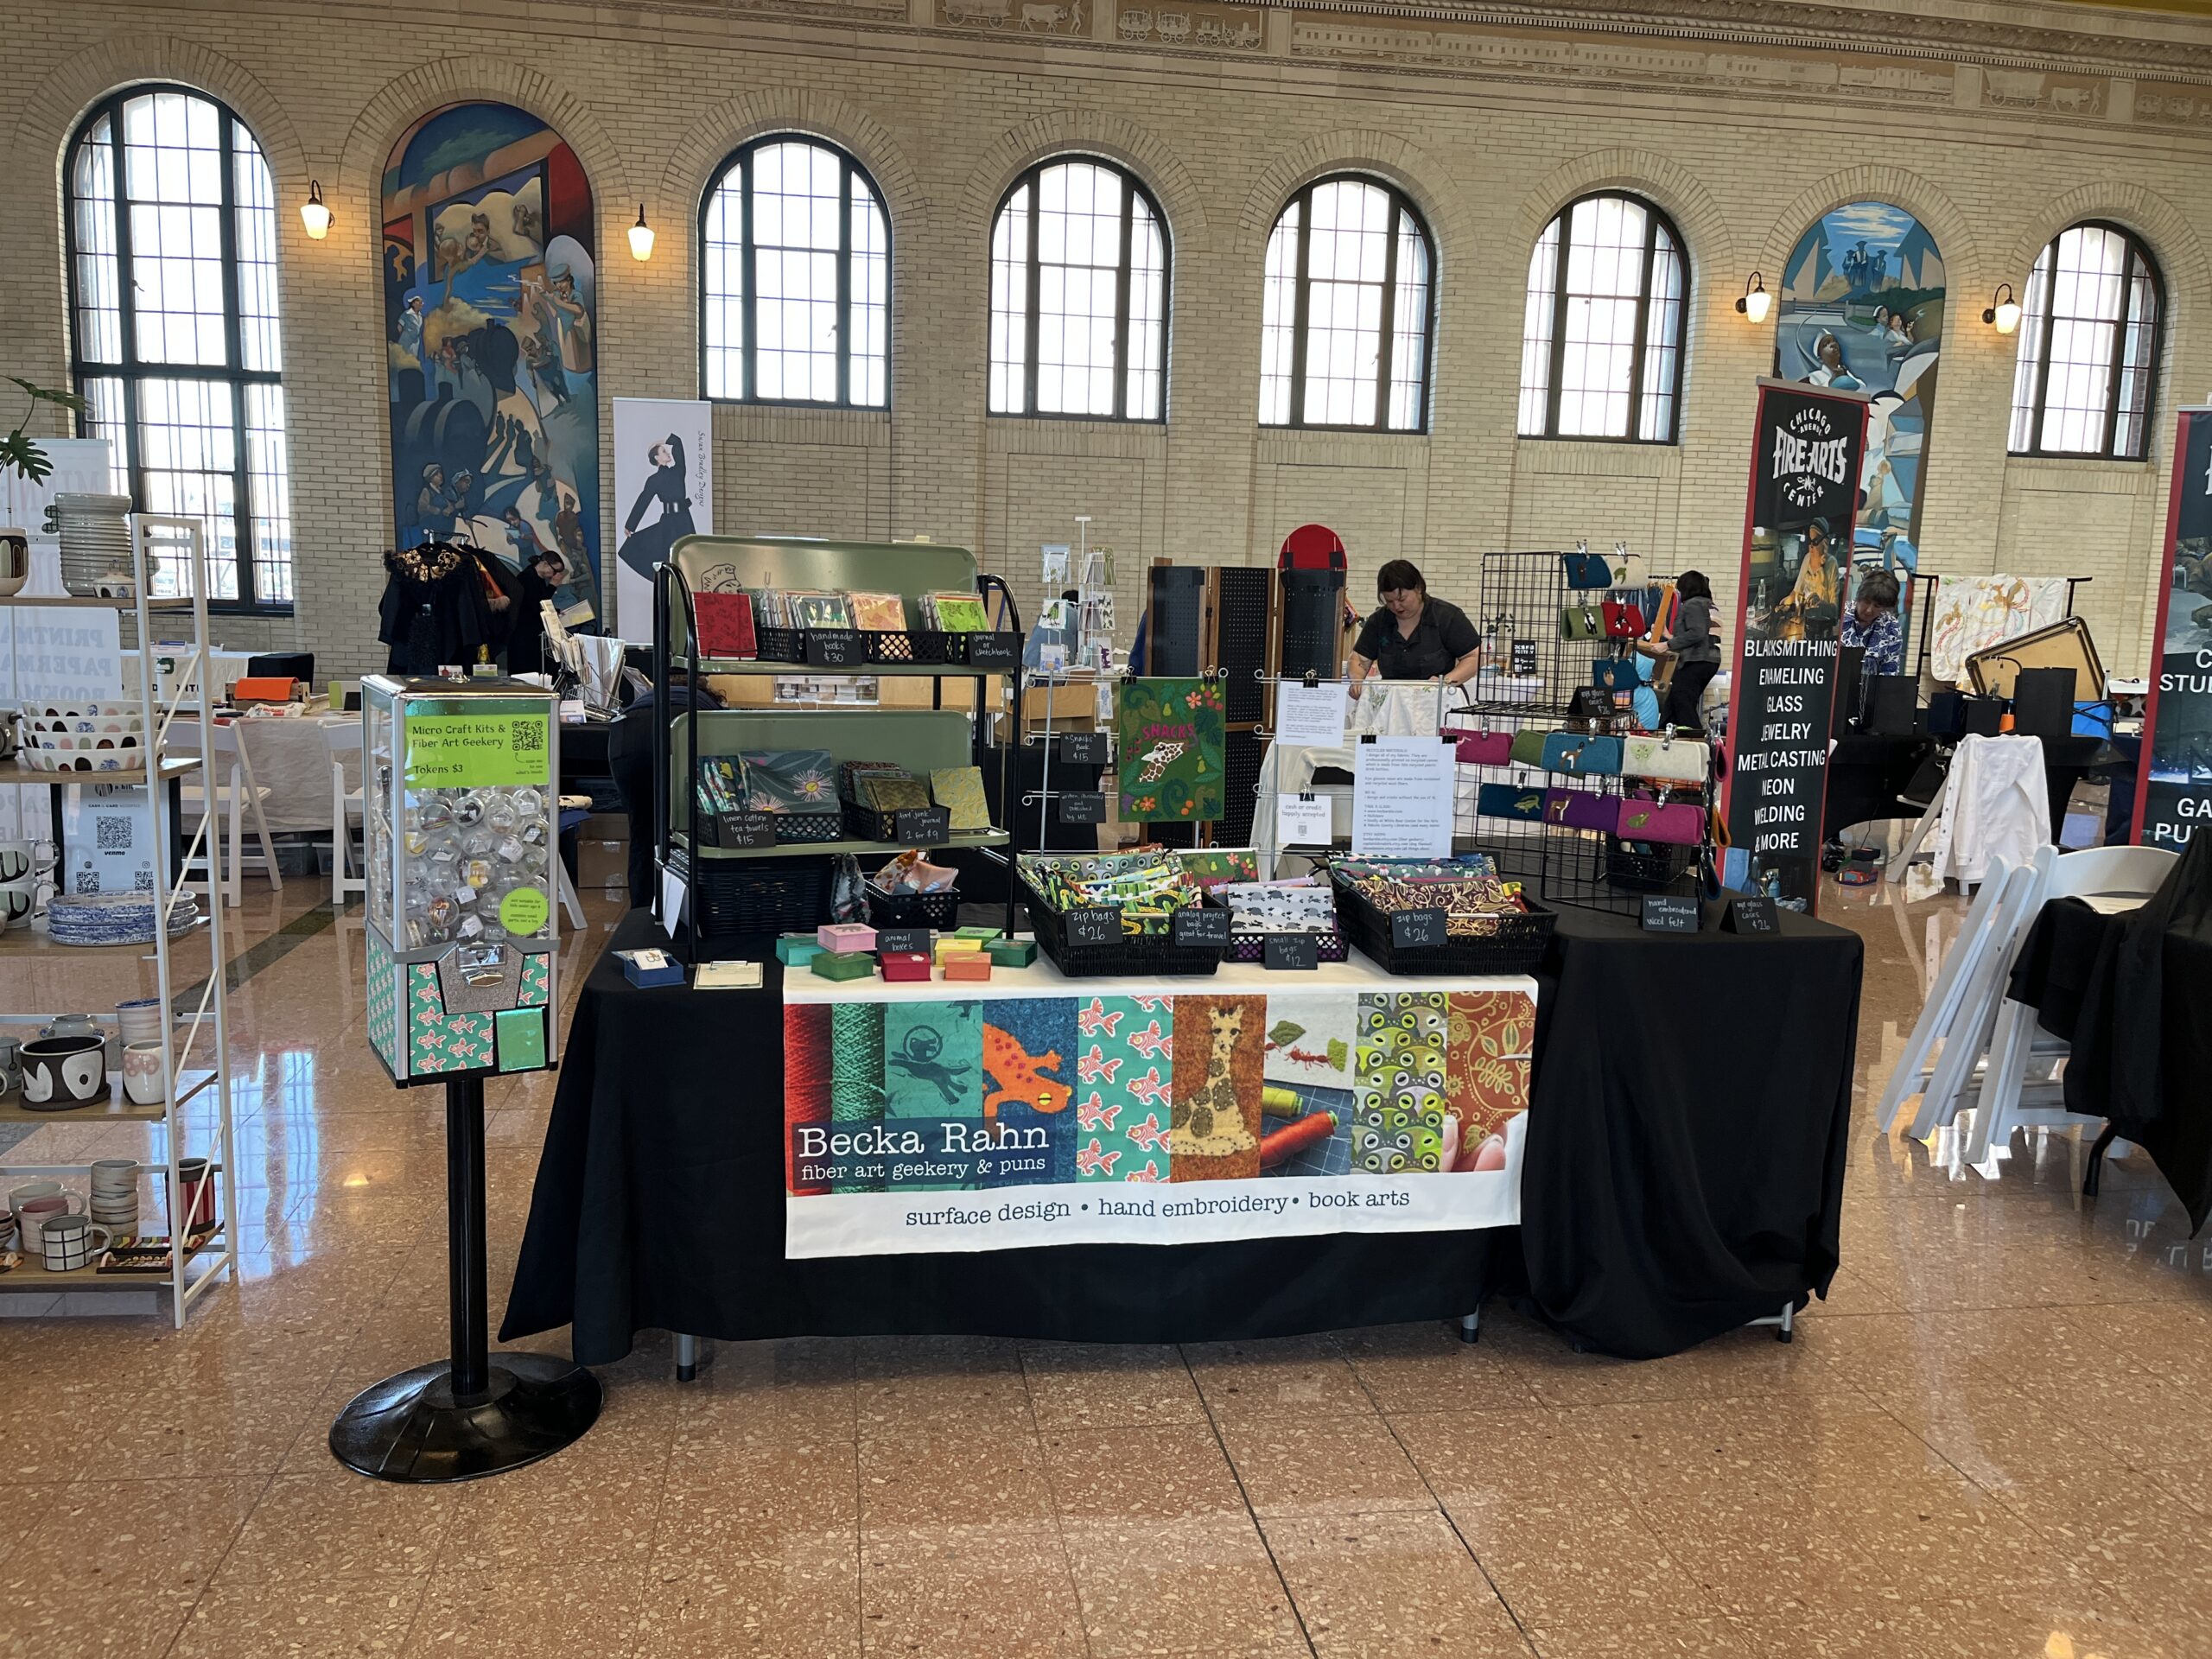
I’ve seen dozens of posts with people talking about how to get ready for an art fair: what to bring, how to set up, how much inventory. But I don’t think I’ve ever seen a post about the aftermath and that’s what I was doing today. So I thought I would talk about it.
First is the tear down. That actually happened yesterday right after the show. When I set up I have everything super organized and put in specific places. But I will be honest, by the time it comes to tear down, I have accumulated things that don’t have a home anymore. Sometimes it’s things I’ve bought. Sometimes, its things that people abandoned at my booth, like other people’s business cards or event make-and-takes, that I don’t want to throw away in case someone comes back for it. And I am tired and I just want to go home. So tear down means I will have a little chaos to deal with the next day. There is a whole jenga system about loading up the rolling cart with bungee cords and fitting it all into my car that only I know. (The results of having helpers for tear down [read more…]
Shop my art
Also find me at

Recent Comments


Mel says:
Denise says:
Heather Willhite says: